
After you install a printer, you must also ensure that it’s connected to your computer. You can add or connect to a printer in Excel using the File and Print options. Once the device has been added, you can print either within the Print option or by using the keyboard shortcut, Ctrl + P.
Note: First, be sure that your printer is installed using the printer’s manufacturer instructions. To find out how to install a printer either locally or in a network, see Install a printer.
In this article
Connect to a printer
-
In Excel, click File > Print.
Tip: You can also use the keyboard shortcut, Ctrl + P.
-
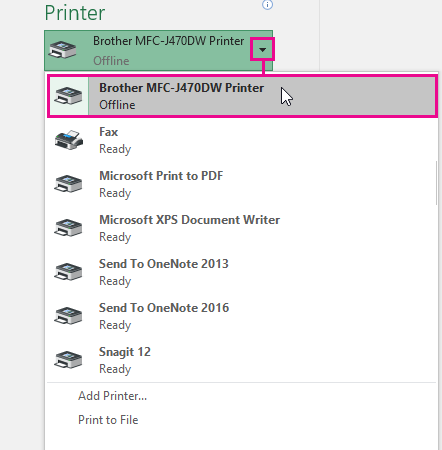
Click the Printer drop-down arrow, and select the printer you want to connect to.
Add a new printer
If the printer you need to connect to is not listed, you need to add it.
-
In Excel, click File > Print.
-
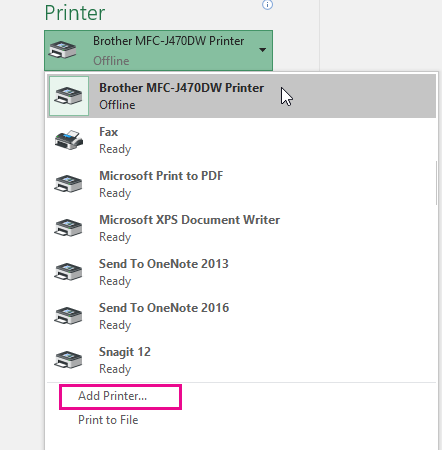
Click the Printer drop-down menu, and click Add Printer.
-
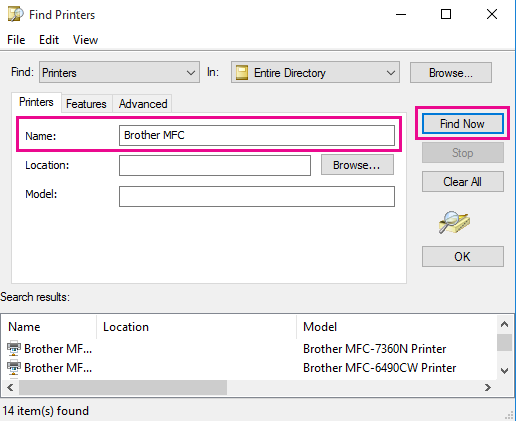
In the Find Printers dialog box, type the name of your printer in the Name text box. Click Find Now to search.
Tip: To search for all printers, leave the Name text box empty, and click Find Now. You can also type part of the printer name to search for it.
-
In the search results, select the printer, and click OK. This printer is connected, and your Excel document will print on this printer.
Set your default printer
For quicker printing, set a printer as the default printer. This process is different slightly among Windows 7, Windows 8, and Windows 10.
-
Open the Devices and Printers dialog box.
In Windows 10, in the Search box, type Devices and Printers, and then click Devices and Printers.
In Windows 8, go to the start screen, type Devices and Printers, then click Devices and Printers.
In Windows 7, click Start > Devices and Printers.
Note: You can also access this through Control Panel. In Control Panel (category view), in the Hardware and Sound category, click View devices and printers.
-
Under Printers right-click the printer you want as your default printer, and click Set as default printer.
Note: This might also be listed under Printers and Faxes, depending your version of Windows.
See Also
My Print button and some printer settings aren’t available
How to troubleshoot print failures in Word for Mac, Excel for Mac, or PowerPoint for Mac


