
This article will help you get answers to some of the most common printing issues. These issues concern the difference between a page and a sheet of paper in Publisher, the differences between printing multiple pages or multiple copies on a sheet of paper, and how to align the pages on the sheet of paper.
What do you want to do?
Learn the difference between pages, papers, and copies
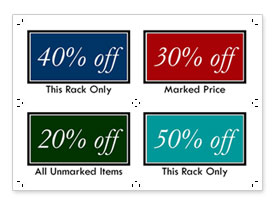
In Publisher, page size refers to the area of your publication. Paper size, or sheet size, is the size of the paper that you use for printing. This means that you can print multiple pages, or multiple copies of a single page, on one sheet of paper. The following illustration shows multiple distinct pages printed on one sheet of paper.
Print multiple pages on a sheet
If you have multiple pages in your publication, you can choose to print them on each sheet of paper:
Note: This option is available only when the publication page size is small enough that more than one page can fit on a single sheet of paper.
-
Click File > Print.
-
Under Settings, click One page per sheet, and then choose Multiple pages per sheet in the list.
-
Click Print.
Tip: Print a test sheet on a sheet of plain paper to verify that your publication prints as you expect before you print on a manufacturer's product or more expensive paper.
Print multiple copies on a sheet
Suppose you have a business card publication. By selecting Multiple copies per sheet, you might choose to print 10 copies of the same card on one sheet of paper.
-
Open the publication that you want to print, such as a label publication.
-
Click File > Print.
-
Under Settings, click One page per sheet, and then choose Multiple copies per sheet in the list.
-
Select the number of copies that you want in the Copies of each page box.
Tip: If you want to print on a specific manufacturer's product — for example, a sheet of labels — try printing on a blank sheet of paper to make sure that your publication will be properly aligned on the product.
Fit more on the sheet
If you aren't trying to align your printout to a manufacturer's product, you may be able to increase or decrease the number of copies of your publication that can fit on a single sheet of paper by adjusting the side and top margins and the horizontal and vertical gaps.
To change the print margins and the horizontal and vertical gaps, do the following:
-
Click File > Print.
-
Under Settings, click One page per sheet, and then choose Multiple copies per sheet in the list.
-
Click Layout Options, and then adjust the margins and gaps.
Paper sizes
You can also change the number of copies that are printed on each sheet by using a different size of paper, or sheet. To print multiple copies on a sheet of paper, the publication page size must be smaller than the paper size. For example, to print two copies of your page on each sheet of paper, your page size must be no more than half as large as the sheet size.
To change which size of paper you plan to print on, do the following:
-
Click File > Print.
-
Under Settings, choose the paper size that you want.
-
Click One page per sheet, and then choose Multiple copies per sheet in the list.
-
Select the number of copies that you want in the Copies of each page box.
Note: If your printer supports custom paper sizes, you can specify a custom paper size after you click Printer Properties. Consult your printer manual for specific instruction for adding custom paper sizes.
Align your publications
When you print publications on a sheet of paper or a specific manufacturer's product, such as labels or business cards, you can align your publication so it will print exactly where you want it.
To make it easier to align a publication to a specific manufacturer's product, turn crop marks on. You can turn the crop marks off after you align your publication on the sheet of paper. For more information on crop marks, see Add and print crop marks in Publisher.
By adjusting the print options in the print settings, you can specify where on a sheet of paper your publication will print. For example, you can force the publication to begin printing an inch from the top of the sheet of paper by changing the Top margin to 1.0.
You can also create more space between publication copies or pages by increasing the Horizontal gap and the Vertical gap so that the printout better fills the sheet of paper.
Adjust print options to choose position
-
Create or open a publication that is smaller than the paper size that you want to print on, such as a business card.
-
Click File > Print.
-
Under Settings, click One page per sheet, and then choose Multiple copies per sheet in the list.
Enter the number copies you want on a sheet (even if it's only 1), in the Copies of each page box.
-
Click Layout Options, and enter the row and column where you want to start printing on the page
-
Change the Side margin, Top margin, Horizontal gap, and Vertical gap measurements so that the preview window displays the positioning and number of copies that you want.
Tip: If you want to print on a specific manufacturer's product, try printing on a blank page first to make sure that your publication will print on the product where you want.


