
You can view your Microsoft SharePoint display language, time zone, country/region, and related settings at any time from your personal profile page, accessible from your desktop or mobile devices. If your organization policies allow it, you can also change your language and region settings. Your settings apply only to your view of your organization’s SharePoint sites and do not affect how other people view these sites.
If you're a SharePoint admin, see Change regional settings for a site to change regional settings on a site collection.
Notes:
-
If you’re working in an environment of local SharePoint sites that your organization manages—and not a Microsoft 365 environment, your site collection admin must make the language available for you to use before you can use the language-dependent guidance in this article.
-
If you set your language in SharePoint and then change it in Microsoft 365, the Microsoft 365 setting will override the SharePoint setting. See Change your display language in Microsoft 365 for more information.
-
The features described in this article depend on whether your organization has set up or customized personal sites and user profiles. For more information, see your SharePoint admin.
To change your personal language and region settings
-
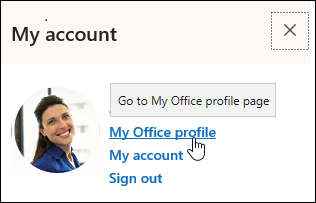
Select your name or picture at the top of any SharePoint or Microsoft 365 site in your organization.
-
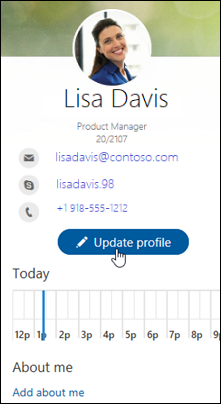
Select My Office profile and then Update profile.
-
Select How can I change language and regional settings? and then select the here link.
-
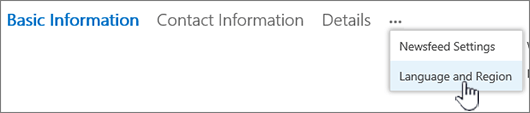
In the In the Edit Details screen, select the ellipsis (…) and then Language and Region.

-
Update your settings. You can use the table below for guidance.
-
Select Save all and close.
-
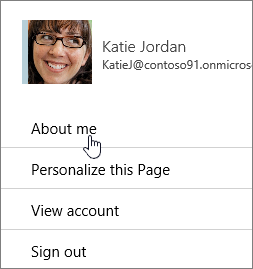
Click your name or picture at the top of any SharePoint or Microsoft 365 site in your organization.
-
Click About me and then Update profile.
-
Click the link under How can I change language and regional settings?
-
On the Edit Details page, click the ellipsis (…), and then click Language and Region.
-
Update your settings. You can use the table that follows this procedure for guidance.
-
Click Save all and close.
The following settings can be set to apply to Everyone, or Only You. If they can't be changed, your administrator may have restricted the settings.
|
To edit these language and region settings: |
Do this: |
|---|---|
|
Language Preferences |
Change your preferences as follows:
If you add multiple languages, you can use the up and down arrows To delete a language, select the X option next to the language. Note: For a consistent viewing experience, select corresponding settings for your language and region options. This way you can avoid conditions where you’re viewing English in an Arabic calendar, for example. |
|
Time Zone |
Select the Time Zone box and choose your current time zone from the list. If you cannot edit this setting, try selecting Always use regional settings defined by your administrator, in the next line under Choose your settings. Doing so should make the Time Zone box available, unless your administrator has customized settings to block editing. |
|
Choose your settings |
Select Always use regional settings defined by your administrator to use the language and region settings defined by your site administrator. Select Always use my personal settings to use your personal settings. Note: This option must be selected in order to edit region and time settings. |
|
Locale |
Click the Locale box, and then select a language. |
|
Set Your Calendar |
Select a calendar type from the drop-down list. Select Show week numbers in the Date Navigator if you want these numbers to appear. |
|
Enable An Alternate Calendar |
Select an alternate calendar type if you wish. |
|
Define Your Work Week |
Select the days of the week that define your work week. For example, if you work Tuesday through Saturday, check those boxes. |
|
Time Format |
Select the Time Format box and select 12 hour or 24 hour. |

See Also
Choose the languages you want to make available for a site’s user interface


