
You can use formulas and functions in SharePoint lists or libraries to calculate data in a variety of ways. By adding a calculated column to a list or library, you can create a formula that includes data from other columns and performs functions to calculate dates and times, to perform mathematical equations, or to manipulate text.
For example, on a tasks list, you can use a column to calculate the number of days it takes to complete each task, based on the Start Date and Date Completed columns.
Note: This article explains how to work with calculated columns in lists and libraries. For detailed information about functions, including syntax and examples of use, see Examples of common formulas in SharePoint Lists.
Add a calculated column to a list or library
In order to use a formula in a list or library, you must add a calculated column to the list or library.
-
Open the list or library.
-
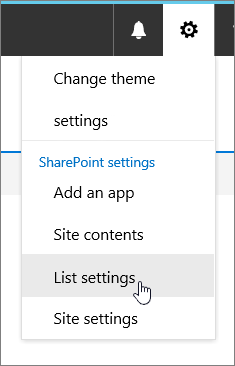
Near the top right of the browser window, select Settings

-
On the Settings page, under Columns, select create Column.
-
In the Name and Type section, enter the name that you want in the Column name box.
-
Under The type of information in this column is, click Calculated (calculation based on other columns).
-
In the Additional Column Settings section, enter the formula that you want to use in the Formula box. You can select items from the Insert Column box and then add functions, constants, and operators to the formula. For examples of formulas, see Examples of common formulas in SharePoint Lists.
-
Select the data type that you want to be returned by the formula, and then click OK.
Note: The formula in a calculated site column can reference only other site columns that are in the same list or library. Therefore, when you add the calculated site column to a list or library, you must also add the site column that is referenced in the formula. For more information, see Make a calculated column available to other lists or libraries in this article.
Make a calculated column available to other lists or libraries
If you have a formula that you want to use frequently in multiple lists or libraries, you can add a calculated column to the list of site columns. This makes the column and its formula available to any list or library in the site or subsites. For example, you can create a calculated column called Expiration Date by using a formula that returns the date 30 days from the value of the Start Date column (=[Start Date]+30). Then you can reuse the formula without recreating it in each list or library.
Notes:
-
The formula in a calculated site column can reference only other site columns that are in the same list or library. Therefore, when you add the calculated site column to a list or library, you must also add the site column that is referenced in the formula. In the above example, you would need to add both the Expiration Date and the Start Date site columns to your list.
-
If your new calculated site column needs to reference other columns in a list, you must first make those columns site columns in order to use them in the formula.
-
Open the SharePoint site.
-
In the navigation pane on the left, select Site contents.
-
On the command bar, near the top right of the browser window, select Site Settings.
-
Under Web Designer Galleries column, select Site columns.
-
Near the top left, select Create.
-
In the Name and Type section, type the name that you want in the Column name box.
-
Under The type of information in this column is, select Calculated (calculation based on other columns).
-
In the Additional Column Settings section, enter the formula that you want to use in the Formula box. You can select other site columns from the Insert Column box and then add functions, constants, and operators to the formula. For examples of formulas, see Examples of common formulas in SharePoint Lists.
-
Select the data type that you want to be returned by the formula, and then click OK.
Add a calculated site column to a list or library
After you create a calculated site column, you can add it to any list or library in the site or subsites.
Note: If you edit the column formula in a specific list or library, the changes to the formula apply only to that list or library.
-
Open the list library that you want to add the column to.
-
Near the top right of the browser window, select Settings > List Settings, or select the settings for the type of library that you are opening.
(For example, in a document library, select Document Library Settings.)
-
Under Columns, select Add from existing site columns.
-
In the Select Columns section, select the group that contains the site column from the Select site columns from list.
-
In the Available site columns box, select the column to add to the list, and then select Add.
Note: If the calculated site column that you are adding contains other site columns, you must add them to the list. You can hide the other columns later if you do not want them to appear in the list or library.
-
If you do not want the column to be added to the default view of the list, clear the Add to default view check box.
-
Click OK.
Add a calculated column to a list or library
In order to use a formula in a list or library, you must add a calculated column to the list or library.
-
If the list or library is not already open, click its name on the Quick Launch.
If the name of your list or library does not appear, click View All Site Content, and then click the name of your list or library.
-
On the Settings menu

-
In the Name and Type section, type the name that you want in the Column name box.
-
Under The type of information in this column is, click Calculated (calculation based on other columns).
-
In the Additional Column Settings section, enter the formula that you want to use in the Formula box. You can select items from the Insert Column box and then add functions, constants, and operators to the formula. For examples of formulas, see Examples of common formulas in SharePoint Lists.
-
Select the data type that you want to be returned by the formula, and then click OK.
Note: The formula in a calculated site column can reference only other site columns that are in the same list or library. Therefore, when you add the calculated site column to a list or library, you must also add the site column that is referenced in the formula. For more information, see Make a calculated column available to other lists or libraries in this article.
Make a calculated column available to other lists or libraries
If you have a formula that you want to use frequently in multiple lists or libraries, you can add a calculated column to the list of site columns. This makes the column and its formula available to any list or library in the site or subsites. For example, you can create a calculated column called Expiration Date by using a formula that returns the date 30 days from the value of the Start Date column (=[Start Date]+30). Then you can reuse the formula without recreating it in each list or library.
Notes:
-
The formula in a calculated site column can reference only other site columns that are in the same list or library. Therefore, when you add the calculated site column to a list or library, you must also add the site column that is referenced in the formula. In the previous example, you would need to add both the Expiration Date and the Start Date site columns to your list.
-
If your new calculated site column needs to reference other columns in a list, you must first make those columns site columns in order to use them in the formula.
-
On the Site Actions menu

Note: On a site for which the Site Actions menu is customized, point to Site Settings, and then click the settings that you want to view.
-
In the Galleries column, click Site columns.
-
On the list toolbar, click Create.
-
In the Name and Type section, type the name that you want in the Column name box.
-
Under The type of information in this column is, click Calculated (calculation based on other columns).
-
In the Additional Column Settings section, enter the formula that you want to use in the Formula box. You can select other site columns from the Insert Column box and then add functions, constants, and operators to the formula. For examples of formulas, see Examples of common formulas in SharePoint Lists.
-
Select the data type that you want to be returned by the formula, and then click OK.
Add a calculated site column to a list or library
After you create a calculated site column, you can add it to any list or library in the site or subsites.
Note: If you edit the column formula in a specific list or library, the changes to the formula apply only to that list or library.
-
If the list or library is not already open, click its name on the Quick Launch.
If the name of your list or library does not appear, click View All Site Content, and then click the name of your list or library.
-
On the Settings menu
For example, in a document library, click Document Library Settings.
-
-
Under Columns, click Add from existing site columns.
-
In the Select Columns section, select the group that contains the site column from the Select site columns from list.
-
In the Available site columns box, select the columns to add to the list, and then click Add.
Note: If the calculated site column that you are adding contains other site columns, you must add them to the list. You can hide the other columns later if you do not want them to appear in the list or library.
-
If you do not want the column to be added to the default view of the list, clear the Add to default view check box.
-
Click OK.


