
By using predefined border styles, you can quickly add a border around cells or ranges of cells. If predefined cell borders do not meet your needs, you can create a custom border.
Note: Cell borders that you apply appear on printed pages. If you do not use cell borders but want worksheet gridline borders to be visible on printed pages, you can display the gridlines. For more information, see Print with or without cell gridlines.
-
On a worksheet, select the cell or range of cells that you want to add a border to, change the border style on, or remove a border from.
-
On the Home tab, in the Font group, do one of the following:
-
To apply a new or different border style, click the arrow next to Borders

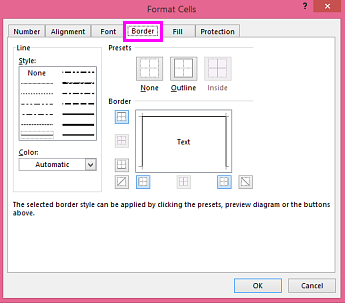
Tip: To apply a custom border style or a diagonal border, click More Borders. In the Format Cells dialog box, on the Border tab, under Line and Color, click the line style and color that you want. Under Presets and Border, click one or more buttons to indicate the border placement. Two diagonal border buttons


-
To remove cell borders, click the arrow next to Borders
-
-
The Borders button displays the most recently used border style. You can click the Borders button (not the arrow) to apply that style.
-
If you apply a border to a selected cell, the border is also applied to adjacent cells that share a bordered cell boundary. For example, if you apply a box border to enclose the range B1:C5, the cells D1:D5 acquire a left border.
-
If you apply two different types of borders to a shared cell boundary, the most recently applied border is displayed.
-
A selected range of cells is formatted as a single block of cells. If you apply a right border to the range of cells B1:C5, the border is displayed only on the right edge of the cells C1:C5.
-
If you want to print the same border on cells that are separated by a page break, but the border appears on only one page, you can apply an inside border. This way, you can print a border at the bottom of the last row of one page and use the same border at the top of the first row on the next page. Do the following:
-
Select the rows on both sides of the page break.
-
Click the arrow next to Borders
-
Under Presets, click the Inside button

-
Under Border, in the preview diagram, remove the vertical border by clicking it.
-
-
On a worksheet, select the cell or range of cells that you want to remove a border from.
To cancel a selection of cells, click any cell on the worksheet.
-
On the Home tab, in the Font group, click the arrow next to Borders
--OR--
Click Home > the Borders arrow > Erase Border, and then select the cells with the border you want to erase.
You can create a cell style that includes a custom border, and then you can apply that cell style when you want to display the custom border around selected cells.
-
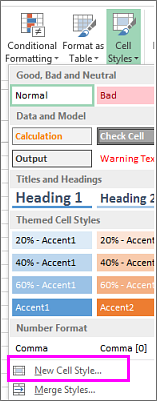
On the Home tab, in the Styles group, click Cell Styles.
Tip: If you do not see the Cell Styles button, click Styles, and then click the More button next to the cell styles box.
-
Click New Cell Style.
-
In the Style name box, type an appropriate name for the new cell style.
-
Click Format.
-
On the Border tab, under Line, in the Style box, click the line style that you want to use for the border.
-
In the Color box, select the color that you want to use.
-
Under Border, click the border buttons to create the border that you want to use.
-
Click OK.
-
In the Style dialog box, under Style Includes (By Example), clear the check boxes for any formatting that you do not want to include in the cell style.
-
Click OK.
-
To apply the cell style, do the following:
-
Select the cells that you want to format with the custom cell border.
-
On the Home tab, in the Styles group, click Cell Styles.
-
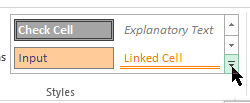
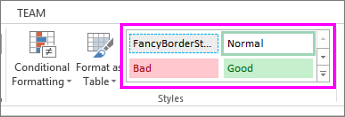
Click the custom cell style that you just created. Like the FancyBorderStyle button in this picture.
-
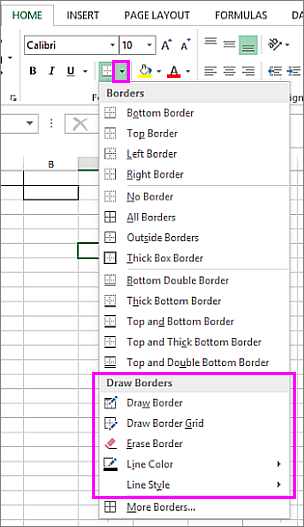
To customize the line style or color of cell borders or erase existing borders, you can use the Draw Borders options. To draw cell borders, you'll first select the border type, then the border color and line style, and select the cells that you want to add a border around. Here's how:
-
Click Home > the Borders arrow

-
Pick Draw Borders for outer borders or Draw Border Grid for gridlines.
-
Click the Borders arrow > Line Color arrow, and then pick a color.
-
Click the Borders arrow > Line Style arrow, and then pick a line style.
-
Select cells you want to draw borders around.
Add a border, border color, or border line style
-
Select the cell or range of cells that you want to add a border around, change the border style on, or remove a border from.
2. Click Home > the Borders arrow, and then pick the border option you want.
-
Add a border color - Click the Borders arrow > Border Color, and then pick a color
-
Add a border line style - Click the Borders arrow > Border Style, and then pick a line style option.
Tips
-
The Borders button shows the most recently used border style. To apply that style, click the Borders button (not the arrow).
-
If you apply a border to a selected cell, the border is also applied to adjacent cells that share a bordered cell boundary. For example, if you apply a box border to enclose the range B1:C5, the cells D1:D5 will acquire a left border.
-
If you apply two different types of borders to a shared cell boundary, the most recently applied border is displayed.
-
A selected range of cells is formatted as a single block of cells. If you apply a right border to the range of cells B1:C5, the border is displayed only on the right edge of the cells C1:C5.
-
If you want to print the same border on cells that are separated by a page break, but the border appears on only one page, you can apply an inside border. This way, you can print a border at the bottom of the last row of one page and use the same border at the top of the first row on the next page. Do the following:
-
Select the rows on both sides of the page break.
-
Click the arrow next to Borders , and then click the Inside Horizontal Border
-
Remove a border
To remove a border, select the cells with the border and click the Borders arrow > No Border.
Need more help?
You can always ask an expert in the Excel Tech Community or get support in Communities.


