
While Visio doesn’t have a header or footer command in the ribbon, you can create a header or footer on your drawing by adding a border. The border is just like a background page, so you edit the header and footer separately from the foreground diagram.
-
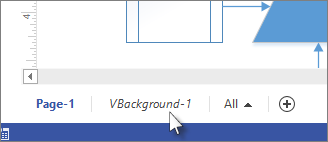
Click Design > Borders & Titles, then click the style you want for the header or footer. The border appears as a background page, usually called something like VBackground-1.
Tip: If you add a border (which includes your header or footer) and one or more backgrounds to the same drawing page, Visio combines them into the same background page.
-
To edit the text in the border, click the background page tab containing the border. Most borders contain three text areas: title, date, and page number. Double-click any of the text areas to make changes and create your header or footer. To delete any of the areas, click it to select it, and press Delete.
Tip: If you want the date to update automatically, double-click the date text area, then right-click and click Insert Field. In the Category box, click Date/Time, then in the Field name box, choose which update type you want to appear on the border.
-
To finish editing the border background page, click the page tab of another drawing page. The border page is not affected by any change you make to other pages.
Adding a header or footer to multiple pages
Border pages for headers and footers work best when applied to each drawing page individually, even if you give every page the same background.
When multiple drawing pages share a border or background page, the background page takes the size of the largest drawing using it. Drawing size is influenced by the number, size and positions of the shapes it contains.
If a page has a mismatched border, remove the border page and assign a fresh border. Here's how:
-
Click Design > Borders & Titles > No Border and Title.
-
Click Design > Borders & Titles and then click the border style that you want.
Note: If you add a page to the drawing, it automatically shares the border or background you most recently applied to your drawing. That means the border will fit the new foreground pages correctly as long as all the added pages that share it are the same size. It's a good idea to check the headers and footers after you’re done adding and building the foreground pages.


