
You can edit the contents of a cell directly in the cell. You can also edit the contents of a cell by typing in the formula bar.
When you edit the contents of a cell, Excel is operating in Edit mode. Some Excel features work differently or are unavailable in Edit mode.
When Excel is in Edit mode, the word Edit appears in the lower-left corner of the Excel program window, as shown in the following illustration.

How does Excel operate differently in Edit mode?
In Edit mode, many commands are unavailable. For example, when Excel is in Edit mode, you cannot apply conditional formatting or change the alignment of the contents of a cell.
Also, the arrow keys behave somewhat differently when Excel is in Edit mode. Instead of moving the cursor from cell to cell, in Edit mode, the arrow keys move the cursor around in the cell.
Enable or disable Edit mode
If you try to use Edit mode and nothing happens, it might be disabled. You can enable or disable Edit mode by changing an Excel option.
-
Click File > Options > Advanced.
-OR-
In Excel 2007 only: Click the Microsoft Office Button

-
Under Editing options, do one of the following:
-
To enable Edit mode, select the Allow editing directly in cells check box.
-
To disable Edit mode, clear the Allow editing directly in cells check box.
-
Enter Edit mode
To start working in Edit mode, do one of the following:
-
Double-click the cell that contains the data that you want to edit.
This starts Edit mode and positions the cursor in the cell in the location that you double-clicked. The cell contents are also displayed in the formula bar.
-
Click the cell that contains the data that you want to edit, and then click anywhere in the formula bar.
This starts Edit mode and positions the cursor in the formula bar at the location that you clicked.
-
Click the cell that contains the data that you want to edit, and then press F2.
This starts Edit mode and positions the cursor at the end of the cell contents.
Insert, delete, or replace cell contents
-
To insert characters, click in the cell where you want to insert them, and then type the new characters.
-
To delete characters, click in the cell where you want to delete them, and then press BACKSPACE, or select the characters and then press DELETE.
-
To replace specific characters, select them and then type the new characters.
-
To turn on Overtype mode so that existing characters are replaced by new characters while you type, press INSERT.
Note: Overtype mode can be turned on or off only when you are in Edit mode. When Overtype mode is turned on, the character to the right of the insertion point is highlighted in the formula bar, and it will be overwritten when you type.
-
To start a new line of text at a specific point in a cell, click in the where you want to break the line, and then press ALT+ENTER.
Cancel or undo edits
Before you press ENTER or TAB, and before or after you press F2, you can press ESC to cancel any edits that you made to the cell contents.
After you press ENTER or TAB, you can undo your edits by pressing CTRL+Z, or by clicking Undo 
Adjust the way cell contents are displayed
After you edit cell contents, you may want to adjust the way they are displayed.
-
At times, a cell might display #####. This can occur when the cell contains a number or a date and the width of its column cannot display all the characters that its format requires. For example, suppose a cell with the Date format "mm/dd/yyyy" contains 12/31/2007. However, the column is only wide enough to display six characters. The cell will display #####. To see the entire contents of the cell with its current format, you must increase the width of the column.
Change the width of a column
-
Click the cell for which you want to change the column width.
-
On the Home tab, in the Cells group, click Format.

-
Under Cell Size, do one of the following:
-
To fit all text in the cell, click AutoFit Column Width.
-
To specify a larger column width, click Column Width, and then type the width that you want in the Column width box.
Note: As an alternative to increasing the width of a column, you can change the format of that column or even an individual cell. For example, you could change the date format so that a date is displayed as only the month and day ("mm/dd" format), such as 12/31, or represent a number in a Scientific (exponential) format, such as 4E+08.
-
-
-
If there are multiple lines of text in a cell, some of the text might not be displayed the way that you want. You can display multiple lines of text inside a cell by wrapping the text.
Note: When Excel is in Edit mode, you cannot change the way text wraps.
Wrap text in a cell
-
Click the cell in which you want to wrap the text.
-
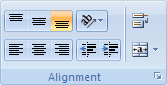
On the Home tab, in the Alignment group, click Wrap Text.
Note: If the text is a single long word, the characters won't wrap; you can widen the column or decrease the font size to see all the text. If not all text is visible in the cell after you wrap the text, you may need to adjust the height of the row.
On the Home tab, in the Cells group, click Format, and then under Cell Size click AutoFit Row.
-
Exit Edit mode
To stop working in Edit mode, do one of the following:
-
Press ENTER.
Excel exits Edit mode and selects the cell directly below the current cell.
You can also specify that pressing ENTER select a different adjacent cell.
-
Click File > Options > Advanced.
-OR-
In Excel 2007 only: Click the Microsoft Office Button
-
Under Editing options, do one of the following:
-
To make the selection remain in the cell that you were editing, clear the After pressing Enter, move selection check box.
-
To control the direction of the selection, select the After pressing Enter, move selection check box, click the arrow next to Direction, and then select a direction from the list.
-
-
-
Press TAB.
This stops Edit mode and selects the cell to the right of the current cell. Pressing SHIFT+TAB selects the cell to the left.
-
Click a different cell.
Excel exits Edit mode and selects the cell that you clicked.
-
Press F2.
Excel exits Edit mode and leaves the cursor where it is.


