
You can specify the paper size and orientation for each page in a multi-page diagram, independent of the other pages. If Auto Size is active, it will make the drawing page match the size and orientation of the printer paper.
The paper size outlines that are created by page break lines (called tiles) on the current page in your diagram are resized to match the printer paper size.
To set the size of the paper for printing
-
On the Design tab, in the Page Setup group, click Size.
-
Click the printer paper size you want to use.
Change the page orientation to portrait or landscape when Auto Size is on
The following procedure sets the tile orientation (as shown by the page break lines) for the current page.
To set the page orientation for the current page
-
On the Design tab, in the Page Setup group, click Orientation.
-
Click either Portrait or Landscape.
Advanced page setup
You can set the drawing page size and the printer paper size independently by using the Page Setup dialog box.
To set the size of the drawing page and the printer page
-
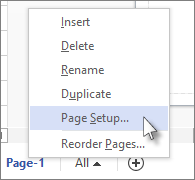
Right-click the page tab, below the drawing window, and then click Page Setup.
-
Use the controls on the Print Setup and Page Size tabs to make changes to the printer paper and the drawing page view independently.
A thumbnail preview on each tab shows how your drawing page view compares with the printer paper setup.
Automatically resize the drawing page to fit the shapes on the page
If you've been working without Auto Size and want to resize the drawing page to fit the contents of a page, use the following procedure.
To resize the drawing page to fit the shapes on the page
-
On the Design tab, in the Page Setup group, click Size.
-
Click Fit to Drawing.
The drawing page size changes to fit the drawing with only the page margin included as surrounding white space.
Note: If Auto Size is active, clicking Fit to Drawing deactivates it.
To activate and deactivate Auto Size
-
On the Design tab, in the Page Setup group, click Auto Size.
Clicking Auto Size toggles it on and off.
To set the page margins of the printed page
-
Right-click the page tab, below the drawing window, and then click Page Setup.
-
On the Print Setup tab, click Setup.
You can set the margins and make other adjustments.


