
Send an announcement to a channel in Microsoft Teams
Sometimes your message needs to stand out. With options for dynamic backgrounds and AI-powered image generation, channel announcements help your message cut through noise.
Note: This feature is currently available to people based in the United States. Non-US organizations may notice a temporary loss in the ability to upload an image. They will gain access in early 2024.
Create an announcement
The steps to post an announcement will be different based on whether you choose to see new posts at the bottom or the top.
Tip: Flip the order of your posts by electing More channel options 
While viewing new posts from the top
-
In the channel's Posts tab, at the top, go to Start a new post.
-
Select Announcement

While viewing new posts from the bottom
-
In the channel's Posts tab, at the bottom click Start a post

-
Next to Post, select Post type

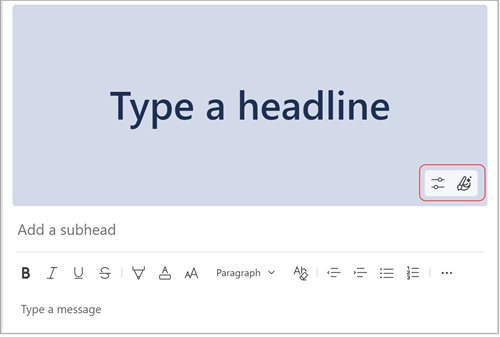
From here, you can type a headline. Select Color scheme 

Note: Announcement messages are available only in channels, not in group or 1:1 chats.
Create a custom announcement background using Microsoft Designer
Use the fully integrated Microsoft Designer app to create a custom announcement background.
-
After selecting Announcement and opening the compose box, select Custom background
-
From here, you can generate an image by typing a prompt in the text box, select Add image, or Explore ideas from existing templates.
Tip: Hover over any example image to see the prompt used to produce it.
Add your own image
-
If you have an image you’d like to use in your announcement banner, select Add image under the search bar.
-
Select the image you want to use from your files, and select Open.
-
Designer will auto-generate templates incorporating your image, which you can then Customize.
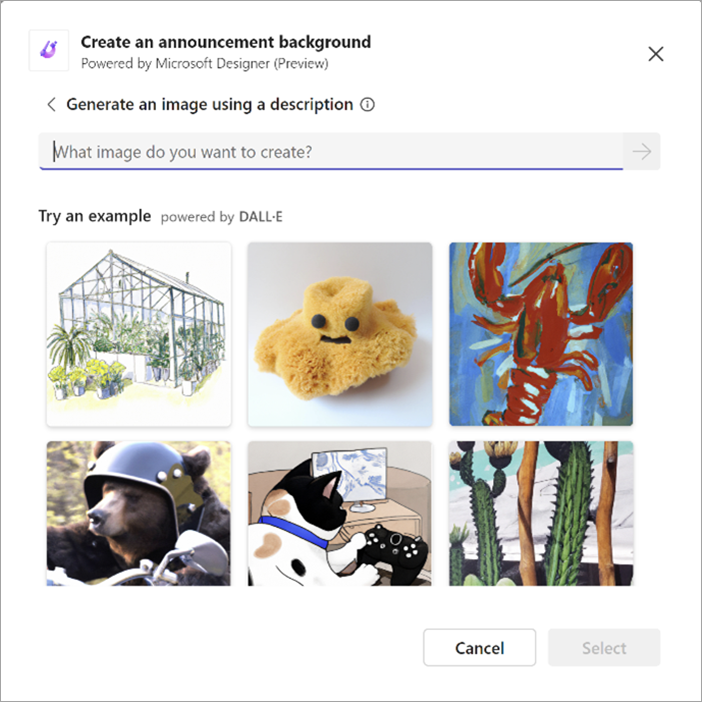
Generate an image from a description using AI
-
Select Generate image.
-
Enter your image description into the text field, and select the arrow or tap Enter. You can add to your description or modify it if the images generated are not quite right.
-
Choose the image you’d like to use in your announcement banner, then choose Select.
-
You’ll see several different banner templates appear incorporating your generated image. Select the one you prefer, and choose Customize to edit the banner further, or Done to use it as-is.
Notes:
-
If you are not able to access the DALL-E image generator, or any other parts of this feature, please check with your administrator.
-
DALL-E creates realistic images and art from text descriptions. It may create things you didn’t expect. If you find a creation to be offensive, send feedback by clicking the Report image flag in the upper right corner of the image you want to report.


Need more help?
Want more options?
Explore subscription benefits, browse training courses, learn how to secure your device, and more.


Communities help you ask and answer questions, give feedback, and hear from experts with rich knowledge.


