
With OneNote for the web, you can use your web browser to create, open, view, edit, format, and share the OneNote notebooks in libraries on your site.
This article outlines some of the basic steps to help get you started with OneNote for the web.
Create a new notebook
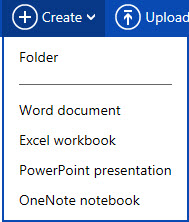
Sign in to OneDrive or your team site and create a notebook in the browser. Click Create > OneNote notebook, and give the notebook a name.
Type or write notes in the browser
OneNote for the web lets you edit your cloud-based OneNote notebooks by opening them in your browser and then typing anywhere on its pages. In addition to typing and formatting text, you can also add pictures and clip art to your notes.
There’s no Save command in OneNote for the web. All of your work is saved automatically and continuously. If you change your mind about something you’ve typed, added, or deleted in your notes, press Ctrl+Z (Windows) or ⌘+Z (Mac) to undo your last action.
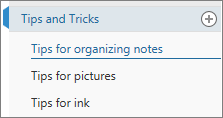
Tabs along the left side of the screen represent pages, which are grouped into sections, to help you organize your thoughts.
If you try to type in the notebook and nothing happens, you’re probably in Reading view. Switch to Editing view: click Edit Notebook > Edit in OneNote for the web.
Add links
Whenever you type text that OneNote for the web recognizes as a link (also known as a hyperlink), it automatically formats it as one. For example, if you type www.microsoft.com into your notes, OneNote for the web turns that into a link. In this example, clicking the link will open the Microsoft website in your browser.
You can also manually insert links into your notes by doing the following:
-
Select the text you want to link.
-
Click Insert > Link.
-
In the Link dialog box, type the link’s destination URL into the Address field and then click Insert.
Note: To edit or remove a link, right-click it in your notes, and then click either Edit Link or Remove Link.
Insert pictures
With OneNote for the web, you can easily insert pictures or clip art into your notes.
-
On any page, put the cursor where you want to insert the picture.
-
Click Insert and then do one of the following:
-
Click Picture to insert a picture file from your computer.
-
Click Clip Art to search for and insert pictures from the Office image library.
-
Draw a table
Tables are a great way to organize information in your notes. To create a table in OneNote for the web, start by drawing a simple grid.
-
Click Insert > Table.
-
Move the mouse pointer over the grid to select the table size you want, and then click the left mouse button to create the table. For example, selecting a 4x6 table would create a table with 4 columns and 6 rows.
To quickly modify a table or any of its parts, right-click in any table cell, and then click the Layout tab that appears on the ribbon. The table tools you find here let you insert and remove rows and columns, select cells and cell ranges, show or hide table borders, and align table cells the way you want.
Add more pages
For more room in any section of your notebook, you can add as many pages as you want.
Do either of the following:
-
Click Insert > New Page, and then type a page title at the top of the new page.
-
Right-click any existing page tab in the notebook, and then click New Page.
Note: To change the order of your page tabs in the sidebar, click and drag any page tab to a new position.
Add more sections
To better organize your notebook into different categories, you can add as many sections as you want.
Do either of the following:
-
Click Insert > New Section, and then type a name for the new section when prompted.
-
Right-click any existing page tab in the notebook, and then click New Section.
Note: To change the order of your section tabs in the sidebar, click and drag any section tab to a new position.
Save your notes
OneNote for the web doesn’t have a Save button. That’s because you never have to save your work in OneNote like you do in other programs.
As you work in your notebooks, OneNote for the web automatically saves everything for you — no matter how small or large the changes you’ve made. This frees your mind to let you think about your projects, thoughts, and ideas instead of thinking about your computer files.
If you change your mind about anything you’ve typed, added, or deleted in your notes, press Ctrl+Z (Windows) or ⌘+Z (Mac) to undo your last action.
Share OneNote notes online
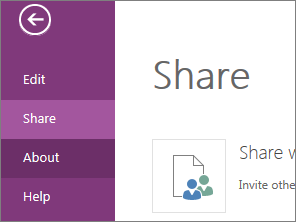
Because your notebook is online, you can share it by sending a link instead of an email attachment. By clicking the link, people can read your notes in their web browser.
Work together in a notebook
Working together in a notebook is a good way to brainstorm ideas or do research for a group project.
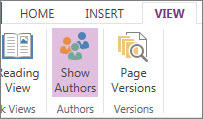
OneNote for the web shows you updates as they happen, and you can see who did what on the page: Go to View > Show Authors (click it again to hide author names).
OneNote keeps the notebook in sync with everyone, even if they’re using different devices. Your colleagues can be using OneNote for the web, OneNote 2010 or 2013 desktop app, or OneNote Mobile on their phone or tablet.


