
Set page margins for pages or text boxes as part of your page design in Publisher.
Set page margins
For detailed steps, see Set page margins for printing using Publisher.
Set margins inside a text box
-
Right-click a text box, and then click Format Text Box.
-
In the Format Text Box dialog box, click the Text Box tab.
-
Under Text Box Margins, type or select the margins you want for Left, Right, Top, and Bottom.
-
Click OK.
Note: Publisher's default text box margins are 0.04 inches on all sides. If you are creating a multi-column newsletter, you may want to change the margins to 0 inches to make it easier to align text and objects.
Use the margin settings from an existing text box as the default settings for new text boxes
-
Right-click the text box that has the margins you want to use as defaults.
-
On the shortcut menu, click Format Text Box, and then click the Colors and Lines tab.
-
Select the Apply settings to new text boxes check box.
-
Click OK.
The next new text box that you create will use the settings from this text box.
Manually create a new text box with the margins you want
-
On the Home tab, click Draw Text Box .
-
Click where you want the text box to appear.
-
Right-click the text box.
-
On the shortcut menu, click Format Text Box, and then click the Text Box tab.
-
Under Text Box Margins, type or select the margins you want for Left, Right, Top, and Bottom.
-
Click the Colors and Lines tab.
-
Select the Apply settings to new text boxes check box.
-
Click OK.
Set page margins
-
On the Page Design tab, click Marginsand select the predefined margins you want
or -
Click Custom Margins, and in the Margin Guides tab type the margin values that you want.
Set page margins to match the minimum margins supported by your desktop printer
Desktop printers normally have a nonprintable region around the edge of the paper that is between 0.17 and 0.5 inches wide. Nothing within that region will print. If you want to set the page margins for your publication to match the minimum margin that is supported by your printer, you must first determine the size of your printer's nonprintable region. To determine your printer’s minimum margins:
-
Click the File button, and then Print to open the print page in the Backstage View.
-
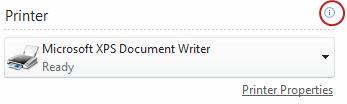
Under Printer, select the printer you want to use.
-
On the right-hand edge of the Printer heading there is a small information icon, hover over this icon and information about your printer’s status will be shown, including, in the Printable Region section, its minimum margin values.
-
Note the minimum margin values. You will need to use these margin values when you set the page margins in your publication.
-
Click the File button to return to your publication.
-
On the Page Design tab, click Margins, and then click the Margin Guides tab.
-
Under Margin Guides, type the minimum margin values that you noted earlier for Left, Right, Top, and Bottom.
-
Click OK.
Set margins inside a text box
-
Click in the text box and then select the Text Box Tools tab.
-
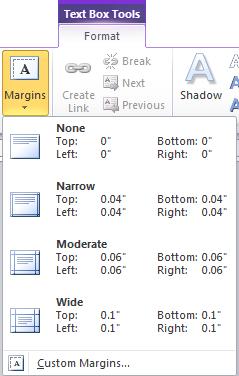
Click the Margins button to bring up the drop-down menu.
-
Select one of the predefined settings from the margin gallery, or click Custom Margins and under Text Box Margins, type or select the margins you want for Left, Right, Top, and Bottomand click OK.
Note: Publisher's default text box margins are 0.04 inches on all sides. If you are creating a multi-column newsletter, you may want to change the margins to 0 inches to make it easier to align text and objects.
Set default margins for new text boxes in the current publication
If there is an existing text box in your publication that already has the margins you want to use as defaults, you can use it as the example for new text boxes that you will create. Otherwise, you need to first create a text box and set the default margins you want.
Use the margin settings from an existing text box as the default settings for new text boxes
-
Right-click the text box that has the margins you want to use as defaults.
-
On the shortcut menu, click Format Text Box, and then click the Colors and Lines tab.
-
Select the Apply settings to new text boxes check box.
-
Click OK.
New text boxes that you create will use the formatting set on this text box.
Set page margins
-
On the Arrange menu, click Layout Guides, and then click the Margin Guides tab.
-
Under Margin Guides, type the margin values that you want.
Set page margins to match the minimum margins supported by your desktop printer
Desktop printers normally have a region around the edge of the paper that is between 0.17 and 0.5 inches wide where nothing within that region will print. If you want to set the page margins for your publication to match the minimum margin that is supported by your printer, you must first determine the size of your printer's printable region.
-
In your publication, select File >Print Setup.
-
In the Print Setup dialog box, select the Printer Details tab. Measurements are In the Printable region section,
Set margins inside a text box
-
Right-click a text box, and then click Format Text Box.
-
In the Format Text Box dialog box, click the Text Box tab.
-
Under Text Box Margins, type or select the margins you want for Left, Right, Top, and Bottom.
-
Click OK.
Note: Publisher's default text box margins are 0.04 inches on all sides. If you are creating a multi-column newsletter, you may want to change the margins to 0 inches to make it easier to align text and objects.
Set default margins for new text boxes in the current publication
If there is an existing text box in your publication that already has the margins you want to use as defaults, you can use it as the example for new text boxes that you will create. Otherwise, you need to first create a text box and set the default margins you want.
Use the margin settings from an existing text box as the default settings for new text boxes
-
Right-click the text box that has the margins you want to use as defaults.
-
On the shortcut menu, click Format Text Box, and then click the Colors and Lines tab.
-
Select the Apply settings to new text boxes check box.
-
Click OK.
The next new text box that you create will use the settings from this text box.
Manually create a new text box with the margins you want
-
On the Objects toolbar, click Text Box

-
Click where you want the text box to appear.
-
Right-click the text box.
-
On the shortcut menu, click Format Text Box, and then click the Text Box tab.
-
Under Text Box Margins, type or select the margins you want for Left, Right, Top, and Bottom.
-
Click the Colors and Lines tab.
-
Select the Apply settings to new text boxes check box.
-
Click OK.


