
You can use the Quick Part Gallery to create, store, and reuse pieces of content, including AutoText, document properties (such as title and author), and fields. These reusable blocks of content are also called building blocks. AutoText is a common type of building block that stores text and graphics. You can use the Building Blocks Organizer to find or edit a building block.
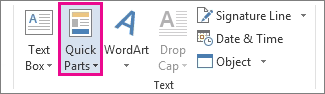
To open the Quick Part Gallery, on the Insert tab, in the Text group, click Quick Parts.
What do you want to do?
-
Select the phrase, sentence, or other portion of your document that you want to save to the gallery.
-
On the Insert tab, in the Text group, click Quick Parts, and then click Save Selection to Quick Part Gallery, change the name and add a description if you like, and click OK.
Note: To save a selection as AutoText, on the Insert tab, in the Text group, click Quick Parts > AutoText > Save Selection to AutoText Gallery.
-
Place your cursor where you want to insert a selection from the Quick Parts Gallery.
-
On the Insert tab, in the Text group, click Quick Parts, and then click the sentence, phrase, or other saved selection you want to reuse.
Note: If you saved the item as AutoText, click Insert > Quick Parts > AutoText to find and click the selection.
You can change a Quick Part by replacing the building block. You insert the building block, make the changes that you want, and then save the building block with the same name.
Important: To replace the original entry in the gallery, the name, category, and gallery must be the same as the original.
-
Click where you want to insert the building block.
-
On the Insert tab, in the Text group, click Quick Parts, and then click Building Blocks Organizer. If you know the name of the building block, click Name to sort by name.
-
Click Insert.
-
Make your changes to the building block
-
Select the revised text.
To store paragraph formatting—including indentation, alignment, line spacing, and pagination—with the entry, include the paragraph mark ( ¶ ) in the selection.
Note: To view paragraph marks, on the Home tab, in the Paragraph group, click Show/Hide.
-
On the Insert tab, in the Text group, click Quick Parts, and then click Save Selection to Quick Part Gallery.
-
In the Create New Building Block dialog box, type the original name, category, and gallery for the building block entry, and then click OK.
-
When asked whether you want to redefine the building block entry, click Yes.
-
On the Insert tab, in the Text group, click Quick Parts, and then click Building Blocks Organizer.
-
Click the name of the building block that you want to rename, and then click Edit Properties.
-
In the Modify Building Block dialog box, type a new name for the entry, and then click OK.
-
When asked whether you want to redefine the building block entry, click Yes.
-
Open a document that contains the Quick Part that you want to delete.
-
On the Insert tab, in the Text group, click Quick Parts, and then click Building Blocks Organizer. If you know the name of the building block, click Name to sort by name.
-
Select the entry, and then click Delete.
-
When asked whether you are sure you want to delete the building block entry, click Yes.
The building block that you deleted is no longer available in galleries, although the content might still appear in the document.


