
|
Here are some basic tasks that you can do to help you learn how to use Microsoft SharePoint Workspace 2010. Note: SharePoint Workspace was previously called Office Groove. |
In this article
What is SharePoint Workspace?
Microsoft SharePoint Workspace 2010 allows you to access your SharePoint content whether or not you are connected to the SharePoint server or working offline. When you are connected to the SharePoint server, all content updates on the server and in the workspace are automatically synchronized. When you are not connected, changes you make in the workspace are cached locally. The next time you connect to the SharePoint server, all changes are automatically synchronized.
SharePoint workspaces provide easy navigation in accessing and working with your SharePoint content. If you are familiar with using a SharePoint site, you will immediately know how to use a SharePoint workspace.
Types of workspaces in SharePoint Workspace
SharePoint Workspace offers three workspace types: SharePoint workspaces, Groove workspaces, and shared folders.
SharePoint workspaces, new in this release, allow you to create a copy of a SharePoint site on your computer that is automatically synchronized with the server. This type of workspace can include only one member, the creator of the workspace.
Groove workspaces will be familiar to anyone who has used an earlier release of this software, such as Office Groove 2007. This type of workspace typically contains a variety of productivity tools, added as needed, and usually contains two or more members who join via invitation.
A shared folder is a special type of Groove workspace that enables you to share the contents of a folder in your Windows file system. For more information about this type of workspace, see About shared folders.
Parts of a SharePoint workspace
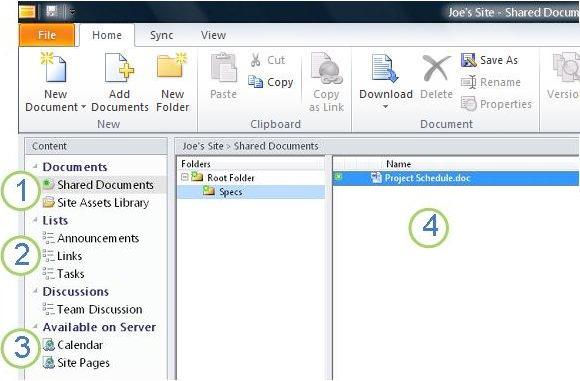
1. SharePoint document libraries synchronized in this workspace.
2. SharePoint lists synchronized in this workspace.
3. Lists or libraries not supported in SharePoint workspace. A Web link is provided for navigating to this content on the SharePoint site.
4. Content in the selected document library.
This document describes how to create a SharePoint Workspace starting from a SharePoint site.
Parts of a Groove workspace
With Groove workspaces, groups or organizations with common purposes and goals can share ideas and work together. A Groove workspace typically contains two or more "members," that is, people who join the workspace via invitation. Workspace content is highly dynamic. All members who are currently online see instantly any updates either they or other members add. You and other members send and receive updates as you come online.
Groove workspaces allow members to work with a variety of specialized application tools. For example, suppose you conduct a weekly meeting to discuss developing marketing materials. Activities might involve setting deadlines, assigning tasks, and reviewing completed work. To facilitate this meeting, workspace members might post files in a Documents tool, discuss issues in a Discussion tool, and collaborate on meeting agendas using a Calendar tool. All members currently online at the same time in the workspace could interact using real-time chat.
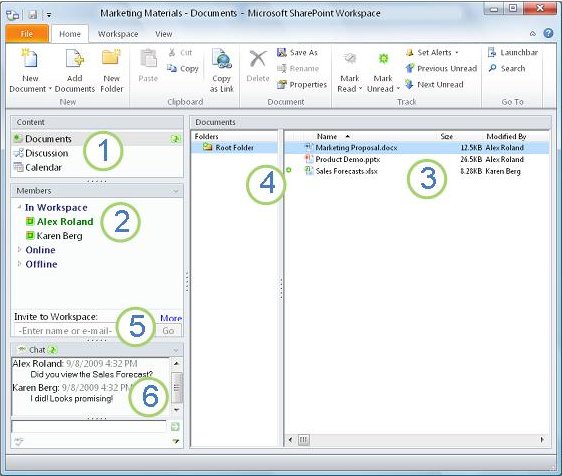
1. Tools in this workspace.
2. Members in this workspace.
3. Content in the currently selected workspace tool.
4. An item that contains new or unread content.
5. Invite new members to this workspace in the Invite to Workspace box.
6. The workspace chat transcript.
Create a SharePoint workspace
You can create SharePoint workspaces starting from a SharePoint site in a Web browser, or from the SharePoint Workspace Launchbar.
Create a SharePoint workspace that downloads items in all lists and libraries
The simplest way to create a SharePoint workspace is to go to the SharePoint site and synchronize the site to your computer. All items in supported lists and libraries will get downloaded to the SharePoint workspace. Note that the content of document library items is downloaded only on demand, as you open documents in the SharePoint workspace.
Lists and libraries that are not yet supported appear in the content pane of the workspace, and provide links to the SharePoint site.
Note: SharePoint Workspace will warn if the SharePoint site you selected is very large and would therefore take a lot of time to download all items.
-
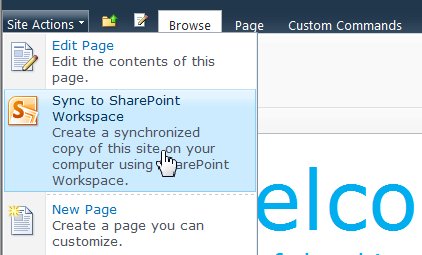
In a Web browser, go to the SharePoint site you would like to synchronize in a SharePoint workspace.
-
Click Site Actions and then click Sync to SharePoint Workspace.
-
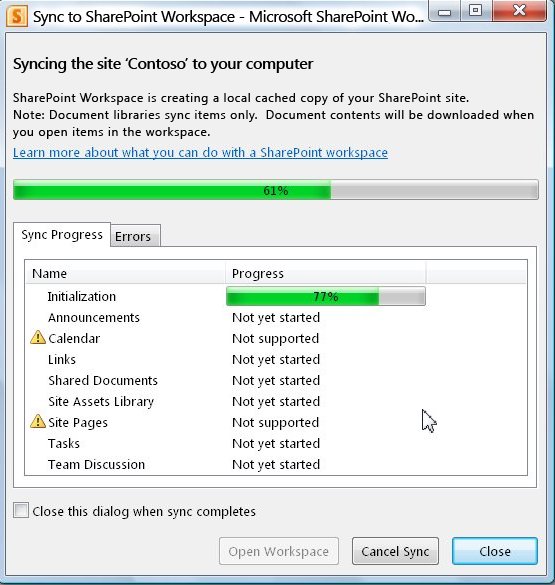
In the Sync to SharePoint Workspace dialog box, click OK.
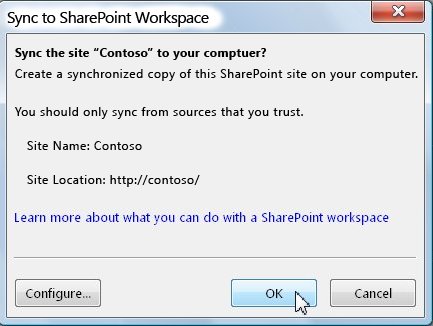
A "Sync Progress" dialog box opens to keep you informed about the progress of the download from the SharePoint site to the SharePoint workspace.
-
When the download completes, click Open Workspace or Close.
Create a SharePoint workspace syncing a selected list or library
Sometimes you may want to synchronize only a specific list or library to your computer in a SharePoint workspace. You can do so and avoid spending the time downloading items from other lists and libraries.
Note: You can also customize the creation of the SharePoint workspace to download a collection of specific lists and libraries. See "Create the SharePoint workspace downloading items from selected lists and libraries" in Creating a new workspace for more information.
-
In a Web browser, go to the SharePoint site you would like to synchronize in a SharePoint workspace.
-
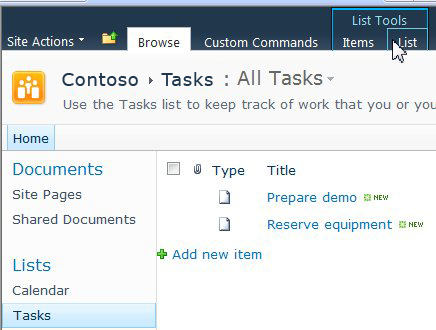
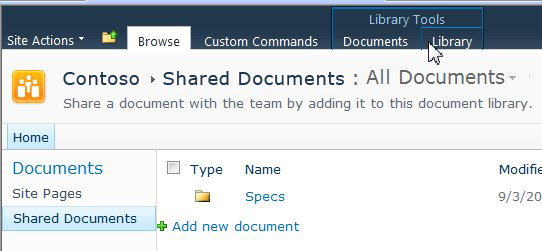
Select the list or library you want to synchronize to your computer.
-
Do one of the following:
-
If you selected a list, click List under List Tools.
-
If you selected a library, click Library under Library Tools.
-
-
In the SharePoint ribbon, in the Connect & Export group, click Sync to SharePoint Workspace.
-
Click OK.
A sync progress dialog box opens to keep you informed about the progress of the download from the SharePoint site to the SharePoint workspace. -
When the download completes, click Open Workspace or Close.
Synchronize content in a SharePoint workspace with the SharePoint server
A SharePoint workspace is automatically synchronized with the SharePoint site as follows:
-
All updates you make in a SharePoint workspace are immediately sent to the SharePoint site when you save them.
-
All content in the SharePoint workspace and the SharePoint site is automatically synchronized as frequently as possible, at minimum every 10 minutes, depending on network traffic.
You do not need to take any actions to keep your content synchronized. However, since updates that occur on the SharePoint site are not immediately sent to the SharePoint workspace, you may sometimes want to manually synchronize the SharePoint workspace to be sure that you have the latest content.
You can synchronize an individual list or library, or all lists and libraries in the SharePoint workspace at once.
Synchronizing an individual list or library
-
Click the list or library that you want to synchronize in the Content pane.
-
On the Sync tab, click Sync, and then click Sync Tool.
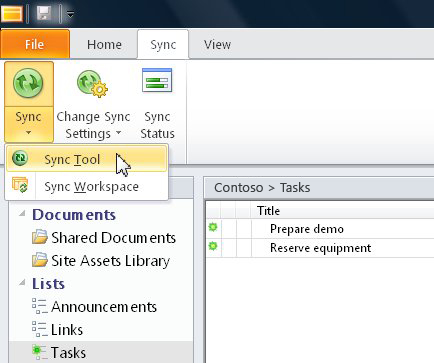
The status bar reports on the progress of the synchronization.
Synchronizing all lists and libraries in the SharePoint workspace
-
On the Sync tab, click Sync, and then click Sync Workspace.
The status bar reports on the progress of the synchronization.
Navigate to a SharePoint workspace
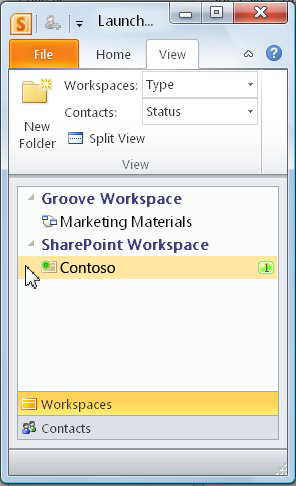
Navigate to a SharePoint workspace in the Launchbar
You can go to any SharePoint workspace you have created by opening it in the Launchbar.
-
Start SharePoint workspace.
-
In the Launchbar, click the Home tab.
-
Double-click the SharePoint workspace name to open the workspace.
Navigate to a SharePoint workspace in your file system
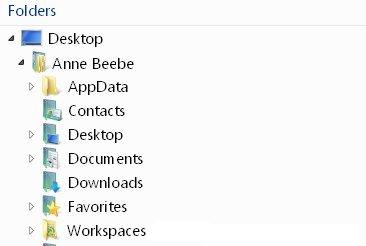
You can navigate to your SharePoint workspaces directly in your file system.
If you are running Windows Vista or later, your workspaces are stored in the Workspaces folder in your User Profile folder.
If you are running Windows XP, your workspaces are stored in the Workspaces folder in your My Documents folder.
Opening the Workspaces folder automatically starts up SharePoint Workspace, if it is not already running. Workspaces are listed with the same icons as in the launchbar.
Note: Only 2010 SharePoint or Groove workspaces display in the list. Additionally, SharePoint workspaces display only if they contain at least one document library, and Groove workspaces display only if they contain at least one Documents tool.
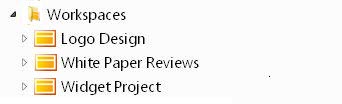
Open any workspace "folder" to see a list of all Documents tools in that workspace.
Creating a Groove workspace
You can create a new Groove workspace in the Launchbar.
-
On the Home tab, click New and then click Groove Workspace.
-
Type a name for the workspace.
-
Click Create.
SharePoint Workspace creates the Groove workspace and lists you as the initial member with the role of Manager. You can now add or update workspace tools and invite people to join as members.
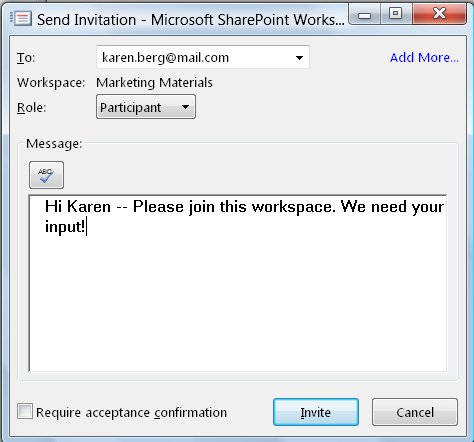
Inviting people to a Groove workspace
To invite someone to a Groove workspace, you can do the following:
-
Open the workspace.
-
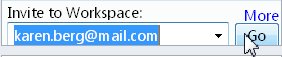
In the Members pane, type the e-mail address of the recipient in the Invite to Workspace box, and then click Go.
Note: If the person you want to invite is already a member of other Groove workspaces or in your contact list, you can find them quickly by typing the first few letters of their screen name in the box.
-
In the Send Invitation box, click Invite.
When you send the invitation, the recipient must open and accept it. You then receive a "confirm acceptance" message.
Once you confirm the acceptance, the workspace is sent to the new member's computer. The new member is added to the member list in the workspace.
For detailed information on sending invitations, see Inviting someone to a Groove workspace.


