
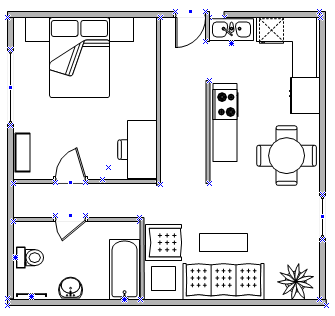
Use the Home Plan template in Visio Professional and Visio Plan 2 to draw new house plans or remodeling plans, experiment with new kitchen and furniture arrangements, or draw plans to add a new room to your home.
Create a home plan
-
On the File tab, select New, and then select Home Plan.
-
Choose Metric Units or US Units, and then select Create.
By default, this template opens a scaled drawing page in landscape orientation

-
Create the basic exterior wall structure in one of the following ways:
Use room shapes.
-
From the Walls, Shell and Structure stencil, drag one of the room shapes onto the drawing page.
-
Resize the room shape by dragging the control handles


Use wall shapes.
-
From the Walls, Shell and Structure stencil, drag exterior wall shapes onto the drawing page.
-
Resize walls by dragging an endpoint (


-
To connect walls, drag an endpoint (
The endpoints turn red when the walls are glued. Intersections between two walls are cleaned up automatically.
Note: For walls to join properly, Glue to Shape geometry must be selected in the Snap & Glue dialog box.
-
-
Create the interior wall structure.
-
Drag wall shapes onto the drawing page, positioning them inside the exterior structure.
-
Resize walls by dragging an endpoint (
-
To connect walls, drag an endpoint (
The endpoints turn red when the walls are glued. Intersections between two walls get cleaned up automatically.
Note: For walls to join properly, Glue to Shape geometry must be selected in the Snap & Glue dialog box.
-
-
Add other structural elements.
-
From the Walls, Shell and Structure stencil, drag structural shapes, such as columns, onto the drawing page.
-
From Building Core, drag building core shapes, such as stairs, onto the drawing page.
-
-
Add doors and windows.
-
From the Walls, Shell and Structure stencil, drag door and window shapes on top of walls.
Doors and windows automatically rotate to align with the wall and glue to the wall. They also acquire the wall's thickness and move with walls when you reposition them.
-
-
After you assemble the building shell and wall structure, you can add electrical symbols and dimension lines.
Add electrical symbols.
-
From the Electrical and Telecom stencil, drag wall switches, outlets, and other wall fixtures onto wall shapes.
-
Release the mouse button when a red square

You can also drag ceiling fixture shapes, such as the Ceiling fan, onto the drawing page.
Add dimension lines to walls.
-
Right-click a wall, and then select Add a Dimension.
-
Reposition dimension lines and dimension text by dragging a control handle
Note: To see a tip about a control handle for a selected shape, pause the pointer over the handle.
-
If you add a dimension to a wall, you can resize the wall by selecting the dimension shape, typing the dimension that you want, and then selecting away from the dimension shape.
-
Insert a CAD home plan
-
On the File tab, select New, and then select Home Plan.
-
Choose Metric Units or US Units, and then select Create.
By default, this template opens a scaled drawing page in landscape orientation
-
On the Insert tab, select CAD Drawing.
-
Locate the CAD file and select Open.
-
To accept the size and location of the CAD drawing, select OK.
After you have inserted the drawing, you can resize it, change its scale, or move it. You can also lock the layer that contains the CAD drawing so that you do not accidentally change it if you create a new plan on top.
Copy an existing Visio home plan into a new drawing
-
On the File tab, select New, and then select Home Plan.
-
Choose Metric Units or US Units, and then select Create.
By default, this template opens a scaled drawing page in landscape orientation
-
Open an existing Visio drawing.
-
On the Design tab, select Page Setup, and then select the Drawing Scale tab. Make note of the scale setting in the existing drawing, and then set the scale of your new drawing to match.
-
In the existing drawing, select the shapes you want to use in the new drawing and then, on the Home tab, select Copy.
-
Switch to the new drawing, and then, on the Home tab, select Paste.
Tip: You can lock the existing layers of a drawing so that you do not accidentally change them when you create a new plan on top.


