
This error occurs after you install an application and the protocols used for synchronization are not set to Outlook. Follow the troubleshooting steps below in the order provided to fix this issue.
Reset protocols to point to Outlook
-
In Windows, click Start > Settings > Apps, and then select Default apps on the left-hand side.
-
Select Set defaults by app.
-
Find Outlook in the list of applications, click it, and select Manage.
-
Check each file type to make sure they are associated with Outlook. If you find one that isn't, click to the right of the file type and select Outlook from the list.
-
Close the window and then run a repair of Office. The steps to access the repair tool vary depending on your operating system. Choose from the drop-down list below.
Select your operating system- Select your operating system
- Windows 10
- Windows 8 or 8.1
- Windows 7 or Vista
-
Right-click the Start button


-
Select the Microsoft Office product you want to repair and select Modify. If you don't see any options, select the three dots on the right side.
Note: This will repair the entire Office suite even if it's just one application you want to repair such as Word or Excel. If you have a standalone app installed, then search for that application by name.
-
Depending on if your copy of Office is Click-to-run or MSI-based install, you'll see the following options to proceed with the repair. Follow the steps for your installation type.
Click-to-run
In the window How would you like to repair your Office Programs, select Online Repair > Repair to make sure everything gets fixed. (The faster Quick Repair option is also available, but it only detects and then replaces corrupted files.)
MSI-based
In Change your installation, select Repair and then click Continue.
-
Follow the instructions on the screen to complete the repair.
-
Right-click the Start button
-
From Category view, under Programs, select Uninstall a program.
-
Right-click the Microsoft Office product you want to repair, and from the drop-down, select Change.
Note: If you have a suite such as Microsoft 365 Family, Office Home & Student 2016, or Office Home and Student 2013, search for the suite name, even if it's just a particular application you want to repair such as Word or Excel. If you have a standalone application such as Word or Excel, search for the application name.
-
Depending if your copy of Office is Click-to-run or an MSI-based install, do the following for your Office installation type:
Click-to-Run installation type:
In How would you like to repair your Office Programs, select Online Repair to make sure everything gets fixed, and then select Repair. (The faster Quick Repair option is also available, but it only detects and then replaces corrupted files.)
MSI-based installation type:
In Change your installation, select Repair and then click Continue.
-
Follow the remaining instructions on the screen to complete the repair.
-
Click the Start button

-
From Category view, under Programs, select Uninstall a program.
-
Click the Office product you want to repair, and then click Change.
Note: If you have a suite such as Microsoft 365 Family, Office Home & Student 2016, or Office Home and Student 2013, search for the suite name, even if it's just a particular application you want to repair such as Word or Excel. If you have a standalone application such as Word or Excel, search for the application name.
-
Depending if your copy of Office is Click-to-run or an MSI-based install, do the following for your Office installation type:
Click-to-Run installation type:
In How would you like to repair your Office Programs, select Online Repair to make sure everything gets fixed, and then select Repair. (The faster Quick Repair option is also available, but it only detects and then replaces corrupted files.)
MSI-based installation type:
In Change your installation, select Repair and then click Continue.
-
Follow the remaining instructions on the screen to complete the repair.
-
After the repair is done and you've restarted your PC, open iCloud and check if it can sync without a problem.
Uninstall previous versions of Office
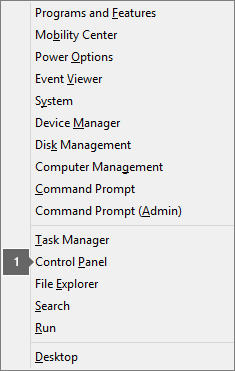
You may have an older version of Office still installed on your PC that's causing this error. To check, open the Control Panel, select Programs and Features, and scan the list for any other version of Office that may be installed. If you come across an older version, select it and click Uninstall. Restart your computer and check if this fixed the problem.
Uninstall the Office installation from the Microsoft Store app
If Office was pre-installed on your PC or was installed from the Microsoft Store it may not work with iCloud. You'll need to uninstall Office and then reinstall it to fix the problem. To do this:
-
Select Start
-
Under Apps & Features select Microsoft Office Desktop Apps. If you don't find that name, scan the list for any other version of Office that may be installed and select it.
-
Select Uninstall.


Restart your computer and then follow the steps in Download and install or reinstall Office 365 or Office 2019 on a PC or Mac to reinstall Office.
Run PowerShell commands
You can run these PowerShell commands on your PC to reconfigure the application. Before you take these steps, remember your sign in credentials to Outlook as you may be prompted to sign back in. Also, you'll need administrator privileges. After running these commands, you'll have to repair Office.
-
Click Start and type powershell in the search bar.
-
Right-click the Windows PowerShell app icon and select Run as Administrator.
-
Once you're in PowerShell, type the following commands:
Get-AppxProvisionedPackage -Online | where-object {$_.packagename –like “*Outlook*”} | Remove-AppxProvisionedPackage –Online
Get-AppxPackage “*Outlook*” | Remove-AppxPackage
-
Close the PowerShell app and then restart it without selecting Run as Administrator.
-
Restart your PC.
-
Repair Office. The steps to access the repair tool vary depending on your operating system. Choose from the drop-down list below.
Select your operating system- Select your operating system
- Windows 10
- Windows 8 or 8.1
- Windows 7 or Vista
-
Right-click the Start button
-
Select the Microsoft Office product you want to repair and select Modify. If you don't see any options, select the three dots on the right side.
Note: This will repair the entire Office suite even if it's just one application you want to repair such as Word or Excel. If you have a standalone app installed, then search for that application by name.
-
Depending on if your copy of Office is Click-to-run or MSI-based install, you'll see the following options to proceed with the repair. Follow the steps for your installation type.
Click-to-run
In the window How would you like to repair your Office Programs, select Online Repair > Repair to make sure everything gets fixed. (The faster Quick Repair option is also available, but it only detects and then replaces corrupted files.)
MSI-based
In Change your installation, select Repair and then click Continue.
-
Follow the instructions on the screen to complete the repair.
-
Right-click the Start button
-
From Category view, under Programs, select Uninstall a program.
-
Right-click the Microsoft Office product you want to repair, and from the drop-down, select Change.
Note: If you have a suite such as Microsoft 365 Family, Office Home & Student 2016, or Office Home and Student 2013, search for the suite name, even if it's just a particular application you want to repair such as Word or Excel. If you have a standalone application such as Word or Excel, search for the application name.
-
Depending if your copy of Office is Click-to-run or an MSI-based install, do the following for your Office installation type:
Click-to-Run installation type:
In How would you like to repair your Office Programs, select Online Repair to make sure everything gets fixed, and then select Repair. (The faster Quick Repair option is also available, but it only detects and then replaces corrupted files.)
MSI-based installation type:
In Change your installation, select Repair and then click Continue.
-
Follow the remaining instructions on the screen to complete the repair.
-
Click the Start button
-
From Category view, under Programs, select Uninstall a program.
-
Click the Office product you want to repair, and then click Change.
Note: If you have a suite such as Microsoft 365 Family, Office Home & Student 2016, or Office Home and Student 2013, search for the suite name, even if it's just a particular application you want to repair such as Word or Excel. If you have a standalone application such as Word or Excel, search for the application name.
-
Depending if your copy of Office is Click-to-run or an MSI-based install, do the following for your Office installation type:
Click-to-Run installation type:
In How would you like to repair your Office Programs, select Online Repair to make sure everything gets fixed, and then select Repair. (The faster Quick Repair option is also available, but it only detects and then replaces corrupted files.)
MSI-based installation type:
In Change your installation, select Repair and then click Continue.
-
Follow the remaining instructions on the screen to complete the repair.


