
You can add an animated on-screen timer or progress bar to make your presentation more interesting. For example, you might want to include a timed quiz at the end of a training with a countdown display. You can use the animation features in PowerPoint to create many different kinds of timers.
If you’re looking for a timer to track how long you’ve been speaking to stay within your allotted time limits, see Start the presentation and see your notes in Presenter view.
Tip: You can also find other types of timers, such as stopwatch timers, at the Office Store or use free slide templates to count down one minute, five minutes, and ten minutes for your audience.
Create a countdown timer
This timer uses a simple but dramatic animation sequence. It shows a countdown in one-second intervals from 5 to 1.
-
Begin by creating five text boxes with numbers 5 through 1. We will animate these to disappear one at a time, in one-second intervals.
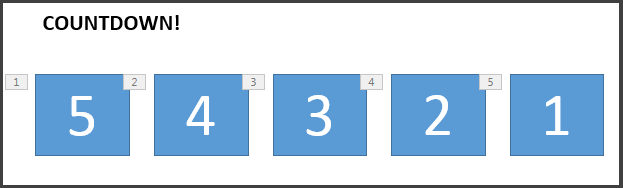
Tip: Create the boxes in order from highest to lowest so it’s easier to animate them in order.
-
To create text boxes, on the Insert tab, in Text group, click Text box, and draw the text box on your slide. Then add the number. You can copy and paste to duplicate and then edit the new boxes.
-
Click inside the text rectangle with the number.
-
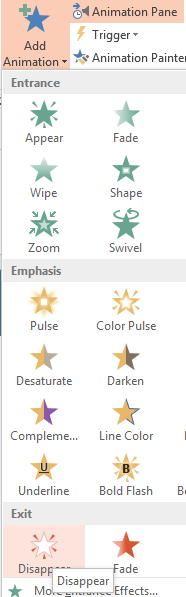
On the Animations tab, in the Advanced Animation group, click Add Animation, and go down to Exit. Here, you can select the animation you want, for example Disappear.
-
Select the rest of the rectangles 4, 3, 2, 1 in order, and apply the same exit animation, Disappear, to each, one at a time.
-
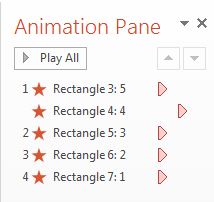
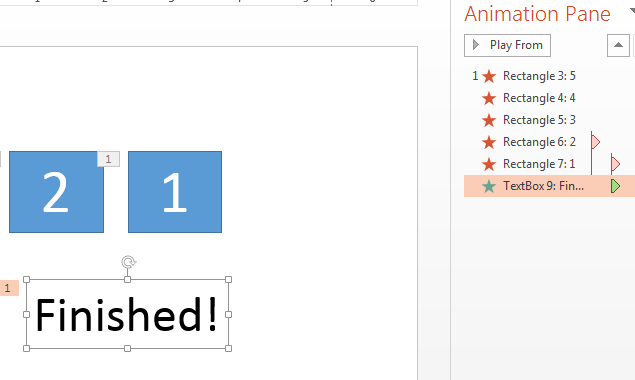
Click Animations > Animation Pane to show the Animation Pane. The numbering of the rectangles can be a little confusing because PowerPoint is accounting for other objects on the slide. Look at the number to the right, which shows the text in the rectangle.
-
You want only the first rectangle with the number 5 to start on a click, and you want it to stay on screen for one second before it disappears. You want the other boxes to then each wait one second before disappearing automatically, one by one.
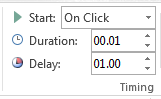
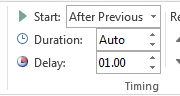
Select Rectangle 5, and in the Animations > Timing group, leave the settings Start: On Click and Duration: .01, but set Delay to 01.00, one second.
-
Now, in the Animation Pane, select the rest of the rectangles one at a time, from 4 to 1. Again, in the Timing group, set the timing details to: Start: After Previous, Duration: Auto, and Delay: 01:00.
-
When you’re done, try it out by going to Slideshow Mode and playing From Current Slide. Click to begin the countdown!
Tips:
-
You can preview your animation effects any time. On the Animations tab, in the Preview group, click Preview.
-
After the countdown, you might want to add an animation, such as a text box that reads Finished! To do this, insert the text box, select it, go to Animations > Advanced Animation > Entrance > Appear. Then, in the Timing group, set Start to After Previous, set Duration to Auto, and set Delay to 00.00. Notice that this text box also appears in the Animation Pane.
Note: You can just as easily animate shapes to appear or disappear using the different entrance and exit animations in PowerPoint. You can use any interval, but it’s a good idea to set the same delay for each object in the sequence.
How to create a progress bar timer
Another effective way to add a countdown timer is to emulate the appearance of a progress bar.
-
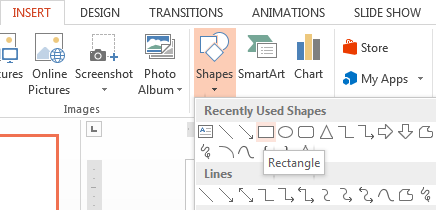
On the Insert tab, in the Illustrations group, click Shapes, and select a rectangle.
-
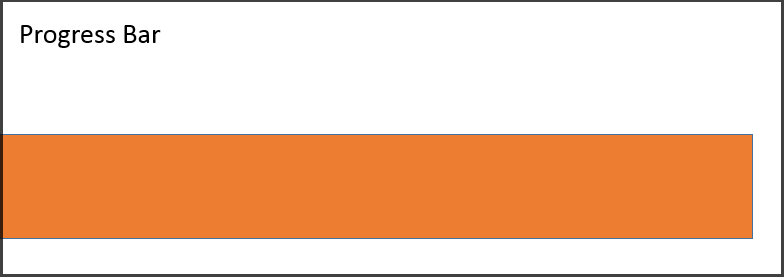
On the slide, click where you want the progress bar, and draw a rectangle with its edge against the left border of the slide.
-
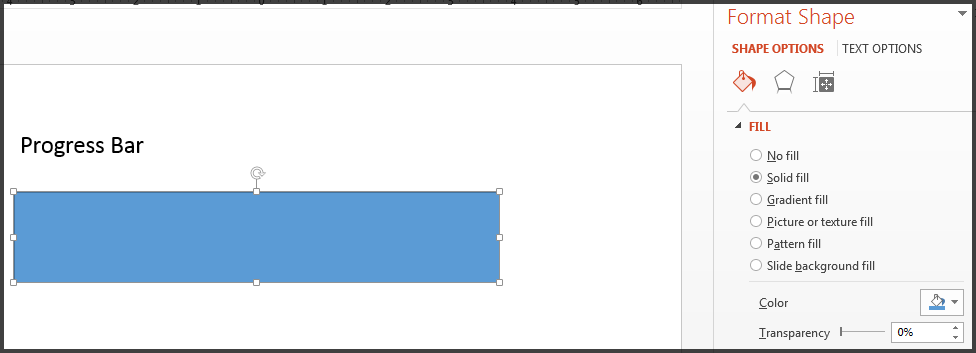
You can color the bar as you like. Right-click the bar and select Format Shape > Shape Options > Fill > Solid fill.
-
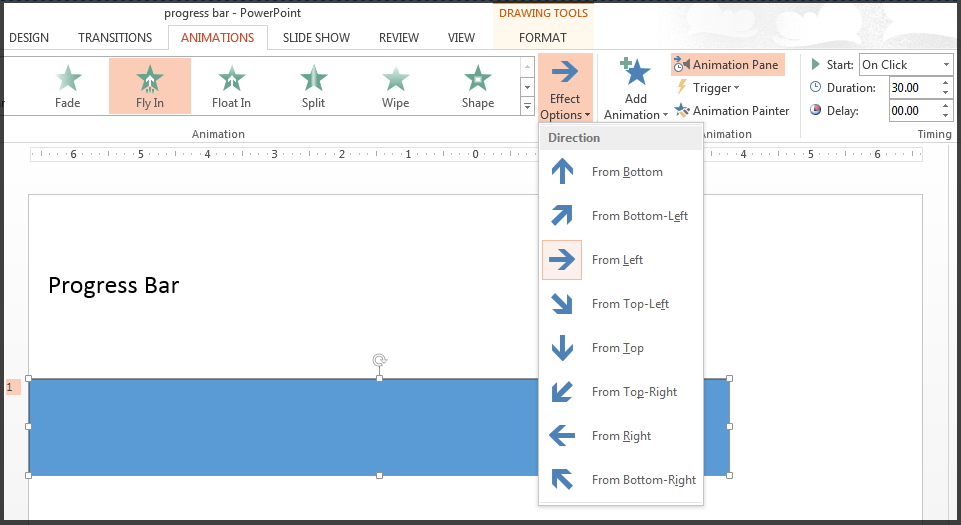
On the Animations tab, in the Animation group, select Fly In.
-
Click Effect Options and select From Left.
-
In the Timing group, set the Duration to the number of seconds you want the progress bar to run, for example, 30 seconds. For Start, select On Click.
Here’s what your settings should look like:
When you’re done, try it out by going to Slideshow Mode and playing From Current Slide. Click to begin the timer. The progress bar should appear to grow from the left side of the screen for 30 seconds and then stop.
See Also
Add, change, or remove transitions between slides
Set the timing and speed of a transition
Animate pictures, clip art, text, and other objects


