
Make a label for everyone on your list more quickly by using a mail merge. The setup takes a little time—but you can print all the labels at the same time. And you can save the label setup to use next time you want to print labels.
Choose a template that matches your labels
If you have a package of labels with a specific product number, look for a template for that product.
-
Click File > New, and type the manufacturer number (such as Avery 8871) in the search box.
-
Select a template, view the description to make sure it works with the label product number, and click Create.
Connect the label publication to your address list
The next step is to connect the sheet of labels to a data source. The data source is a file that contains your address list.
You can use your Outlook Contacts or an address list that’s in an Excel spreadsheet or an Access database. If you don’t have a list yet, you can type one in Publisher.
If you don’t have a list yet
Start by gathering the information for all the people you want in your address list.
-
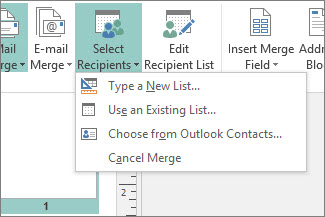
In Publisher, click Mailings > Select Recipients > Type a New List.
-
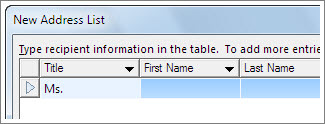
In the first row, type the information for the first person on your list.
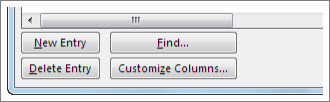
Tip: To change the columns in Publisher, click the Customize Columns button. You can then add, delete, rename, and reorder the columns in the list.
-
When you’ve entered all the information for that person, press New Entry, and type the information for the next person on your list.
-
After you’ve added everyone to your list, click OK.
-
In the Save Address List dialog box, type a name for the address list in the File name box, and select the folder where you want to save the list.
If you already have an address list
-
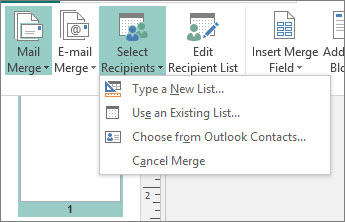
Click Mailings > Select Recipients.
-
If your list is in a spreadsheet or database, click Use an Existing List, browse to the file that contains your list, click it, and click Open. (If you’re prompted to select a table, click OK.)
-
If you want to use your Outlook Contacts, click Choose from Outlook Contacts, click the contacts folder you want to use, and click OK.
Choose which recipients to include
When you use an existing list or your Outlook contacts, Publisher includes everyone in the file or the contacts folder. For your project, you might want to narrow that list.
-
Click Edit Recipient List.
-
In the Mail Merge Recipients dialog box, check the boxes next to the people you want to include, and uncheck boxes next to people you don’t want to include this time.
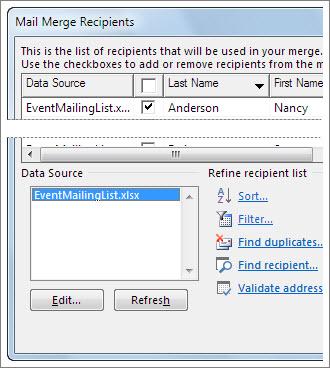
To make it easier to find the people you want to include, you can sort or filter your list.
Sort items in the list
-
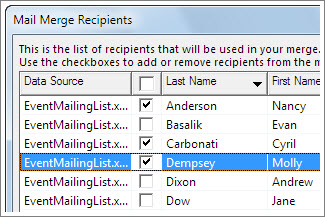
In the Mail Merge Recipients box, click the heading of the column you want to sort by.
For example, if you want to display the list alphabetically by last name, click the Last Name column heading.
Tip: To sort by more than one thing (for example, by state and by city), click Sort under Refine recipient list in the Mail Merge Recipients box. In the Filter and Sort dialog box, select what you want to sort by.
-
Check the boxes next to the people you want to include, and uncheck boxes next to people you don’t want to include this time.
Filter items in the list
-
Click the arrow next to the heading of the column you want to filter on.
-
Click (Blanks) or (Nonblanks) for a general filter. To filter on something more specific—for example, only people living in a specific city—click (Advanced) and fill in the boxes for what you want to filter on.
Tip: In the Filter and Sort box, you can also filter on more than one thing.
-
Check the boxes next to the people you want to include, and uncheck boxes next to people you don’t want to include this time.
To display all the records again, click (All).
Add the addresses to your labels
-
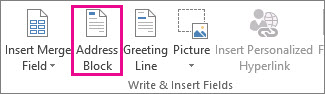
Click Mailings > Address Block.
-
Choose how you want the name to appear.

Tip: To be sure Publisher finds the names and addresses in your list, click Match Fields. Check that the fields you want appear in the list. If a field you want says Not Matched, click the drop-down list for that field and then click the column name that matches that column in your list.
-
Click OK.
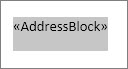
Publisher adds a mail merge field to your publication. When you finish the merge, Publisher will replace that field with an address in each label.
Note: If you’re making other kinds of labels and want to add different information, click Mailings > Insert Merge Field, and click the name for the information you want to add.
Format the addresses
-
In your publication, select the Address Block field, including the marks at the beginning and end of it.
-
Click Text Box Tools Format, and choose the Font, Font Size, and Font Color you want.
Preview your labels
Now you can check how your labels will look before you run the merge.
-
Click Preview Results, and then click the arrows to make sure the labels look the way you want.
Tip: To find and preview a specific entry in your data source, click Find Recipient, type what you’re searching for in the Find Entry box, and click Find Next.
Notes:
-
If you see a name that you meant to leave out of the merge, you can still remove it by clicking Exclude This Recipient.
-
If you realize you have the wrong list altogether, click Edit Recipient List, and sort or filter to get the list you want.
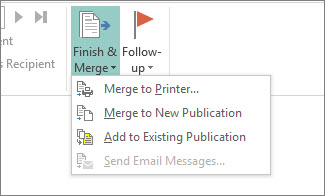
Print the labels
-
Click Finish & Merge > Merge to Printer.
-
Under Settings, make sure Publisher says Multiple pages per sheet.
-
Click Print.
Save the label setup for later use
After you complete the merge, save the label file so you can use it again.
-
Click File > Save As.
-
Click where you want to save the label file, and then click Browse.
-
Type a name for your label publication in the File name box, and then click Save.
The label file stays connected to your address list. To make labels again, open the file and click Yes when Publisher prompts you to keep that connection. Then, if you want to change which people or items you include in the merge, click Edit Recipient List to sort, filter, and select them.


