
Print labels for your mailing list

With your address list set up in an Excel spreadsheet you can use mail merge in Word to create mailing labels. Make sure your data is mistake free and uniformly formatted.
We will use a wizard menu to print your labels. Go to Mailings > Start Mail Merge > Step-by-Step Mail Merge Wizard.
-
In the Mail Merge menu, select Labels.
-
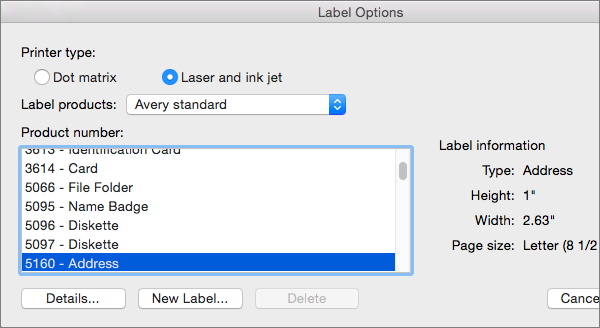
Select Starting document > Label Options to choose your label size. Choose your Label vendors and Product number. You'll find the product number on your package of labels. Select OK.
Tip: If none of the options match your labels, choose New Label, enter your label's information, and give it a name. Choose OK to add the new label to the Product number list.
-
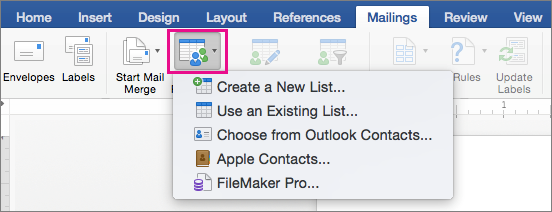
Choose Select recipients > Browse to upload the mailing list. Select your mailing list table and then OK > OK.
-
Select Arrange your labels > Address block to add recipient information. Select OK. To replicate the first label, select Update all labels.
-
Select Preview your labels to edit details such as paragraph spacing.
-
Select Complete the progress. Choose Print > OK > OK to print your labels.
-
Go to File > Save if you want to save your document.
Need more?
Data sources you can use for a mail merge
To create a page of labels with graphics, see Add graphics to labels
To add barcodes to your mailing list labels, see Add barcodes to labels
-
Go to Mailings > Start Mail Merge > Labels.

-
In the Label Options dialog box, choose your label supplier in the Label products list.
-
In the Product number list, choose the product number on your package of labels.
Tip: If none of the options match your labels, choose New Label, enter your label's information, and give it a name. Choose OK to add the new label to the Product number list.
-
Choose OK.
Your document now displays a table with an outline of the labels. If you don't see the outline, go to Table Layout and select View Gridlines.
-
Go to File > Save to save your document.
-
Go to Mailings > Select Recipients, and then choose an option.
For more info, see Data sources you can use for a mail merge.
-
Select OK.
-
Go to Mailings > Insert Merge Field and select the fields to show on your labels.

-
Choose OK.
-
Format the fields in the first label so it looks the way you want the rest of your labels to look.
-
Go to Mailings > Update Labels.
-
Go to Mailings > Preview Results.

Choose Preview Results again to view, add or remove merge fields. Select Update labels when done if you make changes.
-
When the labels look the way you want, go to Mailings > Finish & Merge > Print Documents.
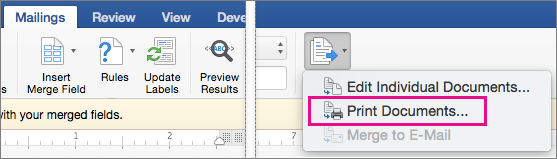
Tip: To review and update each label individually before printing, go to Mailings > Finish & Merge > Edit Individual Documents. When you're done, go to File > Print to print the labels.
See also


Need more help?
Want more options?
Explore subscription benefits, browse training courses, learn how to secure your device, and more.


Communities help you ask and answer questions, give feedback, and hear from experts with rich knowledge.


