
Note: This article has done its job, and will be retiring soon. To prevent "Page not found" woes, we're removing links we know about. If you've created links to this page, please remove them, and together we'll keep the web connected.
Word can automatically count the lines in a document and display the appropriate number next to each line of text. This is useful if you have to refer to specific lines in a document, such as a script or legal contract. By default, Word numbers every line in a document (except those in tables, footnotes, endnotes, text boxes, frames, and headers and footers). However, you can choose which line numbers to display. For example, you can include line numbers in all or part of the document. You can also include line numbers at intervals, such as every tenth line (10, 20, 30, and so on). If you do not want Word to count specific lines, such as a heading or a blank line, you can skip line numbers for these items and continue numbering the subsequent lines.
-
On the View menu, click Print Layout.
-
On the Layout tab, click Line Numbers, and then select the option that you want.
-
On the View menu, click Print Layout.
-
Select the text that you want to number.
-
On the Layout tab, click Line Numbers > Line Numbering Options.
-
On the Apply to list, click Selected text.
-
Click Line Numbers.
-
Select the Add line numbering check box, select the options that you want, and then click OK.
-
Click OK.
Word automatically inserts a section break before and after the text with the line numbers.
-
On the View menu, click Print Layout.
-
Click in a section, or select multiple sections.
-
On the Layout tab, click Line Numbers > Line Numbering Options.
-
On the Apply to list, click This section.
-
Click Line Numbers.
-
Select the Add line numbering check box, select the options that you want, and then click OK.
-
Click OK.
-
On the View menu, click Print Layout.
-
Select the section that you want to remove line numbers from.
-
On the Layout tab, click Line Numbers > Line Numbering Options.
-
Click Line Numbers.
-
Clear the Add line numbering check box, and then click OK.
-
Click OK.
-
On the View menu, click Print Layout.
-
On the Layout tab, click Line Numbers > Line Numbering Options.
-
Click Line Numbers.
-
Clear the Add line numbering check box, and then click OK.
-
Click OK.
-
On the View menu, click Print Layout.
-
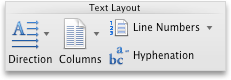
On the Layout tab, under Text Layout, click Line Numbers, and then select the option that you want.
-
On the View menu, click Print Layout.
-
Select the text that you want to number.
-
On the Layout tab, under Text Layout, click Line Numbers, and then click More Line Numbering.
-
On the Apply to pop-up menu, click Selected text.
-
Click Line Numbers.
-
Select the Add line numbering check box, and then select the options that you want.
Word automatically inserts a section break before and after the text with the line numbers.
-
On the View menu, click Print Layout.
-
Click in a section, or select multiple sections.
-
On the Layout tab, under Text Layout, click Line Numbers, and then click More Line Numbering.
-
Click Line Numbers.
-
Select the Add line numbering check box, and then select the options that you want.
-
On the View menu, click Print Layout.
-
Select the section that you want to remove line numbers from.
-
On the Layout tab, under Text Layout, click Line Numbers, and then click More Line Numbering.
-
Click Line Numbers.
-
Clear the Add line numbering check box.
-
On the View menu, click Print Layout.
-
On the Layout tab, under Text Layout, click Line Numbers, and then click More Line Numbering.
-
Click Line Numbers.
-
Clear the Add line numbering check box.


