
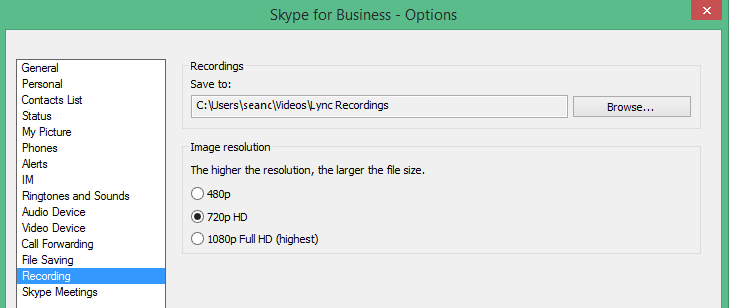
Your Skype for Business meeting recordings are saved in the Videos > Lync Recordings folder. If you prefer to change the location, click Browse and choose a different folder.
Note: Saving your recording to a mapped drive or network location is not supported in Skype for Business.
-
Open the Recording Manager. From the main Skype for Business window, click the tools menu and select Recording Manager.
-
Click Browse.
-
Find the folder where you want to save your recordings.
-
Select the folder and click OK.
Keep in mind that all your future recordings will be saved in the new location. If you change your mind, you can always come back and pick another folder.
You can also change the resolution of a recording (by default, 720 pixel high definition). Remember, the higher resolution you select, the larger the recording file size will be. So if you prefer to have smaller size files, select lower resolutions.
Tip: You can also re-publish a recording with a new resolution from Skype for Business Recording Manager.


