
Customize a new email message in Outlook.com by using the many options Outlook offers. No matter what type of message—personal or business —you're writing, you can always find a way to add your unique style.
You can add an attachment or an image (a picture, texture, or graphic), change fonts, insert a list, a signature, and more.
You can set the level of importance for a message so that recipients can see the indicator in their Inbox before they open it. Setting the level of importance also lets recipients sort their messages by importance.
To change the importance of your message, select the three dots at the top of the new message you're writing 
-
Select the Attach icon

-
Choose whether you want to attach a file from Computer or from Cloud locations.
-
Navigate to the location of the file, select the file, and then select Open.
If you want to add an image that displays in the body of your email, you can add an inline image.
-
Select Insert pictures inline

-
Browse to the location of the picture file on your computer, select the file, and then select Open.
Emoticons, also known as emoji, are graphics that convey an emotion. You can add a variety of emoticons to your messages. You can also choose from popular GIFs to add to your messages.
-
To insert an emoticon, select the Emoji icon

-
To insert a GIF, select the Emoji icon
Note: Not all email programs display emoticons the same way. An emoticon that is colorful on one client might be translated into its symbols in another. For example,
You can give your email message some flair by changing the text font, size, color, and style.
-
Select Show formatting options

-
Select Font

You can use bulleted or numbered lists to show steps, action items, or key takeaways in your email message.
-
To add a bulleted list in your email message, select Show formatting options

-
To add a numbered list in your email message, select Show formatting options

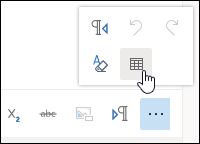
Insert a table to add structured information in rows and columns in your email message.
-
Create a new message or reply to an existing message.
-
At the bottom of the compose pane, select


-
Drag the pointer to choose the number of columns and rows you want in your table.
Create an email signature that appears at the end of your email messages.
-
At the top of the page, select Settings .
-
Select Mail > Compose and reply.
-
In the text box, type your email signature. You can change the font, size, color, and the appearance of your signature from the options available in the ribbon on top of the text box.
-
If you want to include your signature in new messages only, select the check box next to Automatically include my signature on new messages I compose. If you want to add your signature to the messages you forward or reply to, select Automatically include my signature on messages I forward or reply to. If you prefer both options, select both the check boxes.
-
Choose Save when done. Your email signature will now appear on new messages, or on your replies, or on both depending on your selection.
For more ways to customize your email messages, see Customize actions on your messages in Outlook.com.
Still need help?
|
|
To get support in Outlook.com, click here or select Help on the menu bar and enter your query. If the self-help doesn't solve your problem, scroll down to Still need help? and select Yes. To contact us in Outlook.com, you'll need to sign in. If you can't sign in, click here. |
|
|
|
For other help with your Microsoft account and subscriptions, visit Account & Billing Help. |
|
|
|
To get help and troubleshoot other Microsoft products and services, enter your problem here. |
|
|
|
Post questions, follow discussions and share your knowledge in the Outlook.com Community. |


