
If you'd like to give your calendar a brighter, more visually dynamic look, you can use conditional formatting to color-code your appointments and meetings based on sender, location, or whether the appointment is set as Free, Busy, or Out of Office.
To set up conditional formatting rules for your calendar, use the following steps.
-
From your Calendar folder, select View > View Settings.
-
Select Conditional Formatting.
-
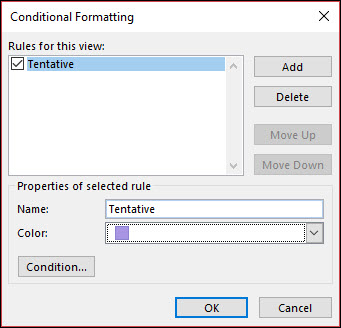
In the Conditional Formatting dialog box, select Add to create a new rule.
-
Give your rule a name and use the Color drop-down to pick a color.
-
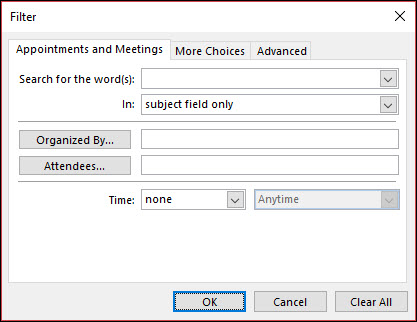
Click Condition.
-
You can select from a variety of fields and criteria. For example, to shade all tentative meetings purple, select Advanced.
-
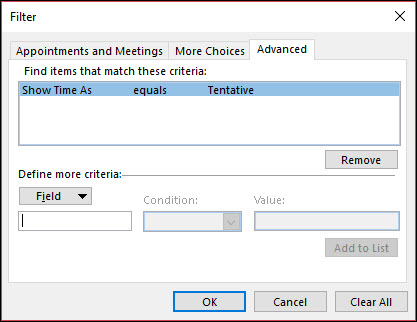
Click Field > All Appointment Fields > Show Time As. Set the Condition to equals and the Value to Tentative. Then click Add to List.
-
You can define additional conditions or click OK three times to save your conditional formatting rule.


