
Important:
-
Certain cloud-based services in Office Lens for Windows, such as saving your pictures to OneDrive, OneNote, Word, PowerPoint, or PDF, are no longer available in the app as of December 31, 2020. You can continue to use any other features of the app as installed on your computer or device.
-
Office Lens for Windows 10 is no longer available for download from the Microsoft Store as of January 1, 2021. To continue to enjoy all Office Lens features, we recommend downloading and using the latest version of Microsoft Lens for iOS or Microsoft Lens for Android on your mobile device.
Office Lens is a great way to capture notes and information from whiteboards, menus, signs, handwritten memos, or anything with a lot of text. You don’t need to jot down notes, rely on blurry images, or worry about misplacing anything. It’s great for capturing sketches, drawings and equations too, and even images without text.
Office Lens gets rid of shadows and odd angles, so that images are easier to read. You can upload document and whiteboard images to Word, PowerPoint, OneNote, OneDrive, and you can save them as PDFs or send them in email.
Choose a mode
As soon as you open Office Lens, you can choose your mode — Photo, Document, Whiteboard, or Business Card — so Office Lens can make the image look its best.
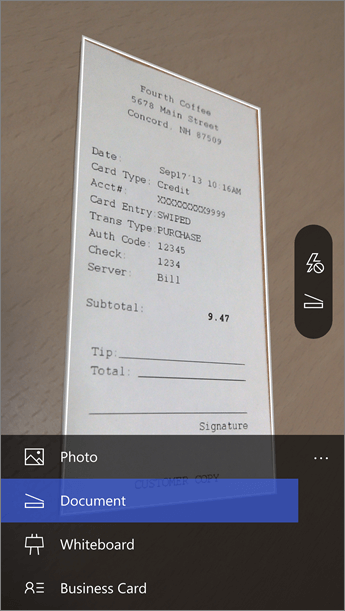
Photo This is a good mode to use if you’re taking pictures of scenery or people.
Document This mode will help you get the most out of small words and details on a page. It’s great for things like posters, fliers, or restaurant menus.
Whiteboard Use this mode to capture notes. Office Lens will adjust images so the background isn’t too bright and the words are easier to read. It’s an ideal setting for blackboards and sketches, too.
Business Card This mode will help you extract contact information and save it into your phone's contacts and into OneNote. This feature currently works best with business cards in English, German, Spanish, and Simplified Chinese.
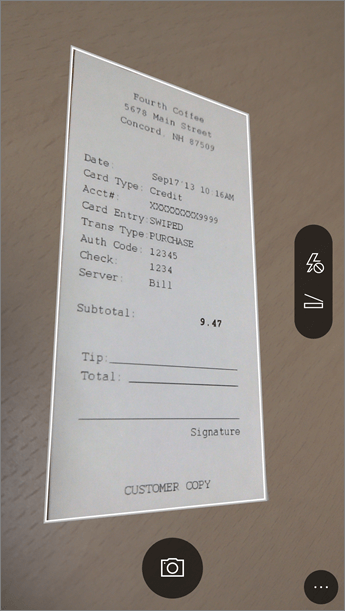
Take a picture
Choose whether or not to use a flash, and then make sure the frame lines up with the item you want to capture. Use the Camera button to take a picture. If you prefer, you can import an existing image from the local gallery on your device. If you want to retake the photo, tap the Trash button icon to delete it, then tap the Take More button to retake the displayed image. If you want to take more photos, tap the Take More button.
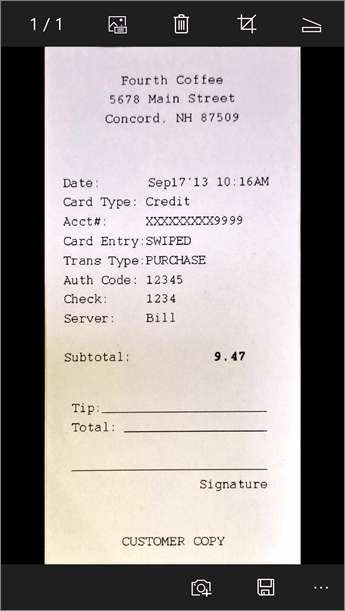
Review and edit
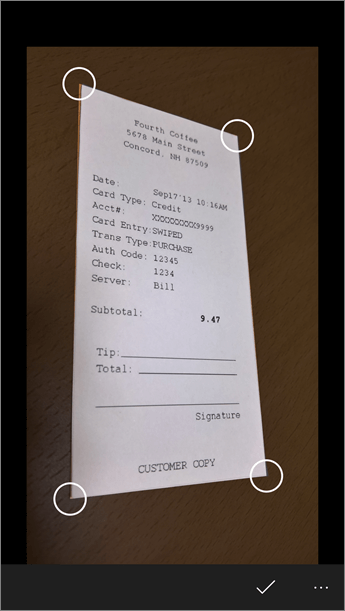
You can edit your image before you save it so it’s exactly the way you want it to be. Tap the Crop icon to trim away any parts of the image that you don’t need. You can also add a caption to the image. This caption will be used as the alt text in OneNote and the file title on OneDrive. After you edit an image, tap Save at the bottom. If you take more than two images, Office Lens will show all the images you took in the gallery.
Save
-
When you’re happy with your edits, choose where to save the image:
-
For captures taken in Photo, Document, or Whiteboard modes, you can save images to OneNote, OneDrive, as a Word or PowerPoint file, or as a PDF. You can also save them to your local photo gallery and edit their titles.
-
-
Add a title when prompted (optional).
By default, images saved to OneNote will be in your main notebook, but you can change the location to keep your notes organized in a way that suits you.
Note: If you’re new to OneNote, you’ll find images in the Quick Notes section of <Your First Name’s> Notebook. If you’ve been using OneNote for a while, your notebook will have a different name, like Personal, Personal (web), or My Notebook, and your captured content will be in the Unfiled Notes section.
Additional information
Images saved as Word or PowerPoint files, or as PDFs will be in your Documents folder in OneDrive or OneDrive for Business, so you can access them from any of your devices. Office Lens doesn’t just import an image into a Word or PowerPoint file. The final Word and PowerPoint documents are real Office documents.
-
For Word, Office Lens recognizes the text, handwritten or printed, and the document layout. All of the text, formatting, and the layout in the Word document it creates is fully editable — just like you authored it at your desk.
-
For PowerPoint, all of the handwritten lines and strokes are transformed into PowerPoint drawing objects that can be recolored, resized, moved around, and edited. You can remove the background of drawings as well, which makes it easier to reuse the drawings in other presentations.
-
For PDFs, Office Lens extracts the text information. You can search the content in a file with the text and you can highlight or copy part of the page with your PDF reader app.
-
Optical Character Recognition (OCR) and supported languages:
Save Destination
Target Text/Input
Languages
Word, PDF, OneDrive, OneNote
Printed Text
English, Simplified Chinese, Traditional Chinese, Czech, Danish, Dutch, Finnish, French, German, Greek, Hungarian, Italian, Japanese, Korean, Norwegian, Polish, Portuguese, Russian, Spanish, Swedish, Turkish
OneNote
Handwriting Text
English
Business Card mode (OneNote)
Business Card
English, Simplified Chinese, German, Spanish
Important:
-
Certain cloud-based services in Office Lens for Windows, such as saving your pictures to OneDrive, OneNote, Word, PowerPoint, or PDF, are no longer available in the app as of December 31, 2020. As of January 1, 2021, your cloud-saved captures in your Recent Uploads tab may no longer be accessible from the Office Lens for Windows app. You’ll still be able to access your previous cloud-saved captures by signing into your OneDrive account in a browser and opening the My Files > Documents > Office Lens folder, but you won’t be able to save new captures at this location with the Office Lens for Windows app.
-
To continue to enjoy all Office Lens features, we recommend downloading and using the latest version of Microsoft Lens for iOS or Microsoft Lens for Android on your mobile device.
Accessibility
Your Windows device has accessibility settings that can help you use Office Lens in a way that works for you. Go to Settings > Ease of Access to turn on features like Narrator, Magnifier, High Contrast, Closed Caption, and more. You can learn more at the Accessibility in Windows 10 website.


