
Part of the fun of managing a community is giving it a look that matches the tone and personality of its members. Things to consider when coming up with the perfect look include font, color, and background image. SharePoint includes numerous looks that you can use as is or build upon to make your community uniquely your own. This article shows you how.
Change the look
Change the look settings are located under Settings 
Note: To change the look, you need site owner or design permissions on the site.
Once you choose a look for your community, all new and existing pages within that community will share it. You can change the look at any time.
-
From the home page of your community site, click Settings
-
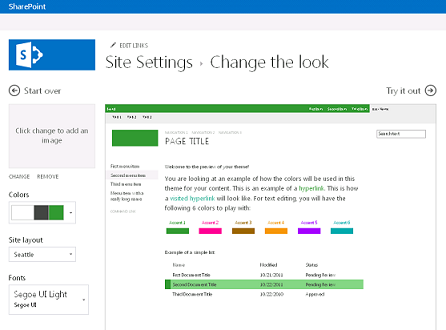
Click Change the look to choose from a set of designs.

-
Select the design you want to use and then customize the design with a new background, layout, colors, and fonts.
-
To change the background, click Change and browse your computer or SharePoint site for the image you want to use. Or, to remove the background image, click Remove.
-
To change the colors used in the design, click the color menu, scroll through the color schemes, and select the one you want to use.
-
To change the layout of the site, choose from the available site layouts. (The site layouts that are listed are based upon the available master pages for your site.)
-
To change the font and typeface, select a font set such as Segue UI, Georgia, or Rockwell.
-
-
Click Try it out to get a preview of your site with its new look.
-
If you like the look, click Yes, keep it. This takes you to the Site Settings page where you can modify the title and logo or configure additional settings. If you don’t like the theme, click No, not quite there and repeat steps 1 through 4.
Add a title, logo, and description
-
From the home page of your community site, click Settings
-
On the Site Settings page, under Look and Feel, click Title, description, and logo.
-
In Title, enter the title that will display on your page.
-
In Description, type a brief description of your site. This description will be displayed in search results and, if deployed, in the community portal.
-
In Insert Logo, select:
-
FROM COMPUTER to upload an image from your computer. In the Add a document dialog, type or browse for the filename and then click OK.
-
FROM SHAREPOINT to use an image from the Site Assets folder of your SharePoint site. Select the file you want to use and then click Insert. You can also add documents to the folder by clicking add.
-
-
In Enter a description, type a brief description of the logo image. This description will show up in tooltips and be read by screen readers.
-
Return to the home page of your community to view your changes.


