
When you print, page breaks appear automatically where content on a sheet "breaks", or continues to the next page. In Normal view, they appear as dashed horizontal and vertical lines; in Page Break Preview view, they appear as solid bold lines between the pages with the page number overlaid in the center. You can adjust where automatic page breaks occur, and add your own page breaks manually. You can remove manual page breaks, but you can't remove automatic page breaks. However, you can adjust column widths or margins, or scale the sheet size to fit the content on fewer pages.
Page breaks as displayed in Page Break Preview view:

View page breaks
Click the View tab on the ribbon, and choose Page Break Preview.
or
Click File > Print (

-
In the Print dialog box, you can view a quick preview of how the pages will print, and use the left/right buttons to see each page.
-
Click Cancel to close the Print dialog box.
After you close the Print dialog box, dashed lines appear on your sheet that indicate where pages will break.
Note: To hide the dashed lines, click Excel > Preferences > View, and then under Show in Workbook, clear the Page breaks check box.
Insert a horizontal or vertical manual page break
-
Do one of the following:
To insert a
Do this
Horizontal page break
Select the row underneath the row where you want the page to break.
Vertical page break
Select the column to the right of the column where you want the page to break.
-
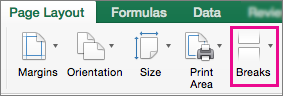
On the Page Layout tab, click Breaks, and then click Insert Page Break.
Move a page break
-
On the View tab, click Page Break Preview.
-
Rest the pointer on the page break line until the pointer changes to a

Note: When you move an automatic page break, it changes to a manual page break. Manual page breaks are not adjusted automatically.
Remove a manual page break
-
Do one of the following:
To remove a
Do this
Horizontal page break
Select the row below the page break.
Vertical page break
Select the column to the right of the page break.
-
On the Page Layout tab, click Breaks, and then click Remove Page Break.
Remove all manual page breaks
-
On the Page Layout tab, click Breaks, and then click Reset All Page Breaks.


