
Lists can include a variety of list items, such as contacts, calendars, announcements, and issues-tracking. Your list can also include the following items: Text, Number, Choice, Currency, Date and Time, Lookup, Yes/No, and Calculated columns.
You can create lists in Microsoft SharePoint, the Lists app in Microsoft 365, or Teams. Learn to get started with Lists in Microsoft Teams.
You can also attach files to a list item to provide additional details, such as a spreadsheet containing supporting numbers or a document containing background information.
Note: To add, edit, or delete list items, you must have edit permissions. If you don't see any options to add or edit list items, contact your SharePoint admin. To delete a complete list, see Delete a list in SharePoint.
Add an item to a list
There are two ways to add an item to a list - single items in list view, or multiple items in grid view (formerly known as "Quick Edit"). The following steps use the modern Microsoft 365 experience.
-
Navigate to the site containing the list where you want to add an item.
-
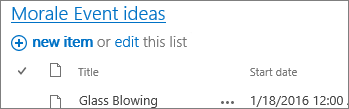
Above the list, select the + New or + New item link to open the New item window.
Note: A site can be significantly modified in appearance and navigation. If you cannot locate an option, such as a command, button, or link, contact your administrator.
-
Enter the information for the list item.
-
Note: You must enter data into a column (field) that has an asterisk * next to it.
-
To attach a file or files to the list item, in the New item window, select Add attachments, and then select the file. Hold down the CTRL key when selecting files to attach more than one file.
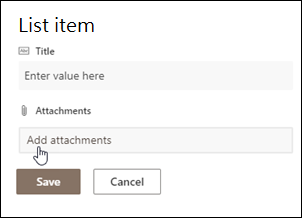
Select Open, and then select OK. If the Add attachments command is unavailable, your list doesn't support attachments.
-
-
Select Save.
-
Navigate to the site containing the list where you want to add an item.
-
At the top of the list, select Edit in grid view.

-
Enter the information for the list item.
For columns that require information, an error dialog appears if you don't enter anything.
Important: You can't attach a file to multiple list items when using Edit in grid view.
-
Do one of the following:
-
When you're finished entering the information, select Exit grid view.
-
To delete an item, select the circle to the left of the item, and then select Delete in the command bar.
-
Just as with adding items, there are two ways to edit an item in a list. You can edit an item in list view, which is the default method, or you can edit multiple items in the Edit in grid view.
-
Navigate to the site containing the list where you want to edit an item.
-
Select the name or title of the list.
-
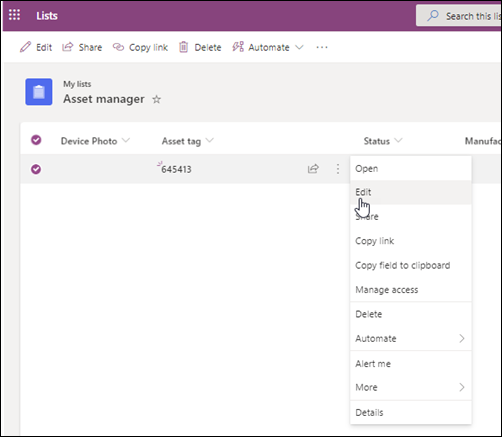
Select the circle next to the item you want to edit, right click, and then select in the dropdown.
-
If you want to edit multiple items, select the circle for both items.
-
-
In the list item, edit the information you want to change.
-
Click Save.
-
Navigate to the site containing the list that you want to add an item.
-
At the top of the list, select Edit in grid view.

You can also select the List tab, and then select Edit in grid view.
-
Edit item information as you would in a spreadsheet.
Important: You can't attach a file to multiple list items when editing in grid view.
-
When you are finished editing the information, select Exit grid view.
-
Navigate to the site containing the list where you want to edit an item.
-
Select the name or title of the list.
-
Select the circle next to the item you want to edit, and in the dropdown, select Edit. If you're in Quick edit view, select the circle next to an item.
-
Select Add attachments, and then select the file. Hold down the CTRL key when selecting files to attach more than one file.
Select Open, and then select OK. If the Add attachments command is unavailable, your list doesn't support attachments.
-
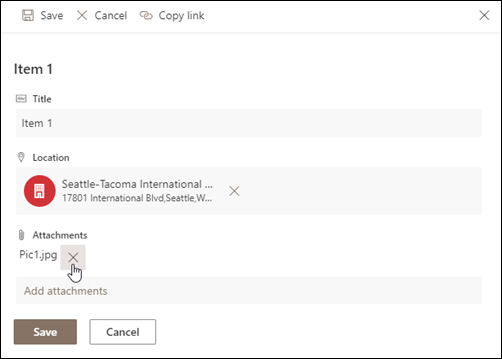
To delete an attachment from a list item, select Edit Item. In the Attachments section on the form next to the attachment you want to remove, select Delete.
-
Select Save.
Caution: Deleting items may be permanent and you might not be able to recover them. Consider moving or archiving the items instead. Depending on how your site was configured, you may be able to recover the items and its contents from the Recycle Bin. For more info, see Restore deleted items in Site recycle bin.
-
Navigate to the site containing the list where you want to delete the items.
-
Select the title of the list in which you want to work.
Note: A site can be significantly modified in appearance and navigation. If you cannot locate an option, such as a command, button, or link, contact your administrator or manager.
-
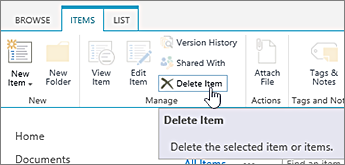
You can select one or more items to delete at a time. Select the checkmark to the left of the items you want to delete, and from the Manage section of the Items tab, select Delete Item.
To add columns to lists, see Create a column in a list or library.
To delete columns from lists, see Delete a column in a list or library.
Views can show different columns, so you can hide columns without deleting. For more info, see Create, change, or delete a view of a list or library.


