
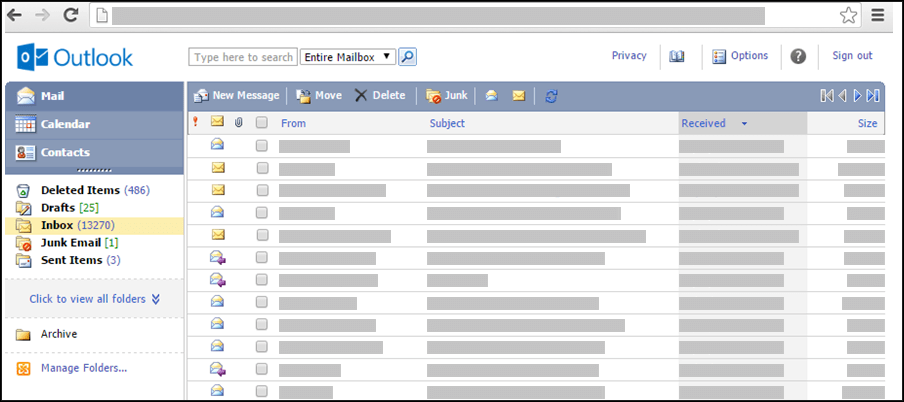
If your Outlook looks like the image below, you're in the light version of Outlook. This means you're using an old browser that's incompatible with the new Outlook.com and Outlook on the web or with Outlook Web App. For the best experience, please update your browser to the latest version.
For information about which browsers support the new Outlook.com and Outlook on the web, see Which browsers work with Office Online.
For information about which browsers support Outlook Web App, see Supported browsers for Outlook Web App.
You can use the light version of Outlook to schedule appointments or meetings, but it has fewer features than the standard version. For detailed lists of features, see Compare the standard and light versions of Outlook.
For example, you can’t do the following tasks in the light version:
-
View or print your calendar by week or month.
-
Set reminders for meetings and appointments.
-
Share a calendar with others, or open a calendar that someone shared with you.
-
Change the color or layout of your calendar.
How do I view my schedule?
The Calendar displays your appointments and meetings for the current day.
-
In the navigation pane, click Calendar.
-
To view a different day, select a date from the month view that's next to your schedule.
-
To view the details of an item or to change it, click the item.
If you edit a repeating item, such as a weekly meeting, you'll be prompted to change either that one occurrence or all occurrences of the meeting.
How do I work with appointments?
Unlike meetings, which include other people, appointments are commitments that only you need to attend, for example, a visit to a physician, picking up a child at school, or time you set aside to work on a project. When you create an appointment on your calendar, you can set how that time appears (such as busy or out of office) when others view your schedule.
-
On the Calendar toolbar, click New Appointment.
-
In the Subject box, type a brief description of the appointment.
-
In the Location box, type the place where the appointment will occur.
-
In the Start time and End time lists, select the appropriate dates and times.
-
In the Show time as list, select the description you want to appear in your schedule for the duration of the appointment. Your selection (Busy, Tentative, Free, or Away) is what others will see when they view your schedule.
-
In the message body, type any additional information, for example, a list of things to take to the appointment. You can also click the paperclip icon to add an attachment to the appointment.
-
Click Save and Close.
You can click Cancel to close the appointment without saving it and to return to the calendar view.
-
Click the date of the entry you want to view or modify. If the calendar you want isn't the default, select it from the My Calendars section in the navigation pane. If the date you're looking for isn't in the current month, use the Last Month and Next Month arrows next to the name of the month to go to the month you want.
-
Click the subject of the entry you want to open. When you open a repeating item, Outlook opens only the currently selected date, not the series. To make changes to a repeating series, click Edit Series on the toolbar or the edit the series link below the toolbar.
-
Make any changes you want.
-
Click Save and Close.
-
Find and open the entry that you want to delete.
-
Click Delete.
-
If you're deleting a meeting request, you'll be prompted to send a cancellation notice to the attendees.
-
If you're deleting a repeating item, you'll be given the option to delete only the current occurrence, delete all occurrences from a given date forward, or delete all occurrences regardless of the date.
How do I work with meetings?
A meeting is an appointment you share with another person. When you request a meeting, in addition to setting a time and subject, you'll add a list of attendees to invite. You can also add resources, such as a conference room or projector. If the recipients are in your organization’s address book, you can see their free/busy time. Most recipients can respond to the meeting request by accepting, tentatively accepting, or declining your invitation. Like appointments, meeting requests can be for a single meeting or scheduled as repeating meetings.
-
On the Calendar toolbar, click New Meeting Request.
-
In the To and Optional boxes, type the names of the people you want to receive the meeting request. For additional options, click the check names icon on the toolbar. For more information about adding attendees to a meeting request, see ”How do I address a meeting request?” in Use the Address Book in the light version of Outlook.
-
To specify a conference room or a piece of equipment you want to use during the meeting, type the resource or the conference room in the Resources box.
-
To check the availability of potential attendees and resources, click Scheduling Assistant. A list of possible times and the availability of potential attendees will be displayed. Click the time that you want to select.
The possible times are adjusted based on each attendee’s working hours. If one or more of the attendees are in a remote time zone, you might not see any available times. -
By default, the Request a response to this invitation check box is selected. If you don't want your meeting request recipients to send you their responses, clear the check box.
-
In the Subject box, type the meeting topic.
-
In the Location box, type the location where the meeting will be held. If you've selected a Resource, it will be entered in the location field automatically.
-
In the Start time and End time lists, select the appropriate dates and times.
-
In the Show time as list, select the description you want to appear in your schedule for the duration of the meeting. Your selection (Busy, Tentative, Free, or Away) is what others will see when they view your schedule and the schedules of all attendees.
-
In the message body, type any message you want to accompany your meeting request. You can also click the paperclip icon to add an attachment to the meeting request.
-
Click Send.
To modify a meeting:
-
Find and open the original meeting request in your calendar.
-
Make any necessary changes.
-
If there was a scheduling conflict with one or more attendees, click Scheduling Assistant to see possible times and availability. This will help you find a more convenient time.
-
To send the update to all attendees, click Send Update.
To cancel a meeting:
-
Find and open the meeting you want to cancel.
-
If you want to include a message, such as the reason you're canceling the meeting, type your message in the body of the meeting form.
-
Click Delete.
-
You'll be prompted to send a cancellation notice to the attendees.
-
If you're canceling a repeating meeting, you can choose to delete only the current occurrence, delete all occurrences from a given date forward, or delete all occurrences regardless of the date. After you've made your selection, you need to click Send Cancellation to make the change and notify attendees.
Other users may invite you to meetings by using the Calendar in Outlook. These meeting requests appear as messages in your Inbox.
-
To open the meeting request, click the request in your Inbox.
-
Click Accept to add the meeting to your calendar and let the organizer know that you will attend. Click Tentative to add the meeting to your calendar and let the meeting organizer know that you might attend. Click Decline to let the meeting organizer know that you will not attend.
-
You can check your schedule before you accept the meeting by clicking Calendar on the toolbar.
-
If you select Edit the response before sending, a message window addressed to the sender of the meeting request will open when you click Accept, Tentative, or Decline. If you want to add recipients to your meeting response, enter them in the To and Cc boxes.
-
If you want to send a message together with your reply, type a message in the text box. For example, you can explain why you might not attend the meeting.
-
When you’re done, click Send.
-
Open the meeting request.
-
Click Forward on the toolbar.
-
In the To box, type the email address you want to forward the request to.
-
The text of the original message is copied to the message body. Type anything you want to add in or above the sender's original message.
-
Click Send.
How do I work with repeating items?
Many meetings, appointments, and events occur regularly over a period of time. Instead of creating new calendar items for each occurrence, you can set the item as repeating.
-
Compose a new appointment or meeting request or open an item that already appears on your schedule.
-
On the toolbar, click Repeat.
-
Under Appointment Time, use the Start and Duration lists to select the start time and the end time of the repeating item. Set the date as the day you want this repetition pattern to begin.
-
Click Daily, Weekly, Monthly, or Yearly to specify how often the appointment or meeting will occur. By default, appointments are set to repeat weekly.
-
Set the additional options under Repeat Pattern. The options for the repetition pattern will vary depending on whether you selected Daily, Weekly, Monthly, or Yearly.
-
Under Range of Repetition, select when you want the repetition pattern to start and end. You can set range of repetition to no end date, to end after a specific number of occurrences, or to end by a specific date.
-
Click Save to save your changes.
-
In your calendar, open the appointment or meeting you want to change. Select Edit Series.
-
On the appointment or meeting toolbar, click Repeat.
-
In the Repetition dialog box, make the changes you want to the repetition pattern.
-
Click Save to save your changes.
You can delete repetitions of a meeting request or an appointment.
-
In your calendar, click to open the appointment or meeting you want to delete.
-
Click Delete.
-
You can delete the one repetition, all repetitions from a given date forward, or all repetitions regardless of the date.
-
Select the option you want, and then click Save and Close for an appointment, or Send Cancellation for a meeting.
What if I want to know more?
To learn more about the light version of Outlook, such as how to get back to the regular version or what the features and limitations are, see Learn more about the light version of Outlook.


