
|
|

-
Insert a picture in your document.
-
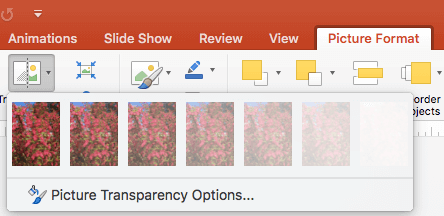
On the Picture Tools Format tab, select Transparency.
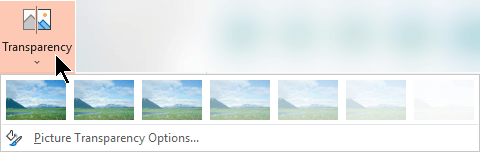
The menu shows thumbnail-sized versions of seven preset transparency options for your picture (0%, 15%, 30%, 50%, 65%, 80% or 95%).
-
Select a preset option. The picture in the document immediately changes according to your selection.
-
Alternately, you can choose Picture Transparency Options to customize the transparency level.
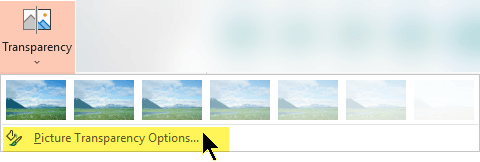
The Format Picture pane opens, and you can drag the Transparency slider rightward to decrease the opacity of the picture.

Requirements
 |
Applies to |
|---|---|
|
Change the opacity of a picture |
PowerPoint for Microsoft 365, Word for Microsoft 365, Excel for Microsoft 365 PowerPoint 2021, Word 2021, Excel 2021 |
Basic steps to picture transparency
In short, the steps for making a picture transparent are:
Draw a shape first, fill it with a picture, and then adjust the picture's transparency.
This process is demonstrated in the video. For more details on this procedure and other methods, click a procedure heading below to expand it and see the details.

One-minute demonstration
Detailed steps for transparency
-
Select Insert > Shapes. Choose a shape from the gallery that opens.
-
Draw the shape in your document, making it the same proportions as the picture you're about to add to it.
-
Select the shape. Click Format > Shape Outline > No Outline.
-
Right-click the shape again, and then click Format Shape.
-
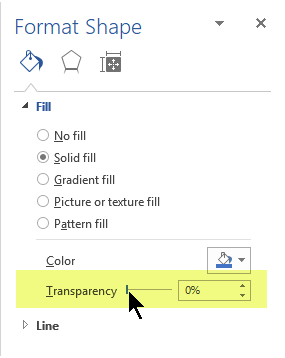
In the Format Shape pane, click the Fill icon

-
Click the File button. In the Insert Picture dialog box, locate the picture file that you want to insert. Select the picture and then select the Insert button.
-
Move the Transparency slider in the Format Shape pane to adjust the picture.
Or you may enter a number in the box next to the slider: 0 is fully opaque, the default setting; and 100% is fully transparent.


If you change the original size ratio of your shape by dragging it, the picture you insert into the shape may be skewed. Also, some pictures may not fit perfectly into certain shapes. You can make adjustments to the appearance of your picture by resizing your shape or by using the Offset settings below the transparency slider.
Note: If you're using PowerPoint, you can make a picture transparent and use it as a slide background.
You can make one color in a picture transparent by using the built-in transparency feature.
Unlike making an entire picture transparent, making only one color transparent is possible only in an object that's inserted as a picture, not inside a shape. If your picture is inserted in a shape as fill, as described above, the Set Transparent Color option is not available.
Important: Areas that seem to be a single color (for example, green leaves) might actually be made up of a range of subtle color variations, and you might not get the effect you want. Setting a transparent color works best with simple, solid-color pictures, such as clip art.
-
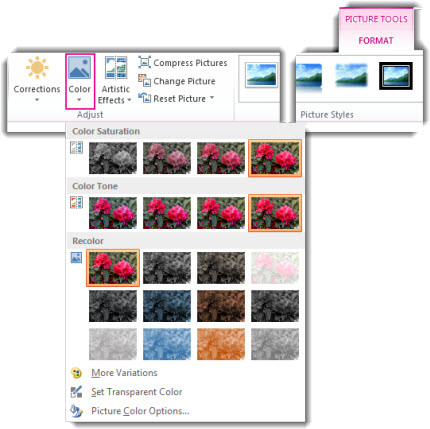
Double-click the picture, and when Picture Tools appears, click Picture Tools Format > Color.
-
Click Set Transparent Color, and when the pointer changes, click the color you want to make transparent.
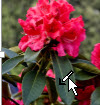
In the picture below, the leaves are composed of several colors of green, so only part of the leaves are made transparent, which makes it difficult to see the transparent effect. Repeating the process with a different color will remove the transparency from the first color. To undo color changes, click Reset Picture in the Adjust group.

Note: When you print pictures with transparent areas, the transparent areas are the same color as the paper. On your screen or a website, the transparent areas are the same color as the background.
See the instructions in Add a background watermark to slides.
-
Select Insert > Shapes.
-
Select a shape from the drop-down gallery and then draw it the size that you want.
-
Right-click the shape and choose Format Shape.
The Format Shape panel opens.
-
In the panel, open the Fill section.
-
Select the Transparency slider and drag rightward to set the degree of transparency you want.
If you have an image editing app, you can use it to make your picture transparent. Then save the picture in a format that preserves transparency information (such as a Portable Network Graphics (.png) file), and insert the file into your Office document.
-
Select the picture for which you want to change the transparency.
-
Select the Picture Format tab, and then select Transparency

A gallery of preset transparency options for the picture appears.
-
Select one of the preset options, or select Picture Transparency Options at the bottom for more detailed choices.
The Format Picture pane opens on the right side.
-
Under Picture Transparency, drag the transparency slider rightward to set the exact percentage of transparency you want, or set a percentage value in the box.
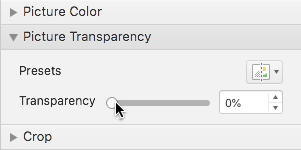
You can vary the percentage of transparency from 0 (fully opaque, the default setting) to 100% (fully transparent).
Change the transparency of a picture or fill color
-
Select the picture or object for which you want to change the transparency.
-
Select the Picture Format or Shape Format tab, and then select Transparency
A gallery of preset transparency options for the picture appears.
-
Select one of the preset options, or select Picture Transparency Options at the bottom for more detailed choices.
The Format Picture pane opens on the right side.
-
Under Picture Transparency, drag the transparency slider rightward to set the exact percentage of transparency you want, or set a percentage value in the box.
You can vary the percentage of transparency from 0 (fully opaque, the default setting) to 100% (fully transparent).
Make part of a picture transparent
You can make one color in a picture transparent to hide part of the picture or create a layered effect. Transparent areas in pictures are the same color as the paper on which they are printed. In an electronic display, such as a web page, transparent areas are the same color as the background.
-
Select the picture for which you want to change the transparency of a color.
-
On the Picture Format tab, select Color, and then select Set Transparent Color.
-
Click the color in the picture or image that you want to make transparent.
Note: You can't make more than one color in a picture transparent. Areas that appear to be a single color (for example, blue sky) might actually be made up of a range of subtle color variations. Therefore, the color that you select might appear in only a small area, and it might be difficult to see the transparent effect in certain pictures.
We're sorry, but making a picture transparent is not supported in Microsoft 365 for the web. You need a desktop version of Office (on either Windows or macOS) instead.
See Also
Add a background or watermark to slides
Remove the background of a picture


