Organizations need to protect sensitive information such as financial data and personally identifiable information (PII) and prevent its inadvertent disclosure. With a data loss prevention (DLP) query in SharePoint Server 2016 or 2019, you can find sensitive information across your organization's site collections that relates to common industry regulations.
With the DLP query, you can preview the search results, fine tune the query, and export and download the results. With a DLP query, you can see what and where sensitive information exists, better understand your risks, and determine what and where is the content that your DLP policies need to help protect.
Before you begin
You create DLP queries in the eDiscovery Center, a site collection where you can use permissions to control who can view the sensitive information. DLP queries work the same as eDiscovery queries and require the same permissions.
First you need to create the eDiscovery Center site collection, add users to the site collection, and also add users to any site collection where they need to query and view sensitive information.
We recommend that you create a security group for your compliance team, and then add the appropriate users to the security group. Then you can grant permissions to the security group, instead of to individual users.
Step 1: Create the eDiscovery Center
An admin with permissions to Central Administration needs to create the eDiscovery Center site collection.
-
In Central Administration > Application Management > Create site collections.
-
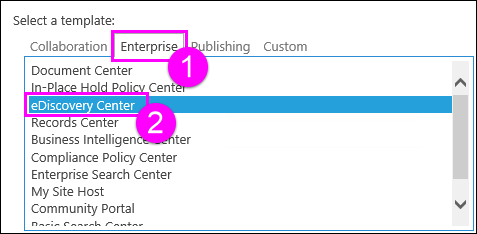
On the Create Site Collection page, fill out the form, including these options:
-
Under Template Selection > Enterprise tab > select the eDiscovery Center template.
-
Enter a primary and secondary site collection administrator. These people can add users to the Compliance Policy Center site collection as described next.
-
Step 2: Grant permissions to the eDiscovery Center
A site collection admin needs to add users to the Owners group of the eDiscovery Center site collection.
-
Go to the eDiscovery Center site collection > choose Settings (gear icon) in the upper right > Site Settings.
-
On the Site Settings page > under Users and Permissions > Site permissions.
-
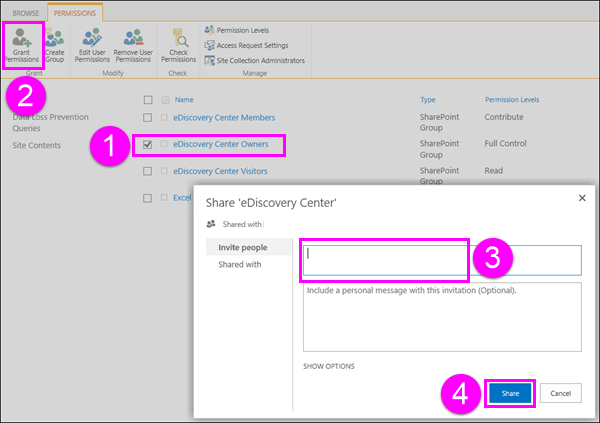
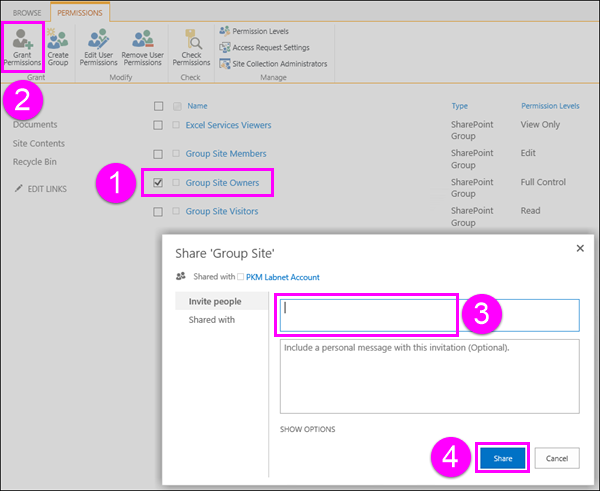
Select the eDiscovery Center Owners group > on the Ribbon, choose Grant Permissions > enter the security group or users > Share.
Step 3: Grant permissions to every site collection that might contain sensitive information
People who create DLP queries also need Owner permissions to every site collection that they need to query. This is different from DLP policies because creating and assigning a policy doesn’t require that you have permissions to view or download all of the content.
There are two options: granting permissions at the web application level, or granting permissions to each site collection individually.
Grant permissions at the web application level
A web application is an Internet Information Services (IIS) website that acts as a container for the site collections that you create. For each web application that contains site collections with sensitive information that you need to query, you can create a user policy that gives Full Control access to the security group containing your compliance team.
-
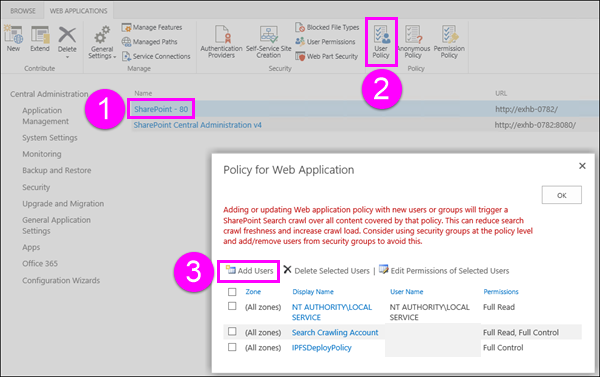
In Central Administration > Manage web applications.
-
Select a web application > on the Ribbon, choose User Policy > Add Users.
-
Leave Zones as (All zones) > Next > under Users, enter the security group > select Full Control permissions > Finish.
Grant permissions at the site collection level
Add the security group to the Owners group for every site collection that contains sensitive information that you need to query. For each site collection, do the following:
-
Go to the top-level site in the site collection > choose Settings (gear icon) in the upper right > Site Settings.
-
On the Site Settings page > under Users and Permissions > Site permissions.
-
Select the Owners group > on the Ribbon, choose Grant Permissions > enter the security group or users > Share.
Create a DLP query
After you create the eDiscovery Center and set up permissions, you’re ready to create a DLP query. If you’re familiar with an eDiscovery query, a DLP query works the same way, except that you can preconfigure the query to look for a minimum number of instances of different types of sensitive information – for example, find all SharePoint content with at least one credit card number.
-
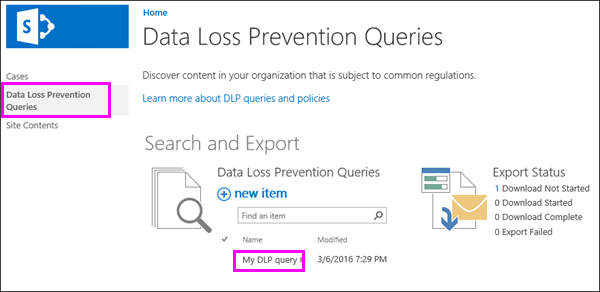
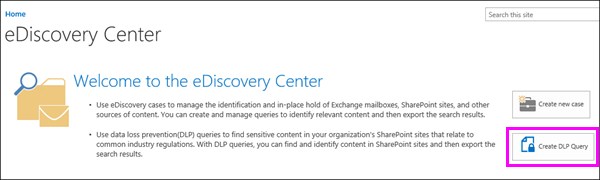
Go to the eDiscovery Center site collection > Create DLP Query.
-
Under Data Loss Prevention Queries > new item.
-
Under New DLP Query > do the following:
-
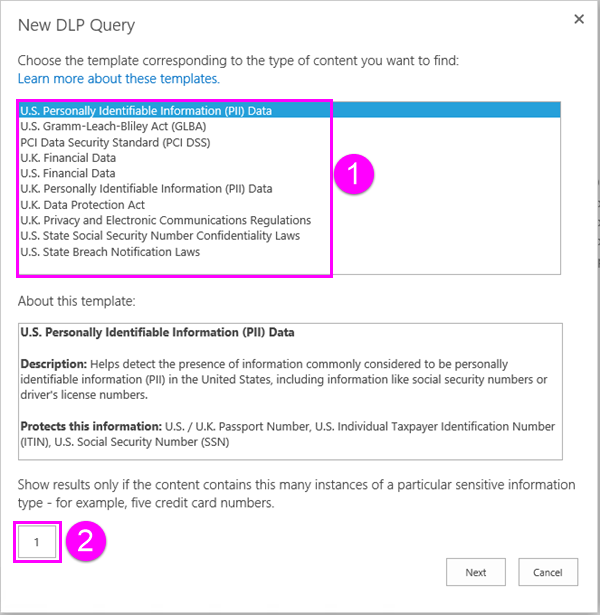
Choose the template that corresponds to the common regulatory requirement for which you need to protect sensitive information. Each DLP template identifies and helps protect specific types of sensitive information – for example, the template named U.S. Financial Data identifies content that contains ABA Routing Numbers, Credit Card Numbers, or U.S. Bank Account Numbers.
-
Enter a number that determines the minimum number of instances of a specific type of sensitive information that must appear in a document before the protective actions are automatically taken (send an incident report, show a policy tip, block access).
For example, if you select the U.S. Financial Data template and enter 10 here, no action will be taken unless a document contains at least 10 ABA routing numbers, 10 credit card numbers, or 10 U.S. bank account numbers. The minimum count is for each type of sensitive information, not a total of all of them.
-
-
When finished, choose Next.
-
On the search page below, you can do any of the following:
-
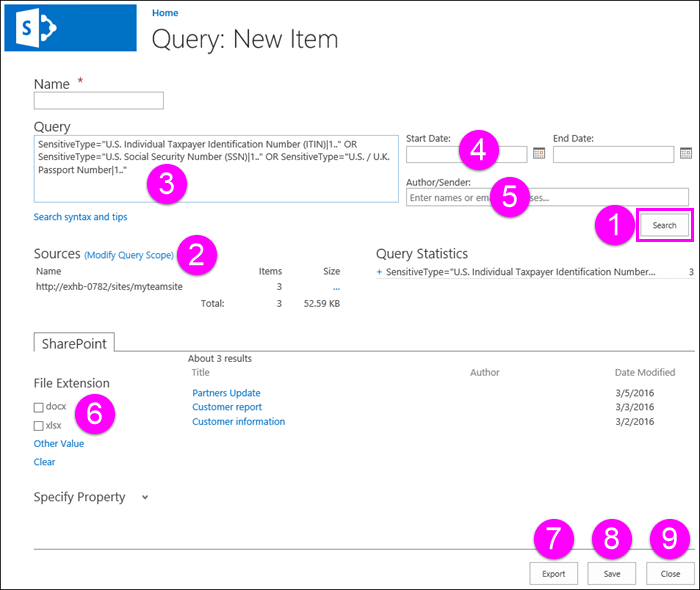
Choose Search to run the query.
-
Choose Modify Query Scope and then enter URLs of specific sites to narrow the query to those sites. You need to add locations before running the search.
-
Modify the query manually. By default, the query is configured with the sensitive information types and minimum count that you selected on the previous page. You can change any of this manually. DLP queries support keyword query language (KQL).
For more information about the syntax of a DLP query, see Form a query to find sensitive data stored on sites.
For more information about using keywords, operators, and wildcards, see Searching and using keywords in eDiscovery – this topic also applies to DLP queries.
-
Choose a start and end date to narrow the results to content in this date range.
-
Enter specific names to filter the query to content by specific authors.
-
Select specific SharePoint properties to filter the query.
-
Choose Export if you want to download and analyze the results in Excel. See the next section for more information.
-
Choose Save if you want to run the query again at a later time.
-
Choose Close to exit the query without saving the search or results.
-
Export the results of a DLP query
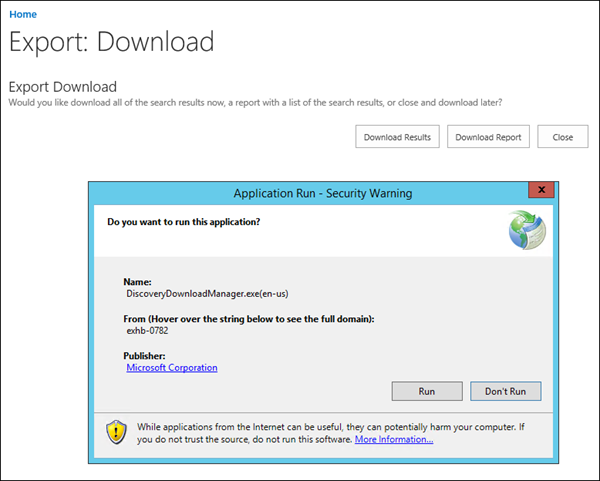
When you create or edit a DLP query, you can export the query results, as shown in the previous section. You can download the results (the content itself) or a report with a list of the search results. The report is in .csv format so that you can use Excel to filter and sort it.
The first time you export content or create a report, the eDiscovery Download Manager is installed, which downloads the SharePoint content and reports to the your computer. When downloading an eDiscovery report, users must log into SharePoint with the same account that they are logged into on their client machine. If you receive a warning asking whether or not to run the Download Manager, choose Run and continue.
The computer you use to export content has to meet the following system requirements:
-
32- or 64-bit version of Windows 7 and later versions
-
Microsoft .NET Framework 4.5
-
One of the following supported browsers:
-
Internet Explorer 10 and later versions
-
Mozilla Firefox or Google Chrome, with the ClickOnce add-in installed
-
Reports called SharePoint Results.csv, Exchange Results.csv, Export Errors.csv, Search Results SharePoint Index Errors.csv, and Exchange Index Errors.csv will be created on your computer.
View or edit a DLP query
In the eDiscovery Center, choose Data Loss Prevention Queries in the left navigation to see your existing DLP queries, and to view the status of any exports. To edit a DLP query, just select the query name.