

Grouping shapes lets you rotate, flip, resize, or arrange them together, as though they were a single shape or object.
Group shapes, pictures, or other objects
-
Press and hold Ctrl while you click the shapes, pictures, or other objects to group.
Tip: For help selecting a shape or picture, see Select a shape or other object.
-
Do one of the following:
-
To group shapes and other objects, on the DRAWING TOOLS FORMAT tab, click Group > Group.

-
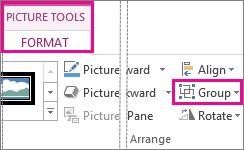
To group pictures, on the PICTURE TOOLS FORMAT tab, click Group > Group.
Notes:
-
You can make changes to the entire group, such as adding a shape fill or effect, or an effect to a picture.
-
After you make your group, you can still work with a single item in the group. Select the group, and then, click the item to select it.
-
You can create groups within groups. For example, add another item on the top of an existing item to build complex drawings.
-
-
Group shapes when you have multiple shapes that you want to treat as a unit.
For example, this rectangle with text inside looks like one unit, but these are actually two shapes.
The rectangle is one shape— when I click it, we see it selected— and the text is contained in a second shape, a text box.
So, if I move the rectangle — I’ll point and drag the four-pointed cursor to do so — the text, in its text box, is left behind.
To move the two shapes together, I need to first select them both.
I’ll click to select the rectangle, then press and hold Ctrl while I click to select the text box.
With both shapes selected, I can move them as a unit.
But I’ll always have to select both shapes to do so.
To avoid that, I’ll group the shapes.
With the shapes selected, I’ll point to them and right-click the four-pointed cursor, point to Group, and click Group. That groups them into a unit.
Now, they have just a single selection box around them, and they move together.
I have added two more rectangles with text, and I have grouped each rectangle with its text box.
So, each shape and its text move as a unit.
Next, I want to work with all the shapes as a unit.
First, I’ll select them — this time, to select, I am going to drag a big box around the shapes.
Then, I’ll right-click one of the selected shapes, point to Group, and click Group.
The shapes are grouped. The selection box now encompasses all of them, and they move as one unit.
A nice advantage to grouping shapes is that I can change them as a unit.
For example, to make them bigger, I point to a corner and drag the two-pointed cursor down diagonally.
I can format all the shapes at once, too.
With the group selected, I’ll click the DRAWING TOOLS FORMAT tab,and click Shape Effects.
Then I’ll point to Shadow, and choose a shadow effect.
It applies to the group.
Grouping also lets me position the shapes as a unit.
Keeping the group selected, I’ll click Align Objects on the FORMAT tab.
Then I’ll click Align Center to center the group horizontally on the slide.
Next, I’ll click Align Objects again, and click Align Middle to center the group vertically.
Up next: Group and format pictures.


Need more help?
Want more options?
Explore subscription benefits, browse training courses, learn how to secure your device, and more.


Communities help you ask and answer questions, give feedback, and hear from experts with rich knowledge.


