
If you're a small business owner or are using OneDrive for business-related needs, you'll need to make sure to store your files to OneDrive for work or school. With OneDrive for work or school, you get the same anywhere access and file protection you get with OneDrive, plus business-specific features like data encryption, advanced data-loss protection, and more control and permission-setting for files.
This article describes how to move files you're storing in your personal OneDrive account to OneDrive for work or school.
Before you begin
If you are migrating data from other cloud service providers like Box, Dropbox, Egnyte or Google Drive, check out Mover. Mover can also be used to migrate from one SharePoint tenant to another, or from OneDrive consumer or OneDrive.com. Learn more about Mover.
Watch
In this video, we'll show you how to move your OneDrive files from Microsoft 365 Family to your Microsoft 365 for business OneDrive folder.

Sync OneDrive for work or school to your computer
When you sync your files with the sync app, you can move your OneDrive files around just like other files on your local computer. It’s easier and quicker, because you don't need to be connected to the internet. Files will automatically sync when you're connected again. If you've already set this up, you can skip to the next section.
-
If you’re moving a large number of files, we recommend that you move files in batches of no more than 100 files each.
-
Sign in to Microsoft 365 with your personal account.
-
Select the white or blue OneDrive cloud icon in the Windows taskbar notification area.

-
Select

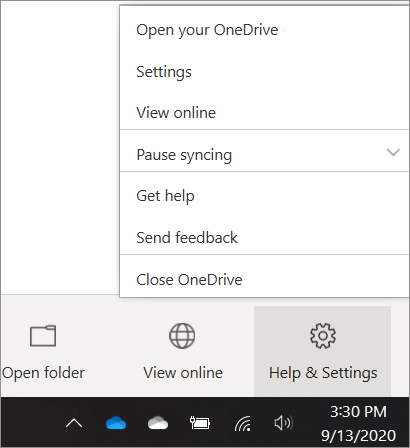
(You might need to click the Show hidden icons arrow next to the notification area to see the OneDrive icon. If the icon doesn't appear in the notification area, OneDrive might not be running. Click Start, type OneDrive in the search box, and then click OneDrive in the search results.)
-
In Settings, select Account, and then select Add an account.

-
When OneDrive Setup starts, enter your new work or school OneDrive account, and then select Sign in.

Move OneDrive files to your synced OneDrive for work or school folder
With both your Microsoft 365 personal and business accounts synced to your device, you can now move your files from your personal OneDrive folder to your synced OneDrive for work or school folder.
Note: Before moving your files from OneDrive to OneDrive for work or school, you may want to consider using Files On-Demand. For more information, see Learn about OneDrive Files On-Demand.
-
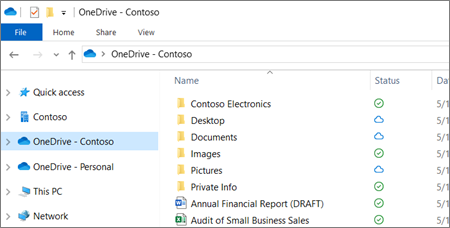
In File Explorer, open your synced OneDrive folder.
By default, your synced OneDrive folder is located in c:\users\username\OneDrive. It should also appear under your favorites.
-
Select and drag the files you want from your OneDrive personal folder to your new OneDrive for work or school folder (OneDrive - Contoso). You can upload individual files and groups of files (such as all files in a particular folder) at one time but you can't copy a folder to OneDrive for work or school. Instead, you’ll need to create the folder structure you want in OneDrive for work or school.
Important: If you’re moving a large number of files, for best results, we strongly recommend that you move files in batches of no more than 100 files each.
Notes about moving files from OneDrive to OneDrive for work or school
-
Files you move from OneDrive to OneDrive for work or school are essentially recognized as new files, and as a result, these files don’t retain metadata details such as Modified and Modified By.
-
OneDrive for work or school restricts certain file types. For more information, refer to Types of files that cannot be added to a list or library.
-
If you shared files in OneDrive, you'll need to share these files again in OneDrive for Business after you move them. Also, once you share the files you move into OneDrive for work or school, we recommend that you delete the original files from OneDrive. This way, people won’t be able to refer to out-of-date copies of files you’d shared with them earlier.
-
Once you’ve moved files to the synced library folder, they’re automatically uploaded to OneDrive for work or school. For information about the various icons related to a file's status, refer to What do the OneDrive icons mean?
-
After you've moved your files to OneDrive for work or school, you can either continue using OneDrive for personal use or cancel your OneDrive personal subscription. For more info, see OneDrive storage plan and billing questions.


