
You can use the Selection pane to manage objects in your document: re-order them, show or hide them, and group or ungroup them.
Tip: In Word, you may want to set the location of objects within a paragraph. When you move a paragraph, the corresponding anchored image(s) move with the paragraph.
Move objects forward or backward
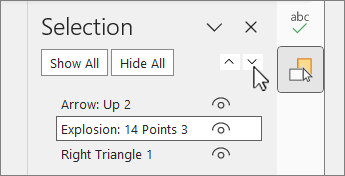
You can change the list's order of overlapping objects by moving objects forward or backward.
-
Select the name of one or more items in the Selection pane list. (Use Ctrl + Click to multi-select).
-
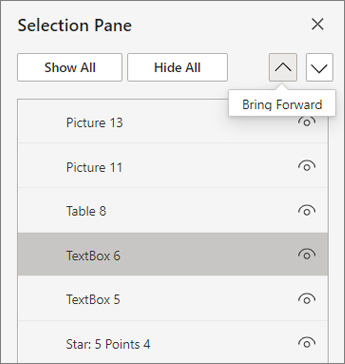
Drag the selected object name up or down in the list. You can also use the Bring Forward or Send Backward. buttons in the Selection pane.
Note: For an object that's in a group, you can only move it within the group.
Group objects
-
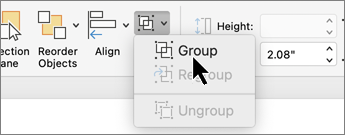
Use Ctrl + Click to select the items you want to group.
-
On the Shape Format tab, select

Ungroup objects
-
Select the group to ungroup.
-
On the Shape Format tab, select

Note: After grouping the objects, you can format them or move or them on the canvas as a single entity. For more information, see Group or ungroup shapes, pictures, or other objects.
Tip: To add an object or objects outside a group, you need to select the group and then select the additional object(s).
Hide/unhide objects
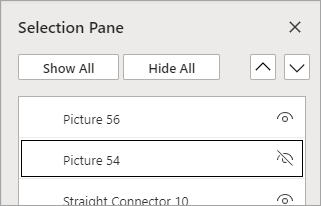
When you hide an object, the object remains in the file, but makes it is not visible on the document.
Important: This feature should be used with caution, because it can be easy to entirely forget about a hidden object.
-
Select an item in the list of object in the Selection pane.
-
To hide the object, select

-
To unhide the object, select

Tip: To see an object that's under another object, you can hide the object on top temporarily, make the changes you want, and then show the object on top again.
Keyboard shortcuts
|
To do this |
Press |
|---|---|
|
Open the Selection pane |
Alt+F10 |
|
Move the keyboard focus through the major regions until it is in the Selection Pane |
F6 |
|
Navigate by keyboard through the buttons in the pane and then into the list |
Tab |
|
Move the focus among the items in the list |
Up arrow, down arrow |
|
Select an item in the list |
Enter or spacebar |
|
Edit the name of the item in the list that has focus |
F2 |
|
Toggle the visibility of the item that has focus |
Ctrl+Shift+S |
|
Lock a selected item that has focus to prevent editing Unlock a selected item that has focus to edit the object |
Ctrl+Shift+L |
Access the Selection pane
-
On the Home tab, choose one of the following in the Editing group.
-
For Word or PowerPoint-choose

-
For Excel-select

-
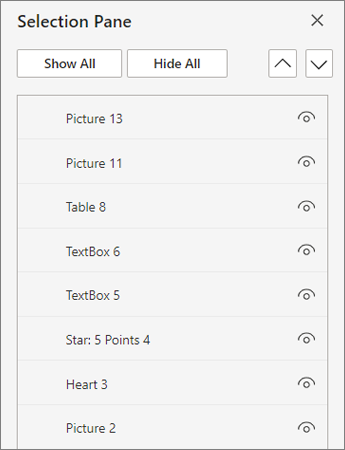
The Selection pane displays the name of each inserted object with the numbered order each was inserted. For objects that overlap, the display shows the top object as the top in the list.
Note: In Word, inline objects are listed in the Selection Pane, but you can't reorder them, hide them, or multi-select them.
Note: After you select an item in the Selection pane, you can select the item again to change the name of the item.
Move objects forward or backward
You can change the list's order of overlapping objects by moving objects forward or backward.
-
Select one or more items in the Selection pane list. Use Ctrl + Click to multi-select.
-
Drag the selected object name up or down in the list. You can also use the Bring Forward or Send Backward. buttons in the Selection pane.
Note: For an object that's in a group, you can only move it within the group.
Group objects
-
Use Ctrl + Click to select the items you want to group.
-
On the Shape Format tab, select
Note: After grouping the objects, you can format them or move or them on the canvas as a single entity. For more information, see Group or ungroup shapes, pictures, or other objects.
Tip: To add an object or objects outside a group, you need to select the group and then select the additional object(s).
Hide or unhide objects
When you hide an object, the object remains in the file, but makes it is not visible on the document.
Important: This feature should be used with caution, because it can be easy to entirely forget about a hidden object.
-
Select an item in the list of object in the Selection pane.
-
To hide the object, select
-
To unhide the object, select
Tip: To see an object that's under another object, you can hide the object on top temporarily, make the changes you want, and then show the object on top again.
Keyboard shortcuts
|
To do this |
Press |
|---|---|
|
Open the Selection pane |
Alt+F10 |
|
Move the keyboard focus through the major regions until it is in the Selection Pane |
F6 |
|
Navigate by keyboard through the buttons in the pane and then into the list |
Tab |
|
Move the focus among the items in the list |
Up arrow, down arrow |
|
Select an item in the list |
Enter or spacebar |
|
Edit the name of the item in the list that has focus |
F2 |
|
Toggle the visibility of the item that has focus |
Ctrl+Shift+S |
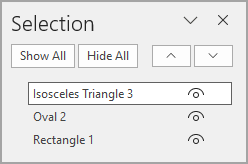
Once you've inserted shapes, text boxes, SmartArt graphics, images, or other objects, you can open the Selection pane to manage them all.
Note: This feature is available in newer versions of Microsoft 365 for Mac. It isn't available in Office for Mac 2011.
Move objects forward or backward
-
Select one of the objects you want to manage.
-
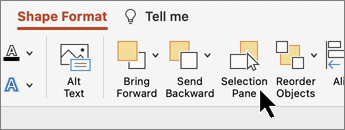
On the Shape Format tab, select Selection Pane.
Note: The Selection pane displays the name of each inserted object with the numbered order each was inserted. For objects that overlap, the display shows the top object as the top in the list.
-
Select an object in the list.
-
Drag an object up to move it forward or down to move it backward.
Hide or unhide objects
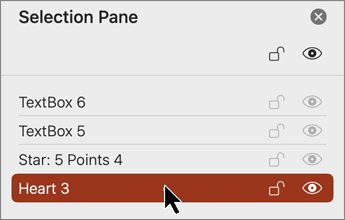
When you hide an object, the object remains in the file, but makes it is not visible on the document.
Important: This feature should be used with caution, because it can be easy to entirely forget about a hidden object.
-
Select an item in the list of object in the Selection pane.
-
To hide the object, select

-
To unhide the object, select

Tip: To see an object that's under another object, you can hide the object on top temporarily, make the changes you want, and then show the object on top again.
Group or ungroup objects
-
Select ⌘ + click to choose multiple objects.
-
On the Shape Format tab, select
In PowerPoint for the web you can use the Selection pane to show or hide items on the slide or to reorder them.
-
Select one or more shapes.
-
On the Home or Shape tab, select

Objects are listed in the pane in visual stacking order—top-to-bottom. The most recently inserted object is at the top of the list.
Change the order of the objects
-
Select one or more items in the list. Use Ctrl + Click to select multiple items.
-
Drag the selected item up or down or select the Bring Forward or Send Backward arrows.
Note: If an object is in a group, you can only reorder it within the group.
Show or hide Objects
To hide or show an individual object on your slide
-
Select an item in the list of object in the Selection Pane.
-
To hide the object, select
-
To unhide the object, select
-
To edit an object that's under another object, hide the object on top temporarily, make the changes you want, and then show the object on top again.
Group objects
-
Use Ctrl + Click to select the items you want to group.
-
On the Home tab, select
After grouping the objects, you can format them or move or them on the canvas as a single entity. For more information, see Group or ungroup shapes, pictures, or other objects.
Note: You can select multiple objects within a group, but you can't select objects within groups together with objects not in groups.
Tips
-
Double-click an item to rename it. In PowerPoint for Microsoft 365, this ability comes in handy for using the Morph transition. See Morph transition: Tips and tricks for details.
-
By default, the most recently inserted object is at the top of the list in the Selection Pane, and the first object inserted is at the bottom of the list.
Keyboard shortcuts
You can use these keyboard shortcuts in the Selection pane:
|
To do this |
Press |
|---|---|
|
Move the keyboard focus through the major regions until it's in the Selection Pane |
Ctrl+F6 |
|
Navigate by keyboard through the buttons in the pane and then into the list |
Tab |
|
Move the focus among the items in the list |
Up arrow, down arrow |
|
Select an item in the list |
Enter or spacebar |
|
Edit the name of the item in the list that has focus |
F2 |
|
Add or remove the item from the selection (multi-select) |
Ctrl+Enter |
|
Toggle the visibility of the item that has focus |
Ctrl+Shift+S |
|
Send the selected items backward |
Ctrl+Shift+B |
|
Bring the selected items forward |
Ctrl+Shift+F |
|
Collapse the current group |
Left arrow |
|
Expand the current group |
Right arrow |
|
Collapse all groups |
Alt+Shift+1 |


