
When scheduling a meeting with Outlook, particularly a meeting where attendees will attend in person, you'll need to include a meeting room in the invitation. If you know the name of the meeting room, you can enter that name directly in the Location field. If you don't know the name, or if you're scheduling a meeting in a location that is unfamiliar, you can use Room Finder.
Note: Don't see Room Finder? Your admin needs to enable this feature on the Exchange server before the button will show up on your ribbon. Tell your admin to see Managing Resource Mailboxes and Scheduling for more information.
Open Room Finder
The Room Finder button is on the ribbon in the meeting invitation. (Create a meeting invitation)

If you're having a hard time finding Room Finder, you'll need to make sure this feature is enabled. If you are not the administrator of your organization, contact the administrator to enable Room Finder. If you are the administrator, you'll need to connect to PowerShell and run the following cmdlets:
New-DistributionGroup -Name "room list name" –RoomList
Add-DistributionGroupMember -Identity "room list name" -Member "room mailbox name"
This will allow the Room Finder to show up and allow you to view the room list and choose from the available rooms as desired.
A tour of Room Finder
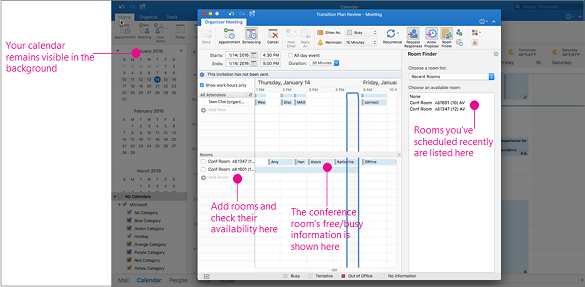
Room Finder opens in the scheduling page of your meeting invitation.
-
Select Recent Rooms in Choose a room list to see any recent rooms you've scheduled.
-
Select one of your recent rooms and it will be added to the Rooms list on the left side of the page. Its free/busy information will be shown in the scheduling grid.
-
Selecting the arrows in Choose a room list shows buildings and/or locations in your company. When you pick a room list, you'll see a list of all the conference rooms in that building or location that are available during the specified meeting time.

-
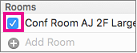
Once you've found an available room, check the box next to its name to include it in your invitation.
Tip: You can hide the Room Finder pane by clicking the Room Finder button again or by clicking the x at the top right of the Room Finder pane.
To create a meeting invitation
-
At the bottom of the navigation pane, click Calendar.

-
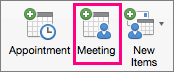
On the Home tab, click Meeting.
-
In the To box, enter the names of people or resources to include for the meeting.
-
In the Subject box, enter a description of the meeting.
-
Click Room Finder to select a room.
-
Enter the details about the event.
-
When you complete your invitation, on the Organizer Meeting tab, click Send.


