
There are many ways to edit a Microsoft SharePoint Server list view. You can present data with different styles, subgroups, columns, sorts, and filters. You need Contribute permission level or higher to edit a view.
-
In the app launcher


-
On the List's command bar, click View options
Click View options
If View options
-
Make your changes, and then click OK at the bottom of the page. For more information, see Settings for views.
Settings for views
Views have many settings to help make it easier for you to quickly find the information that you need in a list. The following are the settings for SharePoint views. All settings are not available for all types of views, such as the settings for calendar views. All the following settings are supported in the classic experience, but only a subset are supported in SharePoint or SharePoint Server 2019 lists. To switch to classic experience, click Return to classic SharePoint at the bottom of the list page.
Default view
You can change the default view to any public view for that list. But you cannot set a personal view as the default view. To delete a view that is the default view, you must first make another public view the default for that list. If Make this the default view is not displayed on the create or edit view pages, you do not have the permission to create a public view, or the view is a personal view.
Audience
When you create any view, you can set the audience for the view to be Personal View or Public View. A personal view is a view that only you can see. A public view is a view that anyone can see.
You cannot change a personal view to a public view or a public view to a personal view. You can use a public view as the starting point for personal or public views. You can use a personal view as the starting point only for personal views.
If Create View is disabled when you try to create a view, you do not have Contribute permission or higher. If Create View is available, but the Create a Public View option is disabled you do not have permission. With Create a Personal View, you need Edit level permission or higher.
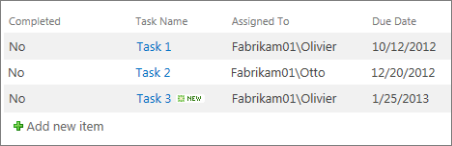
Columns
The columns in a view contain the information that you need to see for list items. Columns, in combination with other features of views, such as filters, can help you see only the information that is most important to your work. This is especially helpful if the list contains lots of items. For more information about working with columns to create custom views, see Edit a list column in SharePoint.
Gantt Columns
Accessed in Classic Experience, under Create view. Select the columns that will be in the Gantt view. Title is a required text field. Start Date, and Due Date are required date fields. When you select a column, such as Title, if no option displays in the drop-down list, you must create the column to support this view.
Sort
Set the order in which items appear in the view. You can have up to two criteria. For example, show the items in a task list sorted by priority and then by due date.
Filter
Configure a view to display a subset of the items in a list by filtering them with information in columns of the list. For example, a view can show the items in a list that are for a specific project.
You can use calculated columns or filters that use calculations, such as [Today] to show items when the date matches today or [Me] to show items for the user of the view. You can also combine simple equations with functions. For example, to show items created in the last seven days, filter on the Created column, set the operator to is less than, and set the value to [Today]-7 (no spaces). See Examples of common formulas in SharePoint Lists for more information.
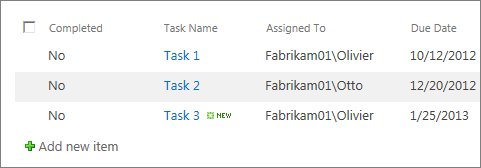
Tabular View
Provides check-boxes for each item so that users can select multiple list items to perform bulk operations. This can save lots of time if many items in a list must be changed. For example, a user can select and check out multiple documents.
Group By
Group list items by information in the columns. For example, group the items in a task list by priority and then percent complete. Note that you cannot use Quick edit on views where items are grouped.
Totals
Displays summary calculations for the columns in the view, such as: count, average, maximum, minimum. By setting the title column to Count in a list, for example, the view will display the number of lists in the view and in the groups in the view. The columns that are available for totals and the settings available for each column differ depending on the type of column, such as number, and the type of list the view is being created for.
Style
Determines the layout for the view, such as newsletter. All styles are not available for all view types.
-
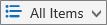
Boxed Displays the items in the list using a layout similar to business cards. This style is available only for lists.
-
Boxed, no labels Similar to the boxed style, but the labels for the columns are not in the view. This style is available only for lists.
-
Default The default view varies, depending on the type and configuration of the list.
-
Document details Displays the files in a library using a layout similar to business cards. This style is available for most libraries, but not lists.
-
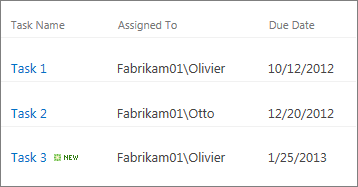
Newsletter Displays items in rows with lines between the rows.
-
Newsletter, no lines Displays items in rows of alternating shades, without the lines between the rows.
-
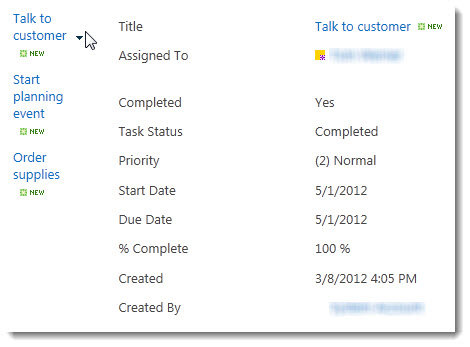
Preview Pane Displays the name of the items on the left side of the page. When you point to the name of an item, the columns selected for the view are displayed on the right side of the page.
-
Shaded Displays items in rows of alternating shades.
Folders
Select Show items in folders to display the list folders in the view with the items. Select Show all items without folders to display only the list items in the view, also referred to as a flat view. You may also be able to select whether the view that you are creating is applicable in all folders, in only the top-level folder, or in folders of a specific content type.
Item limit
You can specify how many items are displayed at the same time (batches) in each view or the total number of items that the view will display. The larger the batch of items in a view, the longer it takes to download in the browser.
Mobile
You can specify that this view is for mobile devices, is the default mobile view for mobile devices, and the number of items to display in the list view Web Part for this view. This option is not available for all lists. The view must be a public view.
Leave us a comment
Was this article helpful? If so, please let us know at the bottom of this page. If it wasn't helpful, let us know what was confusing or missing. We'll use your feedback to double-check the facts, add info, and update this article.


