
Displaying content based on ratings can help content readers find quality content easily. If you are a content manager or author, ratings can help you easily see which topics are considered to be more popular by the readers.
In this article
Sort or filter content temporarily based on ratings
Overview
When ratings are enabled, people can select a star rating to show which documents they consider to be most useful or relevant. After a period of time for computing the ratings, the average rating is displayed next to the list or library item.
If you are a content manager or author, ratings can help you easily see which topics are considered to be more popular by the readers. This input may help you or your team plan for future content that best meets the needs of your readers.
When ratings are added to a list or library, you can display content based on its ratings level in different ways. You can sort or filter content temporarily while viewing the list, create a view that you can reuse later, or sort or filter content on a Web page.
Before users can rate content, ratings must be enabled on your site collection, and on the list or library that contains the content. For more information, see the topic Enable users to rate content.
Sort or filter content temporarily based on ratings
If ratings are enabled, you can sort or filter content quickly while viewing a list or library. To use this procedure, the ratings column must be displayed in the current view of your list or library.
-
If the list or library is not already open, click its name in the Quick Launch or browse to the page that contains the list.
-
Do one of the following:
-
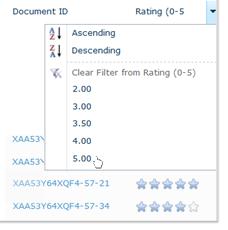
To sort content based on ratings, click the Rating (0-5) column. To change the sort order, click the column again.
-
To filter content based on ratings, click the down arrow next to the Rating (0-5) column, and then click the rating number you want, such as 5.
-
Create a view to filter or sort content based on ratings
You can create a view that filters or sorts content based on ratings. When you create a view, you can reuse it when you view the content later. If you have permission to manage the settings on lists and libraries, you can save the settings as a public view, so that other people can also use it.
Note: If you are sorting content based on ratings, and you make this view the default, people will see the top-rated content by default when they visit the list of library. If you plan to filter content based on ratings, you may not want to make this view the default, unless you want to prevent people from seeing lower rated content or content that has not been rated yet.
-
On the Quick Launch, click the name of the list or library that you want to create a view for. If the list or library is not on the Quick Launch, click Site Actions, click View All Site Content, and then click the name of the list or library.
-
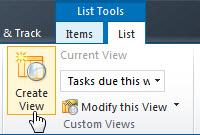
In the Ribbon, click the List or Library tab, and then click Create View.
-
Click Standard View or an existing view based on the Standard View.
-
In the View Name box, type the name for your view. If you want to make this the view that shows by default when people view the list or library, select Make this the default view. Only a public view can be the default view for a list or library.
-
In the Audience section, under View Audience, select Create a Personal view or Create a Public view. If Create a Public View is disabled, you may not have the necessary permissions to create a public view for this list or library.
-
In the Columns section, select the columns that you want in the view and clear the columns that you do not. Next to the selected columns, from the drop-down lists, select the order of the columns in the view.
-
Do one of the following:
-
To sort content based on ratings, in the Sorting section, select Rating (0-5) in the First sort by this column list. If you want to sort based on additional criteria, such as Number of Ratings, select that column in the Then sort by the column.
-
To filter content based on ratings, click Show items only when the following is true. Under Show the items when column, select Rating (0-5), and then select the criteria you want to use to filter, such as is greater than or equal to. In the box below this list, type the number you want to use, such as 3 or 4.
-
-
Click OK.
Find more information about views and related features in the See Also section.
Display highly rated documents on a Web page
If ratings are enabled on a list or library, you can display a view of the most highly rated documents or other items on a Web page. This helps people to easily locate content that their peers have found to be the most useful or relevant.
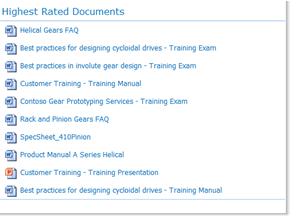
This method uses a Content Query Web Part to display library content that is sorted based on its rating. In a Document Center template, the Highest Rated Documents Web Part is already set up.
-
From a page, in the ribbon, click the Page tab, and then click the Edit command.

Note: If the Edit command is disabled, you may not have the permissions to edit the page. Contact your site owner or administrator.
-
Click on the page where you want to insert the Web Part.
-
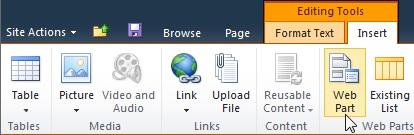
In the ribbon, click the Insert tab, and then click Web Part.
-
Under Categories, click Content Rollup, under Web Parts, click Content Query, and then click Add. The new Web Part appears on the page.
-
To configure the Content Query Web Part:
In the Web Part, click Open the tool pane. – OR –
Point to the Web Part, click the down arrow, and then click Edit Web Part. The configuration tool pane appears. -
In the tool pane, under Source, click Show items from the following list.
-
Click Browse, locate the list or library whose content you want to show, and then click OK.
-
Click Presentation to display the options for presenting content.
-
Under Grouping and Sorting, in the Sort items by list, select Rating (0-5), and then click Show items in descending order.
-
Select the Limit the number of items to display check box, and then enter the number of items you want to display in the Web Part. Limiting the number of items displayed prevents the Web Part from taking up too much space on your page.
-
Under Styles, select any options you want to determine how the information is displayed. For example, you might want to choose Title, description, and document icon in the Item style list to provide a scannable list of document choices.
-
In the Appearance section, type a name for your Web Part in the Title section, such as Highest Rated Content.
-
Select any other options that you want for your Web Part.
-
Click Apply to view your changes, or click OK to accept them and close the tool pane.


