
Note: This article has done its job, and will be retiring soon. To prevent "Page not found" woes, we're removing links we know about. If you've created links to this page, please remove them, and together we'll keep the web connected.
You can customize a list or library within a SharePoint site to broaden or limit which users can access the list or library, and what the users can do to the contents of the list or library. This article shows the most common approach to customizing user access in a step-by-step flow, and then lists individual procedures for more customization.
In this article
Overview
By default, a list or library inherits permissions from the site it is on. The site that a list or library is on is referred to as the parent site. Changes to permissions at the parent site apply to all the lists, libraries, and other content that inherit permissions from this parent.
Note: Site content, also referred to as securable objects, includes: sites, pages, lists, libraries, folders, list items, and library files.
In Microsoft Office SharePoint Server 2007 you can stop inheriting permissions from a parent site and create unique permissions for a list or library. For example, you might want to have unique permissions for a list that contains employee records or a product planning document that has not been finalized.
By default, a site owner for a site can manage permissions for the site and all of the lists, libraries, and content that inherit permissions from the site. Any user with the Full Control or Manage Permissions permission on a particular securable object, such as a library, can manage permissions on that securable object.
Typical steps for customizing user access to a list or library
By default, a list or library inherits permissions from the site it is on. This section provides the typical steps required to create unique permissions for a list or library that is configured to inherit permissions. For more information about customizing user access to a list or library, see More options for customizing user access to a list or library.
Step 3: Add groups to a list or library
Step 1: Create a group
The first step in customizing user access to a list or library is to create SharePoint groups that will be used to give users unique permissions to the list or library.
We recommend using SharePoint groups to give users access to securable objects, such as lists and libraries. It is easier to manage a few SharePoint groups that contain many user accounts than it is to add and manage permissions for many individual user accounts.
-
Open the list or library for which you want to create a new SharePoint group.
-
On the Settings menu, click Document Library Settings or List Settings.
-
In the Permissions and Management column, click Permissions for this document library or Permissions for this list.
-
On the Actions menu, click Manage Permissions of Parent.
Notes:
-
This will take you from the list or library, up the site hierarchy, to the first site that has unique permissions. For example, the Contracts library is configured to inherit permissions from its parent site, Sales. The Sales site is configured to inherit permissions from its parent site, the top-level Adventure Works site. In this example, clicking Manage Permissions of Parent in the Contracts library takes you to the top-level Adventure Works site.
-
Regardless of your starting point, all SharePoint groups are created on the site collection level. This means that all SharePoint groups are available to all sites within the site collection.
-
-
On the New menu, click New Group.
-
On the New Group page, specify the settings for your new SharePoint group, but do not select permissions levels for the group, and then click Create.
The goal is to create a group that has permissions for a specific list or library. Selecting permissions at this step would give the group permissions for the site and all objects that inherit permissions from it.
For the preceding Adventure Works example, the Sales Contracts group is created.
After you click Create, the People and Groups page for your new group appears. Now, you can start adding users to the group.
Step 2: Add users to groups
After you create a SharePoint group, you need to add users to the group. We recommend adding Windows security groups to SharePoint groups to give users access to securable objects, such as lists and libraries. It is easier to add and manage a few Windows security groups for a few SharePoint groups than it is to add and manage permissions for many individual user accounts.
-
On the People and Groups page for your group, on the New menu, click Add users, and then type or browse to the Windows security groups and user accounts that you want to add.
Note: Click Add all authenticated users to add all domain user accounts. For example, you might do this for a group that has the Read permission level for a library to give all domain user accounts the ability to read the content in the library.
-
Verify that Add users to a SharePoint group is selected and the correct group is displayed.
We recommend that you use SharePoint groups when possible to give users access to your site and its content. In rare cases, you may need to give permissions to an individual user by clicking Give users permission directly. However, assigning permissions to large numbers of individual users can quickly become difficult and time-consuming to manage.
-
Optionally, select Send welcome e-mail to new users to e-mail groups and users when they are added to a SharePoint group.
Note: Outgoing e-mail must be enabled for the site collection by a SharePoint administrator. If Send welcome e-mail to new users is selected and outgoing e-mail is not enabled, the groups and users are added to the SharePoint group and an error message appears indicating that the e-mail message could not be sent.
-
Click OK.
Note: If Please select the desired permissions displays, select Give users permission directly, re-select Add users to a SharePoint group, and then click OK.
For the preceding Adventure Works example, the appropriate Windows security groups are added to the Sales Contracts group.
Step 3: Add groups to a list or library
The next step in customizing user access to a list or library is adding SharePoint groups or users to the list or library with the permissions you want.
-
Open the list or library for which you want to give the groups unique permissions.
-
On the Settings menu, click Document Library Settings or List Settings.
-
On the Customize page, in the Permissions and Management column, click Permissions for this document library or Permissions for this list.
-
On the Actions menu, click Edit Permissions, and then click OK to confirm that you want to create unique permissions.
-
On the New menu, click Add Users.
-
In the Add Users section, type or browse to the SharePoint groups you want to add to this list or library.
-
In the Give Permission section, select Give users permissions directly and select the permissions you want to give the group for the list or library. For information about permissions levels, see Manage permission levels.
-
Click OK.
For the preceding Adventure Works example, the Sales Contracts group is given the Contribute permission for the Contracts library.
Step 4: Remove users from a list or library
In the previous step, when you chose to create unique permissions for this list or library, a copy of all SharePoint groups and users from the parent was created for this library. You may not want all of these groups with their associated permission levels to remain. Therefore, you may need to remove SharePoint groups and users from your list or library, so that only the desired users have access to it.
Note: We recommend always having a SharePoint group or users with the Full Control permission level for securable objects, such as lists or libraries, to help you manage the objects.
If you just completed Step 3, you are at the Permissions page that shows the SharePoint groups and users for your list or library. Use the following steps to remove SharePoint groups and users that you don't want.
-
On the Permissions page for your list or library, select the check boxes for the users and SharePoint groups that you want to remove from this list or library.
-
On the Actions menu, click Remove User Permissions, and then click OK to confirm the action.
For the preceding Adventure Works example, you might want to remove the default Adventure Works Members groups from the Contracts library, so they no longer have the Contribute permissions for the library.
More options for customizing user access to a list or library
If you or someone in your organization had previously set up unique permissions on your list or library, or if you are unsure of the situation, the step-by-step approach to customizing user access may not meet your needs. This section describes more options for customizing user access to SharePoint lists and libraries.
View users and groups associated with a list or library
Add users and SharePoint groups to a list or library
Change permission levels of users for a list or library
Reconfigure a list or library to inherit permissions
View users and groups associated with a list or library
-
Open the list or library in which you want to view users and SharePoint groups.
-
On the Settings menu, click Document Library Settings or List Settings.
-
On the Customize page, in the Permissions and Management column, click Permissions for this document library or Permissions for this list.
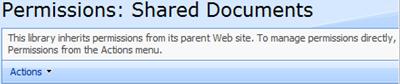
The Permissions: Name of Securable Object page displays all the users and SharePoint groups (and their assigned permission levels) that are used by this securable object. The page also indicates whether the list or library inherits or has unique permissions, as shown in the following image.
Add users and SharePoint groups to a list or library
Use the following steps to add Windows security groups and user accounts to a SharePoint group that is associated with a list or library. If the list or library that you are configuring is using unique permissions, you can add users or SharePoint groups directly to the list or library with the permissions that you want.
Note: We recommend adding Windows security groups to SharePoint groups to give users access to securable objects, such as lists and libraries. It is easier to add and manage a few Windows security groups for a few SharePoint groups than it is to add and manage permissions for many individual user accounts.
If this list or library inherits permissions, you cannot add users or SharePoint groups directly to the list or library. In this case, you can only add users to existing SharePoint groups on the parent site, if you have the required permissions to do so on the parent site. However, if you stop inheritance and create unique permissions for the list or library, you can then add users or SharePoint groups directly to the list or library.
-
Open the list or library to which you want to add users or SharePoint groups.
-
On the Settings menu, click Document Library Settings or List Settings.
-
On the Customize page, in the Permissions and Management column, click Permissions for this document library or Permissions for this list.
-
If your list or library is inheriting permissions, you must first stop inheriting permissions. To do this, on the Actions menu, click Edit Permissions, and then click OK to confirm that you want to create unique permissions.
-
On the New menu, click Add Users.
-
In the Add Users section, specify the users and SharePoint groups that you want to add to this list or library.
-
In the Give Permission section, either add the users to an existing SharePoint group or give them permission directly to the list or library and then select one or more of the check boxes to give these users the permissions that you want. For information about permissions levels, see Manage permission levels.
Note: You cannot add a SharePoint group to another SharePoint group. If you added a SharePoint group in step 6, you must select Give users permission directly.
-
Click OK.
Change permission levels of users for a list or library
Use the following steps to change the the permission levels of selected users and SharePoint groups for a list or library. If the list or library inherits permissions, performing the following steps stop inheritance and creates unique permissions for the list or library.
-
Open the list or library for which you want to edit permission levels.
-
On the Settings menu, click List Settings or Document Library Settings.
-
On the Customize page, in the Permissions and Management column, click Permissions for this list or Permissions for this document library.
-
If your list or library is inheriting permissions, you must first stop inheriting permissions to edit permission levels on this list or library. To do this, on the Actions menu, click Edit Permissions, and then click OK to confirm that you want to create unique permissions.
-
Select the check boxes for the users and SharePoint groups for which you want to edit permission levels.
-
On the Actions menu, click Edit User Permissions.
-
In the Choose Permissions section, select the permission levels that you want, clear those you do not want, and then click OK. For information about permissions levels, see Manage permission levels.
Reconfigure a list or library to inherit permissions
By default, a list or library inherit permissions from its parent site. However, this inheritance can be stopped to create unique permissions for a list or library. You can also, at any time, reconfigure the list or library that is using unique permissions to inherit permissions again.
Use the following steps to configure a list or library that is using unique permissions to inherit permissions from its parent site again.
Re-inheritng permissions discards discards unique permissions that were created for the list or library, such as unique SharePoint groups or the assignment of permissions levels that were created at the list or library while it was configured to use unique permissions. Unique permissions are also discarded from folders, list items, and library files within the list or library.
-
Open the list or library on which you want to re-inherit permissions.
-
On the Settings menu, click List Settings or Document Library Settings.
-
On the Customize page, in the Permissions and Management column, click Permissions for this list or Permissions for this document library.
-
On the Actions menu, click Inherit Permissions and then click OK to confirm the action. The Inherit Permissions option is not available on the Actions menu if permissions are already being inherited from the parent site.
Remove user permissions for a list or library
Use the following steps to remove users or SharePoint groups from a list or library.
-
Open the list or library on which you want to remove user permissions.
-
On the Settings menu, click List Settings or Document Library Settings.
-
On the Customize page, in the Permissions and Management column, click Permissions for this list or Permissions for this document library.
If permissions are being inherited from the parent, you cannot remove users directly from this list or library without first stopping inheritance. If you want to delete users and SharePoint groups from the parent site from which this list or library inherits permissions, you must manage the permissions of the parent.
-
Do one of the following:
-
To manage the permissions of the parent, on the Actions menu, click Manage Permissions of Parent.
-
If you are currently inheriting permissions from the parent and want to stop this inheritance and create unique permissions for this securable object, on the Actions menu, click Edit Permissions, and then click OK to confirm the action.
-
If the list or library is already using unique permissions that are not inherited from the parent, proceed to the next step.
-
-
Select the check boxes for the users and SharePoint groups that you want to remove from this list or library.
-
On the Actions menu, click Remove User Permissions, and then click OK to confirm the action.


