
Publisher features the ability to connect to a datasource, such as a database, a spreadsheet, or even a text file, and use the data to easily create a catalog of your products or services. You can also use catalog merge to create directories, photo albums, or any other type of publication that displays one or more items on each page.
How catalog merge works
Catalog merge is similar to mail merge. When you use catalog merge, you create a catalog merge template publication, and then you combine the template with information from a data source to generate merged pages.
1 Data source with record information, such as item names and descriptions.
2 Catalog merge template publication with catalog merge area and merge fields that are placeholders for record information.
3 Resulting merged pages displaying multiple records per page.
You can save your catalog merge as a new publication, or you can add it to the end of an existing publication. You can also save your catalog merge template and use it again, whenever you update the information in your data source, to create additional sets of merged pages.
Before you start
The following tips will help you create a successful catalog merge:
-
Start the catalog merge in a new publication.
-
In addition to pages such as a cover, table of contents, and order forms, give yourself one page for your merge fields, even through your catalog will likely have multiple pages once you create the merged document.
-
Set up the catalog merge template with the page dimensions that you want for your final merged pages.
-
If you plan to add the merged pages that you create to the end of an existing publication, make sure that your catalog merge template matches the existing publication in the following ways:
-
Page size (height and width)
-
Page view (one-page spread or two-page spread)
-
Publication type (Web or print)
-
Page order (left-to-right or right-to-left)
-
Plan your catalog
Before you begin your catalog merge, think about what kind of information you want to list in the final merged pages.
-
Do you want to list item names and prices?
-
Do you want to include a description of each item?
-
Do you want to include a picture of each item?
Plan your data source
After you decide the kind of information that you want to include in your catalog, you can create the data source that you will use for your catalog merge. If you already have a data source, you can make sure that it contains all the information that you want to include in the merge.
Publisher’s catalog merge can use a variety of data source formats. If you don't already have a data source to use for your merge, you can generate one in Publisher. You can also create a data source in a Microsoft Office Excel worksheet or in a Microsoft Office Word table.
The data fields that you include in your data source correspond to the merge fields that you insert into your catalog merge template.
When you set up your data source, create a column for each type of information, such as the item name, the stock number, and the price. Each row, or record, corresponds to the information for one item.
Important Make sure that your data source includes a data field, or a column, for each kind of information that you will merge. Depending on the type of your data source, you might be able to make some changes to the data after you connect to it in Publisher, but it's better to finalize the information before you start.
If you plan to merge photos into your catalog pages, you need to include a column for the path of each picture file that you plan to use. Do not include the actual pictures or images in your data source.
If you plan to create your data source in Publisher, you can do that after you create the template publication.
Create a template publication
Now you can create your catalog merge template publication, where you design the layout of your final merged pages. When you complete the merge, you use this catalog merge template to generate merged pages, which you can save as a new publication or add to the end of an existing publication.
Your catalog merge template should have the same layout (page size and orientation) that you want for your final merged pages. Also, it should contain any text or graphics that you want to appear on each page of your final publication, for example, a background image or the name and phone number of your company. This is best done using a Master Page for these elements of the merge template.
If you plan to add your merged pages to the end of an existing publication, make sure that your catalog merge template matches the existing publication in the following ways:
-
Page size (height and width)
-
Page view (one-page spread or two-page spread)
-
Publication type (Web or print)
-
Page order (left-to-right or right-to-left)
Create the catalog merge template
-
Choose a publication template that is appropriate for your catalog.
-
On the Insert tab, click Catalog Pages.

-
Catalog pages will be created with a default Catalog Merge Area and the Catalog Tools tab will appear on the ribbon. At this time you can position the Catalog Merge Areaas you want it on the page and add any text or images that you want to appear on every page of your catalog. The smaller the merge area, the more catalog items can be merged to the page. For example, a 2”x2” merge area will repeat more times than a 4”x4” merge area. Don’t worry too much about getting it exactly right as you can go back and edit these items at any time.
Tip Don’t configure the Catalog Merge Area at this time, wait until it’s time to insert the merge fields and use one of the pre-made designs from the Layout gallery.
Connect to your data source
After you format your catalog merge template page, the next step is to create or locate and connect to your data source. The option that you choose next depends on whether you already have a data source or whether you want to create a new list in Publisher.
-
In the Catalog Tools tab, click Add List, and do one of the following:
-
Select Type a new list if you need to create the data source for your merge.
-
Click Use an existing list if you already have a data source that you want to use.
-
Click Select from Outlook Contacts if you want to create a directory of your contacts.
-
Type a new list
-
In the New Product List dialog box, type the information for the first item, or record, that you want to include in your catalog.
If you want to add or remove columns — for example, if you aren't including pictures — click Customize Columns, and then make the changes that you want.
-
After you type all the information for your first record, click New Entry, and then type the information for the next record. Continue until you have typed information for all the records that you want to include.
-
When your new list is complete, click OK.
-
In the Save Address List dialog box, type a name for your new list, and then click Save.
Use an existing list
-
In the Select Data Source dialog box, locate and click the data source that you want.
By default, Publisher saves data sources in the My Data Sources folder. You may need to browse to the My Data Sources folder to locate your data source.
-
Click Open.
Depending on the type of data source you select, other dialog boxes may appear requesting specific information. For example, if your data source is an Excel worksheet that has information about multiple tabs, you must select the tab that contains the information you want, and then click OK.
Select from Outlook Contacts
-
Do one of the following:
-
In the Select Contacts dialog box, click the list of contacts that you want to use.
-
In the Choose Profile dialog box, select the correct profile for the contacts that you want to use.
-
-
Click OK.
Add more lists
If you want to use more than one list in your catalog merge, you can add lists.
-
Click Edit List, and In the Catalog Merge Product List, under Add to product list, click Select an existing list, Select from Outlook Contacts, or Type a new list.
Publisher will prompt you to fix mismatches between fields in the various source lists by opening the Add to Product List dialog box. -
In the Add to Product List dialog box, select a field that is not checked in the Matched column, select the field to which you want it to correspond in the Product list fields with matched fields list, and then click Match.
-
In the Match Field dialog box, verify that the field that you selected is listed under Match to a product list field or select another, and then click OK.
-
If you need to add a new field to your recipient list to make a match, select the field that you want to add in the new list (the left list in the Add to Recipient List dialog box), click Add, and then click OK.
Added fields are shown under New fields to be added to recipient list
Select the records that you want to include
-
Click Edit List.
-
In the Catalog Merge Product List dialog box, do one of the following:
-
Select the check boxes next to the records that you want to include, and clear the check boxes next to the records you want to exclude.
Tip If you want to include only a few records in the list, click Clear All, and then select the records you want.
-
Filter your list by a specific criterion by clicking the arrow next to the column heading of the item that you want to filter by and then clicking the value that you want to use as a filter.
-
(Blanks)displays all the records in which the corresponding field is blank.
-
(Nonblanks) displays all the records in which the corresponding field contains information.
Note If your data source contains records that share the same information, and there are ten or fewer unique values in the column, you can filter by specific information. For example, if your data source is a list of properties for sale and there are multiple property records that list Buffalo as the city/location, you can filter on Buffalo.
The Catalog Merge Product List dialog box displays only the designated records. To display all the records again, click (All).
-
-
Sort items in the list by clicking the column heading of the item that you want to sort by. For example, if you want to display the list alphabetically by city/location, click the City/Location column heading.
-
-
Click OK.
Insert merge fields
Now it's time to arrange the information that you want to display in your publication. To lay out the page, you add merge fields to the catalog merge area. Each merge field represents a column in your data source, and the catalog merge area displays how the information in one record will be displayed.
You arrange the catalog merge area the way that you want, and then you specify how many times the merge area repeats on each page. For example, you might want to show four items on each page. Each item will be displayed in the same way, based on how you arrange the catalog merge area. You can adjust the size of each item, and you can change the size of the catalog merge area.
Important If you insert merge fields outside the catalog merge area, they will not repeat when you complete your merge.
Select merge area layout
-
In the Layout group, do one of the following:
-
Select from one of the pre-made design galleries.

-
Select the number of rows and columns on each page in the Rows and Columns drop-down.

-
Insert text merge fields into the catalog merge area
-
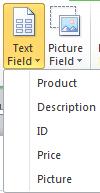
Click the Text Field button, and click the first merge field that you want to insert.
-
In the catalog merge area, select the merge field and then move and resize the merge field by doing the following:
-
To move the merge field, position the mouse pointer over the merge field until the pointer changes to the Move pointer

-
To resize the merge field, position the mouse pointer over one of the sizing handles on the text box or picture frame until the pointer changes to the Resize pointer

-
-
Click outside of the merge field so that it is no longer selected.
-
Repeat Steps 1-3 until you have inserted all of the fields that you want from your data source.
Important The fields are inserted at the current insertion point (insertion point blinking cursor). If there is no insertion point, a new textbox will be created and the merge field placed in this new textbox.
Format the text merge fields
You can format the merged catalog data by formatting the merge fields in your catalog merge template. These fields can be treated like any text box and you can include non-merged text and formatting as well as the merged items.
-
In the catalog merge template, select the field containing the information that you want to format, including the surrounding merge field characters («« »»).
-
On the Text Box Tools tab, select the options that you want.
Insert picture merge fields into the catalog merge area
-
Click the Picture Field button, and click the first merge field that you want to insert.
-
In the catalog merge area, select the merge field and then move and resize the merge field by doing the following:
-
To move the merge field, position the mouse pointer over the merge field until the pointer changes to the Move pointer

-
To resize the merge field, position the mouse pointer over one of the handles on the text box or picture frame until the pointer changes to the Resize pointer

-
-
Click outside of the merge field so that it is no longer selected.
-
Repeat Steps 1-3 until you have inserted all of the fields that you want from your data source.
Important The fields are inserted at the current insertion point (insertion point blinking cursor). If there is no insertion point, a new textbox will be created and the merge field placed in this new textbox.
Move or resize the catalog merge area
If your formatted merge fields no longer fit in the catalog merge area, you can resize it.
Note If you increase the size, you may need to fit fewer items, or records, on each page.
-
Click the Catalog Merge Area to select it.
-
Position the mouse pointer over one of the handles on the Catalog Merge Area, and then drag the mouse.
-
Specify how many items should appear on each page by typing the numbers that you want for items down the page and across the page on the Catalog Merge Layout toolbar.
Finish and preview the template
-
Click Preview Results.
-
Click the arrows to view each page of merged data.
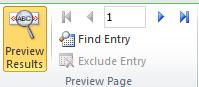
If you decide not to include an item, click the previewed item, and then click Exclude Entry in the Preview Page group.
Complete, print, and save your catalog publication
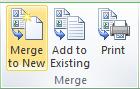
To complete the merge, you have three options:
-
You can print your merged publication directly.
-
You can create and print a new publication that contains the merged content. You can make changes to the content of this publication just as you would change any other publication in Publisher.
Tip If you want to include multiple catalog merges in a publication, you will need to create a new publication for the merged pages as there can only be one set of catalog pages per publication.
-
You can add the merged content to an existing publication.
If you want to add a front and back cover to your publication, or if you want to add any other pages, you need to create a new publication or add your content to an existing publication.
Merge to a new publication
If you want to edit your merged pages, save them for later use, or print them at a later time, you can collect and save all of your merged pages as a single new merged publication that contains the actual data — for example, product names and prices — instead of merge fields.
-
In the Merge group, click Merge to New.
Publisher creates a new publication that you can save and edit. You can even add front and back cover pages.
Note If you plan to print your catalog as a booklet, make sure that the total number of pages is a multiple of four. -
In the Catalog Merge task pane, click Save this publication.
-
In the File name box, type a name for your new publication, and then click Save.
-
If necessary, also save any changes that you made to your catalog merge template. You can use this catalog merge template again to create additional merged pages whenever you update the information in your data source.
Add to an existing publication
If you already have your covers set up in a separate publication, or if you want the catalog placed at the end of a longer publication, you can add your merged content directly.
Before you add your merged pages to the end of an existing publication, make sure that your catalog merge template matches the existing publication in the following ways:
-
Page size (height and width)
-
Page view (one-page spread or two-page spread)
-
Publication type (Web or print)
-
Page order (left-to-right or right-to-left)
Note Publisher cannot add merged pages to an open publication. If you are working on the publication to which you want to merge, make sure that you save and close it before you complete your merge.
-
In the Merge group, click Add to Existing.
-
In the Open Publication dialog box, locate and select the publication to which you want to add the merged pages, and then click Open.
Publisher adds the merged pages to the end of the existing publication.
Tip To rearrange the pages in your updated publication, click any page that you want to move on the page navigation pane, and then drag it to the location that you want.
-
In the existing publication, click Save to save your updates.
-
If necessary, also save any changes that you made to your catalog merge template. You can use this catalog merge template again to create additional merged pages whenever you update the information in your data source.
Print your merged publication
-
In the Merge group, click Print.
Publisher opens the print page in the BackStage view.


