

Adding page numbers to a worksheet is one of the most common uses of headers and footers. Watch this video to see how.
Add or change the header or footer text in Page Layout view
Click the worksheet that you want to add headers or footers, or that contains headers or footers that you want to change.
-
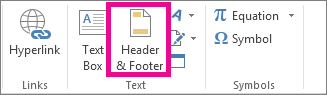
On the INSERT tab, in the Text group, click Header & Footer.
Excel displays the worksheet in the page layout view. You can also click Page Layout View

-
Do one of the following:
-
To add a header or footer, click the left, center, or right header or footer text box at the top or the bottom of the worksheet page (under Header or above Footer).
-
To change a header or footer, click the header or footer text box at the top or the bottom of the worksheet page, and then select the text that you want to change.
-
-
Type the new header or footer text.
Notes:
-
To start a new line in a header or footer text box, press Enter.
-
To delete a portion of a header or footer, select the portion that you want to delete in the header or footer text box, and then press Delete or Backspace.
You can also click the text, and then press Backspace to delete the previous characters.
-
To include a single ampersand (&) in the text of a header or footer, use two ampersands. For example, to include "Subcontractors & Services" in a header, type "Subcontractors && Services".
-
To close the headers or footers, click anywhere in the worksheet. To close the headers or footers without keeping the changes that you made, press Esc.
-
Add or change the header or footer text in the Page Setup dialog box
-
Click the worksheet or worksheets, chart sheet, or embedded chart to which you want to add headers or footers, or that contains headers or footers that you want to change.
How to select multiple worksheets?
To select
Do this
A single sheet
Click the sheet tab.
If you don't see the tab that you want, click the tab scrolling buttons to display the tab, and then click the tab.

Two or more adjacent sheets
Click the tab for the first sheet. Then hold down Shift and click the tab for the last sheet that you want to select.
Two or more non-adjacent sheets
Click the tab for the first sheet. Then hold down Ctrl and click the tabs of the other sheets that you want to select.
All sheets in a workbook
Right-click a sheet tab, and then click Select All Sheets on the shortcut menu.
When multiple worksheets are selected, Group appears in the title bar at the top of the worksheet. To cancel a selection of multiple worksheets in a workbook, click any unselected worksheet. If no unselected sheet is visible, right-click the tab of a selected sheet, and then click Ungroup Sheets.
-
On the PAGE LAYOUT tab, in the Page Setup group, click the dialog box launcher
Excel displays the Page Setup dialog box.
If you select a chart sheet or embedded chart, clicking Header & Footer in the Text group on the INSERT tab also displays the Page Setup dialog box.
-
On the Header/Footer tab, click Custom Header or Custom Footer.
-
Click the left section, center section, or right section box, and then click the buttons to insert the header or footer information that you want in that section.
-
To add or change the header or footer text, type additional text or edit the existing text in the left section, center section, or right section box.
Notes:
-
To start a new line in a section box, press Enter.
-
To delete a portion of a header or footer, select the portion that you want to delete in the section box and then press Delete or Backspace. You can also click the text, and then press Backspace to delete the previous characters.
-
To include a single ampersand (&) in the text of a header or footer, use two ampersands. For example, to include "Subcontractors & Services" in a header, type "Subcontractors && Services".
-
To base a custom header or footer on an existing header or footer, click the header or footer in the Header or Footer box.
-


Add a built-in header or footer
-
Excel has many built-in headers and footers that you can use. For worksheets, you can work with headers and footers in Page Layout view. For other sheet types such as chart sheets, or for embedded charts, you can work with the headers and footers in the Page Setup dialog box.
Add a built-in header or footer to a worksheet in Page Layout view
-
Click the worksheet to which you want to add a predefined header or footer.
-
On the INSERT tab, in the Text group, click Header & Footer.
Excel displays the worksheet in Page Layout view. You can also click Page Layout view
-
Click the left, center, or right header or footer text box at the top or the bottom of the worksheet page.
Clicking any text box selects the header or footer and displays the HEADER AND FOOTER TOOLS, adding the DESIGN tab.
-
On the DESIGN tab, in the Header & Footer group, click Header or Footer, and then click the pre-defined header or footer that you want.
Add a built-in header or footer to a chart
-
Click the chart sheet or embedded chart to which you want to add a pre-defined header or footer.
-
On the INSERT tab, in the Text group, click Header & Footer.
Excel displays the Page Setup dialog box.
-
Click the predefined header or footer that you want to use in the Header or Footer box.
Adding page numbers to a worksheet is one of the most common uses of headers and footers.
You can use a pre-defined header or footer option to add page numbers.
On the INSERT tab, click the Header & Footer button. On the DESIGN tab, click the Header or Footer button.
There are many options, and they are the same for header and footer.
Click an option from the drop-down list, such as Page 1 of ?, and page numbers are added to the header or footer of the worksheet.
As you probably noticed, pre-defined headers and footers overwrite existing headers and footers.
By default, Excel numbers and prints pages from the top down, and then, left to right on the worksheet.
In this example, Page 2 should be to the page to the right, since the table couldn’t fit on Page 1.
To fix this, click the PAGE LAYOUT tab, and click Print Titles.
In the Page Setup dialog box, on the Sheet tab, click Over, then down, and click OK.
And the pages are now numbered correctly.
If you want page numbers to start at a number other than one (three, for example), double-click the section with a page number. After the page right, square bracket, type a plus sign, the number you want to increase the pages by (2, in this example), and a space.
Click anywhere in the worksheet, and the page numbers now start at 3.
If you don’t type the space, in this example, you’ll get a first page number of 12, page 1 followed by the number 2.
You can have different headers and footers on odd and even pages.
For example, you might want to show even page numbers on the left side, and odd page numbers on the right side of printed pages.
In the DESIGN tab, check Different Odd & Even Pages.
On Page 1, in the header or footer, select the right section, and click Page Number.
On Page 2, in the header or footer, select the left section, and click Page Number again.
In this video, you saw how to use the ribbon to add and configure page numbers in the headers and footers of a worksheet.
For other sheet types, such as chart sheets, and for embedded charts, you can insert headers and footers only by using the Page Setup dialog box.
For information about this, see the article, Headers and footers in a worksheet on Office.com. There’s a link to it in the course summary at the end of this course.
Up next, header and footer details.


Need more help?
Want more options?
Explore subscription benefits, browse training courses, learn how to secure your device, and more.


Communities help you ask and answer questions, give feedback, and hear from experts with rich knowledge.


