
Edit this template like a pro
As you're editing the Welcome to Word template to make it your own, you'll get the best results if you're familiar with some of these Word features:
-
Title styles
-
Picture positioning
-
Tables for layout

The title and subtitle of this template are formatted with the Title and Subtitle styles. We modified the styles to get white text on a blue background, and to add a little bit of space on the left side.

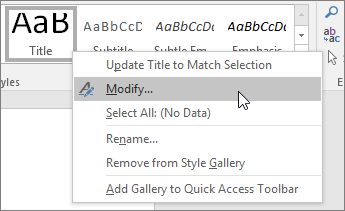
Here's how to modify a style to get the same result:
-
Right-click the style, and select Modify.
-
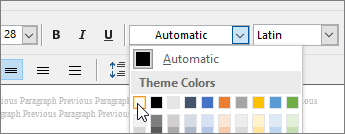
In the Formatting section of the Modify Style dialog box, choose white for the font color.
-
At the bottom of the Modify Style dialog box click Format.

-
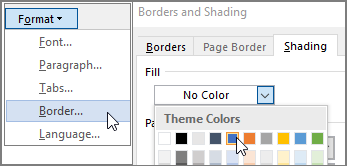
To make the blue background, select Border, and on the Shading tab, pick a shade of blue in the Fill box. Then click OK.
-
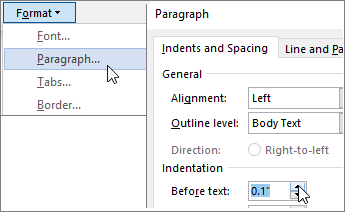
To add some space from the left margin, click Format again, and select Paragraph. Under Indentation, in the Before text box, set the amount to 0.1". Click OK.
-
Click OK again to save the modifications.
The Word logo in the title of the template can be dragged and positioned just about anywhere, and it won't be hidden behind text.

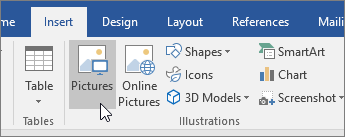
Here's how to set up a picture like that, starting with a picture that's stored on your computer:
-
To get the picture in the document, go to Insert > Pictures and double-click the picture.
-
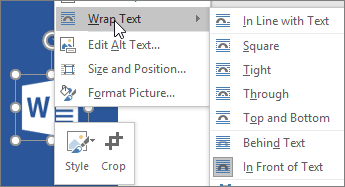
Right-click the picture, point to Wrap Text, and choose In Front of Text.
-
Drag the picture to position it.
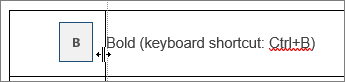
In some places in the template, we used a table to make it easy to place pictures next to text. You can tell where these tables are by clicking in text that's next to a picture.
If your cursor is in a table, you'll see:
-
Little handles for moving


-
Table Tools tabs on the ribbon.

-
If the switch for viewing gridlines is turned on you'll see a faint dotted line between the table cells.
Tip: The gridlines won't appear when the document is printed. If you want to switch them off while viewing the document in Word, click in the table, then go to the Layout tab under Table Tools, and select View Gridlines.
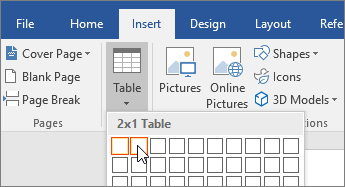
Here's how to use a table for positioning a picture to the left of some text:
-
On the Insert tab click Table, and then select one row with two cells side by side (2x1 Table).
-
With your cursor in the left cell, go to the Insert tab, select Pictures, and then double-click the picture you want (Or, select Online Pictures, and search for a picture).
-
Click in the right cell and type your text.
-
Adjust the cell sizes and the spacing between the picture and the text.
-
Drag a corner of the picture to change its size and adjust the size of the cells.
-
Select the border between the cells and drag it to the right or left to increase or decrease the amount of space between the picture and the text.
-
-
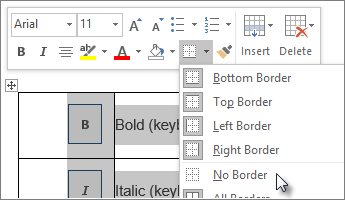
The table is for layout only, so let's get rid of the table borders.
Select the table by clicking its move handle
Tip: If you want more rows for aligning pictures and text, press the Tab key while your cursor is in the cell on the right. Word adds another row to the table.


