
In Save & Send, you can save your publication in several formats. You can save your publication as an image, a PDF or XPS file, or as an HTML file. You can save the publication as a Microsoft Publisher 2010 template or in a format compatible with Publisher 2000 or Publisher 98. You can also create a packed Publisher file that contains all the elements that you need for taking the publication to a commercial printer, including a PDF file if you choose, or to move the publication to another computer. In addition to saving your publication, you can send your publication in e-mail, either as an e-mail message or as an attachment. In some locales you will also be able to from this page share templates you create with the online template community.
In this article
Send using e-mail
You can send your publication as an e-mail using one of five options.
Important: In order to send using e-mail, you must have one of the following programs installed on your computer:
-
Microsoft Office Outlook
-
Outlook Express (version 5.0 or later)
-
Windows Mail
-
Click the File tab.
-
Choose Save & Sendand then selectSend Using E-mailand choose one of the following options:
-
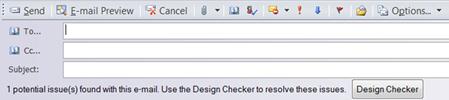
Send Current Page: This will send the currently selected page from your publication as an HTML e-mail message, so the recipients do no need to have Publisher to view the publication. Publisher’s user interface will change to look like an e-mail giving you access to your address book and the ability to preview the e-mail in your default Web browser, and cancel the e-mail message.
-
Send All Pages : This will create a single HTML e-mail message from all the pages in your publication. Publisher’s user interface will change to look like an e-mail giving you access to your address book and the ability to preview and cancel the e-mail message.
Note: In the process of creating a single e-mail message page from multiple pages in your publication some formatting may be lost.
-
Send as Attachment: This will create an e-mail message with your publication as an attachment. To view the publication the recipients will have to have Publisher installed.
-
Send as PDF : This will create a PDF version of your publication and attach it to an e-mail message. To view the document the recipients must have a PDF reader installed on their computers, such as the Acrobat Reader available from Adobe Systems.
-
Send as XPS : This will create a XPS version of your publication and attach it to an e-mail message.
Note: For more information on saving your publications as PDF or XPS documents see Save as PDF or XPS.
-
-
Enter the recipient addresses, a subject, and any other e-mail options, and click Send.
E-mail Preview
This option will show you what your publication will look like in an e-mail message by opening your default Web browser and previewing an HTML version of your publication.
-
Click the File tab.
-
Choose Save & Send, chooseE-mail Preview, and then click theE-mail previewbutton.
-
Publisher will display your publication as a Web page.
Change file type
This selection enables you to save your publication as a Microsoft Publisher 2010 template, in a format compatible with Publisher 2000 or Publisher 98, as one of several standard image types, or as a Web page.
-
Click the File tab.
-
Choose Save & Send, selectChange File Type.
-
Select from the available options.
Publish HTML
This selection enables you to publish your publication as a Web page.
-
Click the File tab.
-
Choose Save & Send and selectPublish HTML.
-
Under Publish HTML, you can choose to save in one of two formats:
-
Web Page (HTML): This will save your publication as an HTML document, and create a folder containing supporting files such as images and sounds that appear on the page.
-
Single File Web Page (MHTML) : This option creates a single MHT document with the supporting files embedded.
-
-
Click Publish HTML, and in theSave Asdialog select a location and enter a file name.
Save as PDF or XPS
Sometimes you want to save files so that they cannot be modified, but you still want them to be easy to share and print. With Publisher 2010 you can convert publications into PDF or XPS formats without needing additional software or add-ins. Use this when you want a document that:
-
Looks the same on most computers
-
Has a small file size
-
Complies with an industry format
-
Can be viewed by people who do not have Publisher installed, but do have a free PDF or XPS viewer
Examples include resumes, legal documents, newsletters, files intended to only be read and printed, documents intended for professional printing.
Important: Once you have saved a document as a PDF or XPS file, you cannot convert it back to a Microsoft Office file format without specialized software or a third-party add-in.
What are PDF and XPS formats?
-
Portable Document Format (PDF) PDF preserves document formatting and enables file sharing. When the PDF format file is viewed online or printed, it retains the format that you intended. Data in the file cannot be easily changed, and can be explicitly set to prohibit editing. The PDF format is also useful for documents that will be reproduced using commercial printing methods. PDF is accepted as a valid format to many agencies and organizations, and viewers are available on a wider variety of platforms than XPS.
Important: To view a PDF file, you must have a PDF reader installed on your computer such as the Acrobat Reader, available from Adobe Systems.
-
XML Paper Specification (XPS) XPS is a platform-independent technology that also preserves document formatting and enables file sharing. When the XPS file is viewed online or printed, it retains exactly the format that you intended, and the data in the file cannot be easily changed. XPS embeds all fonts in the file so they appear as intended, regardless of whether the specified font is available on the recipient's computer, and has more precise image and color rendering on the recipient's computer than PDF.
Save as PDF
-
Click the File tab.
-
Choose Save & Send, select Create PDF/XPS Document, and then click Create PDF/XPS.
-
In the Publish as PDF or XPS dialog, select PDF (*.PDF) in the Save as type pull-down.
-
Enter a name for the document in the File name text box.
-
To change the publishing options, click Options.
-
You can select from four pre-defined sets of options and change the Print Options:
-
Minimum size: This will set the resolution of pictures in your publication to a maximum of 96 dots per inch (dpi), a resolution suitable for on-screen display, but not what you generally want for a printed publication. Fonts will not be embedded or bitmapped, so people viewing the file who do not have the fonts installed will see different fonts. The Print Options are optimized for online viewing of the document as a single page. This selection will also include your publication’s properties.
-
Standard: This will set the resolution of pictures in your publication to a maximum of 150 dpi, suitable for online distribution such as e-mail where the recipient may print the publication on a desktop printer. The Print Options are optimized for online viewing of the document as a single page. This selection will also include your publication’s properties as well as any structural tags to enhance accessibility.
-
High quality printing: This is the default set of options suitable for either desktop of copy shop printing. The pictures will be set to maximum of 450 dpi for color/greyscale, above this threshold and the picture will be downsampled to 300 dpi, and 1,800 dpi for line art, above this threshold and the art will be downsampled to 1,200 dpi. This selection will also include your publication’s properties, as well as any structural tags to enhance accessibility. The Print Options are optimized for printing.
-
Commercial Press : This set of options creates the largest and highest quality file, suitable for commercial printing. The pictures will be capped at a maximum of 450 dpi (downsampled to 350 dpi when the original is above 450 dpi) for color/greyscale, and 3600 dpi (downsampled to 2400 dpi when the original is above 3600 dpi) for line art. Print options are set to a basic single copy of your publication (so that the commercial printer can use their own imposition, bleeds, etc.) This selection will also include your publication’s properties and will convert fonts that cannot be embedded to bitmap images. It will run Design Checker and warn you about any potential problems with the use of color or transparency. In addition, the option to encrypt the document with a password will be disabled.
-
Custom : This selection simply makes all the options available to you . If you choose one of the pre-set options and then edit the properties it will change to Custom .
-
Print Options: Clicking this button will launch the Print Options dialog.
-
-
Other options:
-
Picture & Line Art downsampling : If the dpi of the picture or line art is over the second number, reduce the DPI (reduce quality) to the first number. If it's not over the second number, don't change it. This helps to manage the size of your publication.
-
Warn about transparency & color use : Will run the Design Checker prior to saving - refer to Design Checker help article
-
Document Properties : Saves the document properties from the .publication file, found in the Advanced Properties of the Publication Properties, in the PDF.
-
Document Structure Tags for Accessibility : Includes PDF Tags in the resulting PDF, which make the PDF more accessible (accessibility tools know how to navigate and read the PDF) and provide PDF reader software more information about how content in the PDF is related.
-
ISO 19005-1 compliant (PDF/A) : When turned on, the resulting PDF file will be compliant with the PDF/A ISO standard. This standard is intended to create universally readable PDFs suitable for archiving.
-
All fonts are embedded, unless their license prohibits it, in which case the text is converted to a bitmap to maintain the original appearance
-
Document properties are always included
-
Any uses of transparency within the publication are removed (all transparent regions become opaque)
-
The PDF cannot be encrypted
-
The PDF is locked so that it cannot be edited
-
-
Bitmap text when fonts may not be embedded :Each font has a license which indicates whether it may be embedded in a file. If the licensedoes not allow embedding, this option will convert all such fonts to images, so that the appearance does not change when the PDF is opened on a machine that does not have the font. This will result in an increase in file size, and the loss of the ability to select and copy the text in the PDF file (since it's an image). If this option is not selected, another font will be used substituted when viewed on a machine that does not have the licensed font.
-
Encrypt the document with a password :Allows the PDF file to be encrypted with a password, so that it cannot be viewed or edited unless the password is entered.
-
Click OK and then click Publish.
Save as XPS
-
Click the File tab.
-
Choose Save & Send, select Create PDF/XPS Document, and then click Create PDF/XPS.
-
In the Publish as PDF or XPS dialog, select XPS Document (*.xps) in the Save as type pull-down.
-
Enter a name for the document in the File name text box.
-
To change the publishing options, click Change.
-
You can select from three pre-defined sets of options and change the Print Options:
-
Minimum size: This will set the resolution of pictures in your publication to a maximum of 96 dots per inch (dpi), a resolution suitable for on-screen display, but not what you generally want for a printed publication. Fonts that cannot be embedded will be bitmapped. The Print Options are optimized for online viewing of the document as a single page. This selection will also include your publication’s properties.
-
Standard: This will set the resolution of pictures in your publication to a maximum of 150 dpi, suitable for online distribution such as e-mail where the recipient may print the publication on a desktop printer. The Print Options are optimized for online viewing of the document as a single page. This selection will also include your publication’s properties as well as any structural tags to enhance accessibility.
-
High quality printing: This is the default set of options suitable for either desktop of copy shop printing. The pictures will be set to maximum of 450 dpi for color/greyscale, above this threshold and the picture will be downsampled to 300 dpi, and 1,800 dpi for line art, above this threshold and the art will be downsampled to 1,200 dpi. This selection will also include your publication’s properties, as well as any structural tags to enhance accessibility. The Print Options are optimized for printing. Fonts that cannot be embedded will be bitmapped.
-
Custom : This selection simply makes all the options available to you.
-
Print Options: Clicking this button will launch the Print Options dialog.
-
-
Click OK and then click Publish.
Pack and Go
The Pack and Go Wizard packs a publication and its linked files into a single file that you can take to a commercial printer or a copy shop to be printed. You can also take the packed file to another computer to be edited. Using the Pack and Go Wizard ensures that you have all the files necessary to hand off the completed publication to someone who can work with or view it.
Save for a commercial printer
-
Click the File tab.
-
Choose Save & Send, select Save for a Commercial Printer.
-
Under Save for a Commercial Printer, you have the following options:
-
File size and quality options: These are the same four set of pre-defined options used in saving as PDF.
-
Save PDF and Publisher files, or only PDF: You can save both a PDF and .pub file, or you can save only a PDF file to take to your printer.
-
-
Click the Pack and Go Wizard button.
-
Select a location to save the file, such as a CD drive, and click Next .
-
The wizard will pack your files and save them to the selected location, select or clear the Print a composite proof check box, and then click OK.
Note: The Print a composite proof check box is always selected by default. Use the composite proof to review and catch any errors in a printed version of your publication before you send the file to the commercial printer. If your commercial printer fixes errors in the file, the cost of printing usually increases.
Save for another computer
-
Click the File tab.
-
Choose Save & Send, select Save for Another Computer.
-
Click the Pack and Go Wizard button and then click Next.
-
Select a location to save the file, such as a CD drive, and click Next .
-
In the Include fonts and graphics dialog, select the options you want for embedding TrueType fonts, and linking graphics, and then click Next.
-
Click Finish to save your publication to a .zip file.


