
In Duet Enterprise for Microsoft SharePoint and SAP 2.0, the workflow task workspace site displays all pending tasks for a user. Users can click on a task item to see the task details page, which provides the information needed to evaluate and complete the workflow task. This can include task forms, and other relevant details, such as links to online resources and related reports and documents.
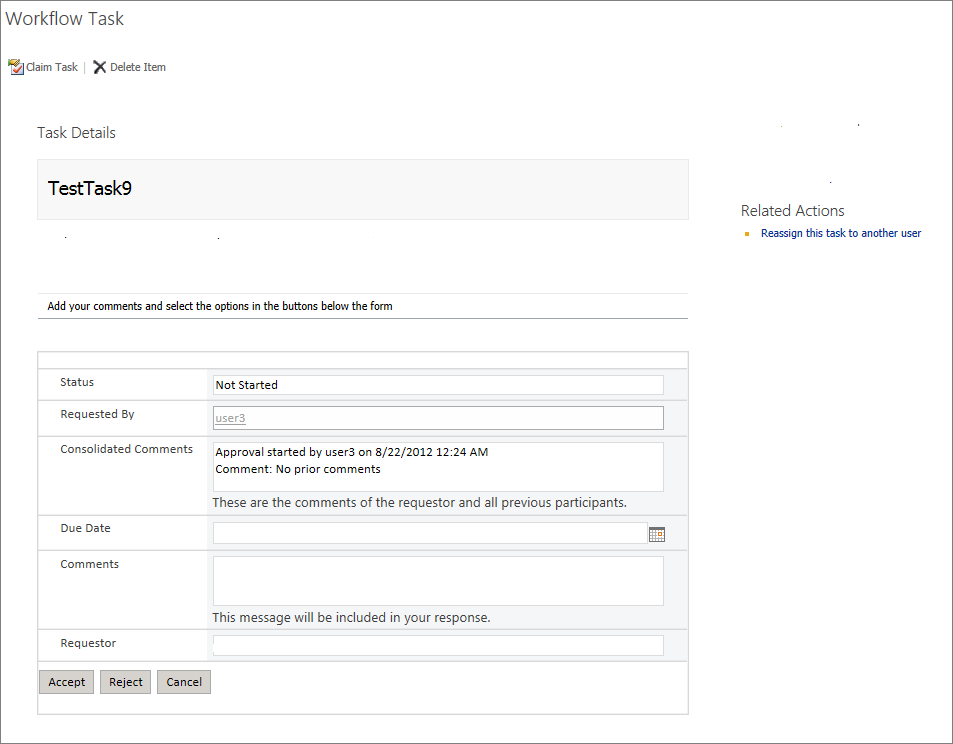
You can customize the layout of the task details page, and customize the form that displays on the page. For example, you can change the label of a field from "Comments" to "Optional Comments", or add a new text box named Project.
SharePoint Designer 2013 and InfoPath Designer 2013 are used to customize a task details page.
Note: You can use the Task Workspace Locator List to see all the workflow tasks for a root workflow site. From the root workflow site, click the Settings icon and then click Site contents. In the Site Contents page, click Task Workspace Locator List.
In this article:
Open the task details page for editing
To modify the task details page, you must open it in SharePoint Designer 2013.
-
Start SharePoint Designer 2013 and then click Open Site.
-
In the Site name box of the Open Site dialog box, enter the URL for the workflow task workspace.
-
In the Navigation pane, click Site Pages to display the list of your site pages.
-
Click the name of the task details page that you want to edit. This opens the master file for the task details page.
-
On the ribbon, click Edit File, and then click Edit File in Advanced Mode. You can now edit the layout of your site, add or remove Web Parts, and make changes as required.

-
Click Save to save your changes.
Customize the form in a task details page
Your task details page may have a form within it. To modify this form, you use SharePoint Designer 2013 to open the task details page and then edit the form in InfoPath Designer 2013.
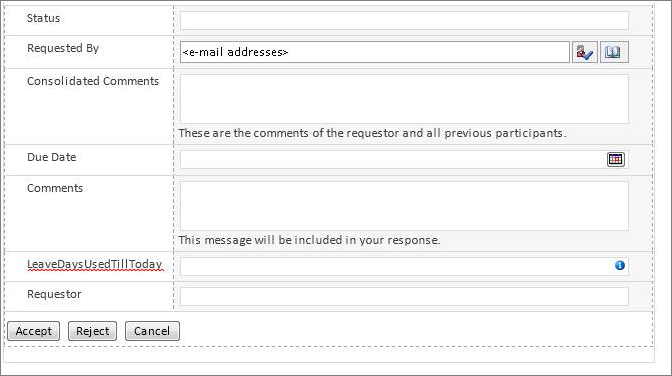
For example, you can edit the form to add an extended business property. When an SAP workflow task type is configured, the site administrator specifies any extended business properties for the SAP workflow. This enables the workflow task workspace to receive the extended business property information from the SAP system. You can then edit the task form and add a field for the extended business property. For more information about extended properties, see the "Step 3 - Configure a new SAP workflow task type" section in Create an SAP workflow on a Duet Enterprise site.
To add an extended business property to the form:
-
Start SharePoint Designer 2013 and then click Open Site.
-
In the Site name box of the Open Site dialog box, enter the URL for the workflow task workspace.
For example, the URL http://MySiteName/Workflows/LeaveTask/
-
In the Navigation pane, click Workflows to display a list of active workflows.
-
In the List Workflow section, click the name of the workflow that you want to customize.
-
In the Forms section of the page, click the form that you want to edit. This opens the form in InfoPath Designer.
-
Add a row to the table.
-
In the Fields pane, under the Actions section, click Manage Data Connections.
-
In the Data Connections dialog box, click the data connection that the task details form is currently using, and then click Add.
-
In the Data Connection Wizard, click Next.
-
In the Select the data source of your data page, click SharePoint library or list, and then click Next.
-
In the SharePoint site details page, enter the URL of the workflow task workspace, and then click Next.
This is the same URL that you specified in step 2. -
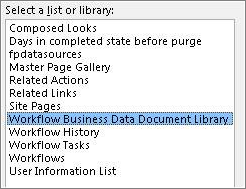
In the Select a list or library list, click Workflow Business Data Library, and then click Next.
-
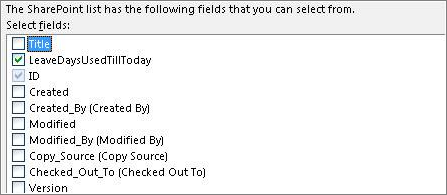
In the Select fields box, select the extended business property that you want to add to the form, and then click Next.
Note: Extended business properties come from the SAP system. If you do not see the extended business property that you expected to see, confirm with the site administrator that the extended business property is configured in the SAP workflow task type.
-
If you want to store data in the form template for offline use, select Store a copy of the data in the form template. Click Next.
-
Enter a name for the data connection and then click Finish to close the Data Connection Wizard.
-
In the Fields pane, click Show advanced view.
-
In the Fields list, click the name of the data connection that you specified in step 15.
-
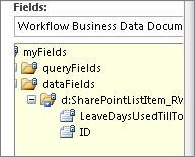
Expand the dataFields group until you see the field that you want to add to the form.
-
Click the field that you want to add and drag it to the right column of the new row in the form.
-
In the left column of the new row, enter a display name for the row.
-
When you finish modifying the form, click Save.
-
Click File, and then click Quick Publish.


