
You can create workspaces for synchronizing SharePoint content on your local computer, which are intended for your own exclusive use. These workspaces are called SharePoint workspaces. You can also create workspaces that use tools for sharing content with other people who join the workspace as invited members. These workspaces are called Groove workspaces (Microsoft SharePoint Workspace was previously named Microsoft Office Groove). Finally, you can also create "Shared Folders," which is a special workspace type that allows you to share the contents of a folder in your windows file system.
You can create a new SharePoint workspace starting from a SharePoint site in a Web browser, from the SharePoint Workspace Launchbar, or from the Backstage view. When you create the SharePoint workspace, you can choose to download all supported lists and libraries, or download selected lists and libraries. Downloading all lists and libraries is simplest, but takes more time compared to setting up a selective download.
Note: SharePoint workspaces can synchronize only with sites running on Microsoft SharePoint Server 2010 or later, Microsoft SharePoint Foundation 2010, SharePoint Online 2010 servers or later.
This article describes how to:
Creating a SharePoint workspace, starting from a SharePoint site
When you create a SharePoint workspace from a SharePoint site, you can optionally configure the workspace to initially download items from all or only selected lists and libraries. You can:
Create the SharePoint workspace, downloading items from all lists and libraries
This is the simplest way to create a SharePoint workspace. However, it may also take some time depending on the number of lists and libraries, and the number of items in those lists and libraries, on the selected SharePoint site.
-
In a Web browser, go to the SharePoint site you would like to synchronize in a SharePoint workspace.
-
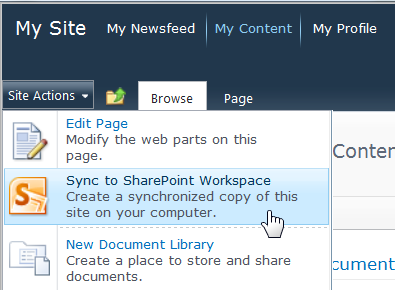
Click Site Actions and then click Sync to SharePoint Workspace.
Note: If you don’t see a Site Actions menu, you’re probably looking at a 2013 SharePoint site. If this is the case, in order to create the workspace you must use the procedure described below in Create a SharePoint Workspace, starting from the Launchbar or the Backstage view.
-
In the Sync to SharePoint Workspace dialog box, click OK.
A sync progress dialog box opens to keep you informed about the progress of the download from the SharePoint site to the SharePoint workspace.
-
When the download completes, click Open Workspace or Close.
Create the SharePoint workspace, downloading items from selected lists and libraries
You can decide which lists and libraries to download when the SharePoint workspace is created. This can save you time if you are only interested in working with items from selected lists and libraries.
-
In a Web browser, go to the SharePoint site you would like to synchronize in a SharePoint Workspace.
-
Click Site Actions and then click Sync to SharePoint Workspace.
Note: If you don’t see a Site Actions menu, you’re probably looking at a 2013 SharePoint site. If this is the case, in order to create the workspace you must use the procedure described below in Create a SharePoint Workspace, starting from the Launchbar or the Backstage view.
-
In the Sync to SharePoint Workspace dialog box, click Configure to open the Configure Settings dialog box.
For each selected library, you can choose All Items (the default), Headers Only, or No Content.
The Headers Only option downloads only document properties. You might use this option if you only want to work with a few, selected documents in a large document library. You can thus save the time of downloading the entire library. To download the content of selected documents, click the Sync tab, click Download Contents, and then click Download. You can also double-click individual documents to download their content.
For each selected list, you can choose All Items (the default), or No Content.
Tip: You can right-click each list or library to select a download option.
-
When you are done configuring the download settings, click OK.
A sync progress dialog box opens to keep you informed about the progress of the download from the SharePoint site to the SharePoint workspace.
-
When the download completes, click Open Workspace or Close.
Create the SharePoint workspace, downloading items only from a specific list
Sometimes you may want to synchronize only a specific list to your computer in a SharePoint workspace. You can do so and avoid spending the time downloading items from other SharePoint lists.
-
In a Web browser, go to the SharePoint site you would like to synchronize in a SharePoint Workspace.
-
Select the list you want to sync to your computer.
-
Click List under List Tools.
-
In the SharePoint ribbon, click Sync to SharePoint Workspace.
-
Click OK to start downloading the list to the workspace.
-
When the download completes, click Open Workspace or Close.
Create the SharePoint workspace, downloading items only from a specific library
Sometimes you may want to synchronize only a specific library to your computer in a SharePoint workspace. You can do so and avoid spending the time downloading items from other SharePoint lists.
-
In a Web browser, go to the SharePoint site you would like to synchronize in a SharePoint Workspace.
-
Select the library you want to sync to your computer.
-
Click Library under Library Tools.
-
In the SharePoint ribbon, click Sync to SharePoint Workspace.
Note: If you’re looking at a SharePoint 2013 site, you’ll see the option “Sync library to computer” instead of “Sync to SharePoint Workspace”. If this is the case, in order to create the workspace you must use the procedure described below in Create a SharePoint Workspace, starting from the Launchbar or the Backstage view.
-
Click OK to start downloading the library to the workspace.
-
When the download completes, click Open Workspace or Close.
Creating a SharePoint workspace, starting from the Launchbar or the Backstage view
-
Click New and then click SharePoint Workspace.
-
Do one of the following:
-
If listed, click the SharePoint site from which you want to download content.
-
If the SharePoint site you want is not listed, enter the Web address for the site in the Location box.
To avoid typographical errors, you can copy and paste the SharePoint site Web address from a Web browser.
-
-
If you want to download all supported lists and libraries, click OK.
-
If you want to download selected lists and libraries, click Configure...
-
In the Configure Settings dialog box, change the download settings, as desired, for each list or library by clicking the drop-down menu in the Content column.
-
Click OK.
A sync progress dialog box opens to keep you informed about the progress of the download from the SharePoint site to the SharePoint workspace.
-
When the download completes, click Open Workspace or Close.
If you previously downloaded items from only selected lists and libraries, you can download the other lists and libraries later as needed.
Creating a new Groove workspace
You can create a new Groove workspace from the Launchbar or from the Backstage view.
-
Click New and then click Groove Workspace.
-
Type a name for the workspace.
-
To change the workspace version for the new workspace, click Options, and then selection the version you want from the drop-down menu.
The workspace version determines the list of tools that will be available for adding to the workspace. It also sets version requirements for people who might become members of the workspace. For example, people who are still running Office Groove 2007 can only join workspaces that contain version 2007 tools (or earlier).
-
Click Create.
SharePoint Workspace creates the Groove workspace and lists you as the initial member with the role of Manager. You can now add or update workspace tools and invite people to join as members.
Creating a new workspace from a template
If you have saved an existing Groove workspace as a template or have access to Groove workspace templates created by others, you can use these as the basis for new workspaces.
-
Go to the Backstage view and click New.
-
Click Workspace from Template.
If the workspace template file is stored in the Groove Workspace Templates folder in My Documents (the default location), you can select it in the Browse dialog box. If it is stored in another folder, you will need to go to the folder in the Browse dialog box and then select it.
-
Click Open.
Creating a new workspace from an archive
In general, the purpose for creating a Groove workspace from an archive is to restore the workspace.
Creating a shared folder
You can create a shared folder directly in Windows Explorer or in the SharePoint Workspace Launchbar. You can also create a shared folder from a folder that is already being synchronized. For information, see Creating a shared folder.


