
Note: This article applies to classic publishing sites in SharePoint only. If you are using SharePoint for Microsoft 365 and creating modern pages, see Create and use modern pages on a SharePoint site.
SharePoint Publishing pages provide familiar buttons and tools for authoring simple web pages. The pages are based on page layouts, which are templates that determine how a page should look and where content should be placed. Because the templates define the basic layout, authors can focus on creating and formatting text, inserting graphics and other elements, and publishing the finished pages.
A brief tour of the ribbon
If you’ve worked with team sites or document libraries you’ve probably already used the ribbon. But publishing sites have some unique buttons and features that enable you to author and publish site pages. Let’s take a look.
Note: Available options depend on which features are enabled and how page layouts and content types have been configured. If options you want to use are grayed on your ribbon, see your site administrator.
Page tab

Use the Page tab to edit or save a page, check a page in and out, view history of the page, preview it, set SEO properties (public websites only), change the page layout, and more. Your changes are made in real time so you don’t have to wait to see them take effect.
Publish tab
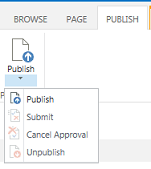
Use the Publish tab to publish your page to production servers (also known as making the page go live) or submit it for approval when a publishing workflow has been set up for your site. You can also unpublish a page, such as when the content is out of date or no longer needed, or cancel the approval workflow. You might cancel the workflow when you discover that additional changes are necessary before a page can be published.
Not all sites use an approval workflow. Workflows are quite handy when a site includes multiple stakeholders or must be carefully reviewed before any content is published. The workflow automates the routing of pages for approval and ensures that no content is published until all approvals have been received. Site administrators configure the workflow when provisioning the publishing site or site collection. For more information about publishing workflows see Work with a publishing approval workflow.
Format Text tab

Buttons on the Format Text tab should be familiar if you’ve used Office applications such as Microsoft Word or PowerPoint. These buttons allow you to control font sizes and styles, insert bullets or numbered lists, cut and paste, check spelling, and so on.
Insert tab
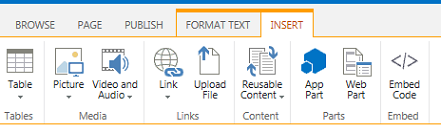
Use the Insert tab to insert tables, pictures, audio files, videos, hyperlinks, and so on. You can also insert App Parts and Web Parts from this tab. App Parts are small web applications that perform specific tasks. For example, you might add an Access app, which enables you to pull data from an Access database into your site pages.
Web Parts are preconfigured controls that enable you to add functionality to a web page. For example, let’s say you’re writing welcome text for the home page of your site. You want to include a hyperlinked table of contents to show users both the available site content as well as how the site is structured. You could do this easily by inserting the table of contents web part on your page. Once inserted, the table of contents is automatically structured to reflect your site hierarchy and all hyperlinks are inserted for you.
Site administrators or others with appropriate permissions can create custom apps that meet the unique needs of your team or organization. For more information see Support resources for developing apps for Office and SharePoint.
Create a publishing page
Once a publishing site has been established, it’s easy to create new pages for it. But you must be part of the site owners or members group in order to author site pages. If you aren’t already a member of one of these groups or are unsure about your membership, see your site administrator.
-
Navigate to the publishing site where you want to create a page.
-
Click Settings

-
In the Add a page dialog, type a name for the page. This name appears at the top of the new page, in the Quick Launch, and in the title bar of the browser window.
-
Click Create. The new page opens in edit mode with a notice at the top that says the page is checked out to you.
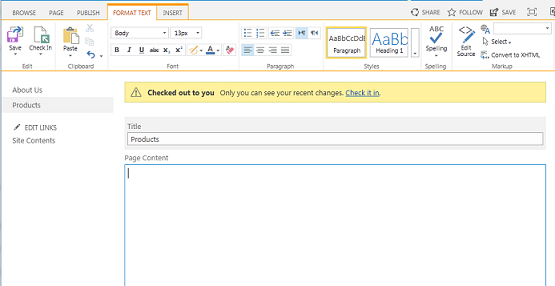
As long as the page is checked out to you, no other users can see your changes or make changes of their own. Once you the check in the page, others in your organization can check it out and edit it but site visitors can’t see it yet. The page is not visible to site visitors until you publish it.
Edit a publishing page
-
Navigate to the publishing page that you want to edit.
-
On the Page tab click Edit.
-
Make your changes, and then click Save. Changes will not be visible to others in your organization until you check them in.
Check out a publishing page
When you create or edit a publishing page, the page is automatically checked out to you. You can manually check it out by following these steps.
-
Navigate to the publishing page that you want to check out.
-
On the Page tab click Check Out.
Check in a publishing page
-
Navigate to the publishing page that you want to check in.
-
On the Page tab click Check In.
-
Type comments relevant to the check-in. These will be visible in the page history.
-
Click Continue.
Publish or unpublish a page
-
Navigate to the page that you want to publish.
-
On the Publishing tab click:
-
Submit to queue the page for approval by one or more stakeholders on your site. Note that this button will not be enabled unless a publishing workflow has been set up by the site administrator.
-
Publish if you are ready to publish the page immediately and have the permissions to do so. Note that this button may not appear on your page if the publishing workflow is set up to require the content to be approved before it can be published.
-
To unpublish the page:
-
Navigate to the page that you want to unpublish.
-
Click Settings
-
On the Publish tab click Unpublish.
Delete a publishing page
-
Navigate to the page that you want to delete.
-
On the Manage tab click Delete Page.
-
Click OK to confirm. The page will be placed in the Recycle Bin.
Restore a deleted page from the Recycle Bin
-
Click Settings
-
On the SharePoint site, on the left navigation pane, choose Recycle Bin.
-
Select the item that you want to restore.
-
Click Restore Selection.
-
Click OK to confirm.


