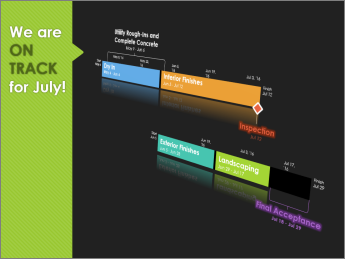
A timeline can really help you out when you need to report “big picture” project information. It’s a professional-looking snapshot of key tasks and milestones that’s good to go in any status meeting — just drop it into a PowerPoint slide or Word doc, print it, or email it to your boss.
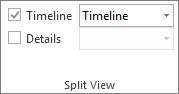
Tip: The timeline is on by default most of the time. It appears above the current view.
-
Click View, and then select Timeline.
-
Right-click a task, and then click Add to Timeline. Repeat this for each task or milestone you want to add.
Tip: If you're using Project as part of a Project Online subscription, you can give your timeline a name! Click the Timeline view, then click Format > Bar Label.
In Project, you can create a second timeline bar, to show multiple timelines, and then you can change the start and end dates for each timeline.
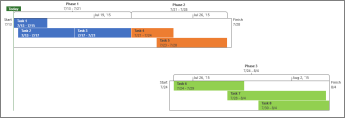
To add another timeline bar
-
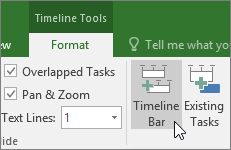
Click the Timeline view, and then click Format > Timeline Bar.
-
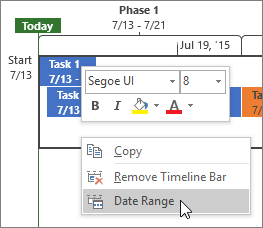
Right-click a timeline and choose Date Range to choose custom start and finish dates.
You can use the timeline as-is, or you can rearrange the tasks any way you want, add text, and even change their colors to make them stand out.
Before:
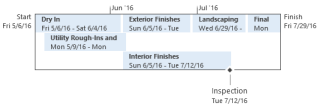
After:

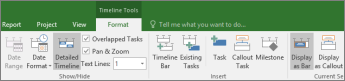
Here's how! Click anywhere in the timeline, and then click Format to see all your options for making the timeline look better.
Make some tasks callouts
-
Click a task in the timeline.
-
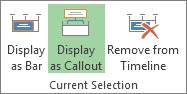
Click Format > Display as Callout. The task now points to the timeline from above or below.
-
Drag the task to where you want it.
-
Click a callout and then click Display as Bar to turn it back into a bar.
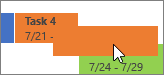
Move tasks to separate rows
Drag tasks up or down within the timeline to show them on different rows, or drag tasks between different timelines.
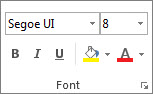
Change bar, background, and font colors
Click the task you want to change in the timeline. To pick several tasks at the same time, hold down Ctrl and click each one.
-
Click Background Color (the little paint bucket) and pick the color you want.
-
Use the other options in the Font group to change the look of the task. This works the same as in other Office programs.
Note: Don't want to see the progress shading on task? If you're using Project as part of a Project Online subscription, you can click Format > Date Format > Task Progress to toggle this off.
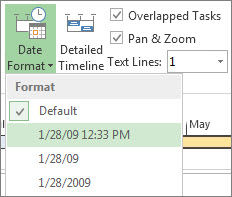
Change the date format
Click anywhere on the timeline, click Format > Date Format, and pick the format you want. This list is also where you go to get rid of dates on the timeline altogether.
Tip: When you paste a timeline into Word, PowerPoint, Outlook, Excel, or Visio, you get even more advanced formatting options. You can add reflections, 3D effects, gradients, and more to your timeline.