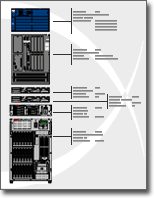
A rack diagram helps make quick work of designing and documenting a rack of network equipment. When purchasing equipment, rack diagrams can help you determine which equipment and racks to buy.

With Microsoft Visio, you can quickly build a rack diagram from equipment shapes that conform to industry-standard measurements. The shapes are designed to fit together precisely, and their connection points make them easy to snap into place.
You can also store data such as serial number and location with the equipment shapes and generate detailed reports based on that data.
What do you want to do?
Create a rack diagram
-
On the File menu, point to New, point to Network, and then click Rack Diagram.
-
From Rack-mounted Equipment, drag a Rack shape onto the drawing page. To hide the U height, right-click the shape and then click Hide U sizes on the shortcut menu.
-
Find an equipment shape that you want to add to your drawing, and drag it onto the Rack shape.
Connection points at the lower corners of the equipment shape are glued to the connection points on the Rack shape. When the equipment shape is correctly connected to the Rack shape, the connection points turn to a different color, indicating that they are glued.
Notes:
-
The connection points turn to green in Visio 2016 and newer versions.
-
-
To add text to an equipment shape, click the shape and type. To move the text, drag the control handle.
Notes:
-
In Visio 2016 and newer versions, the control handle is:

-
-
To store data with a shape, right-click the shape, point to Data on the shortcut menu, and then click Shape Data.
-
In the Shape Data dialog box, type values for the data that you want to store.
Generate equipment reports
-
On the Review menu, click Shape Reports.
-
In the Reports list, click the name of the report definition that you want to use.
Tip: If you don't see the report definition that you want, clear the Show only drawing-specific reports check box, or click Browse and navigate to the location of the report definition.
Notes:
-
To modify an existing report definition before you generate a report, select the report definition, click Modify, and then follow the instructions in the Report Definition Wizard.
-
To create a new report definition, click New, and then follow the instructions in the Report Definition Wizard.
-
-
Click Run, and then, in the Run Report dialog box, select the report format that you want:
-
To save your report as a Web page, click HTML.
-
To create your report on a Microsoft Office Excel worksheet, click Excel.
-
To save your report as an Excel worksheet embedded in a shape in your drawing, click Visio shape.
-
To save your report as an XML file, click XML.
Note: You must have Microsoft Office Excel installed in order to save your report as an Excel worksheet or as an embedded shape in your drawing.
-
-
Do one of the following:
-
If you are saving your report as a Microsoft Office Visio shape on the drawing, select whether to save a copy of the report definition with the shape or to link to the report definition.
Tip: If you intend to share your drawing with others, select Copy of report definition so that others can see the report.
-
If you are saving your report as an HTML or XML file, type a name for the report definition.
-
-
Click OK.


