
Visio includes shapes to build a table in a drawing, though their editing capabilities are limited. If you want a table you can customize, or you want to show information that might change, it’s best to build a table in Excel, Word or PowerPoint, and paste it onto your drawing.
Build a table with Visio shapes
The most common Visio shapes to build tables are in the Charting Shapes stencil.
In the Shapes window, click More Shapes, then point to Business > Charts and Graphs and click Charting Shapes. The stencil appears in your Shapes window.
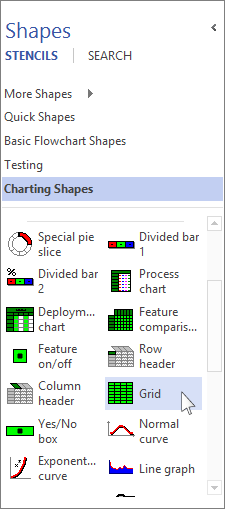
The Grid shape is the easiest way to start most common tables.
-
Drag the Grid shape from the Shapes window to the drawing page.
-
In the Shape Data box that appears when you release the shape, enter how many rows and columns you want in your table. Click OK, and the grid appears on the drawing.
Tip: To move the table, drag it without clicking it first. If you click the table, you’ll probably select a single cell in the grid, and then the table won’t move. If that happens, click away from the table and then try again to drag it.
-
To make the table bigger or smaller, drag the sizing handles on the shape sides.
-
Double-click in any cell to begin typing. To stop typing in that cell, press Esc or click another part of the drawing.
Note: The cell size does not automatically adjust if the text won’t fit in the cell. If this is important, it might be easier for you to build the table in Excel or Word. See below for more about that.
-
If you want special headers for your rows or columns, drag the Row Header or Column Header shape onto the drawing page and place them where you want them. Double-click to type in them.
Paste a table from another Office program
You might find it easier or more flexible to build a table in Excel or Word and place it onto your Visio drawing. Use Paste Special to keep the table’s original formatting, and to let you edit it later in the program you built it in.
Note: You can paste a table built in PowerPoint and keep its original formatting, but you can’t edit the table later, even if you use Paste Special.
Use these same steps to copy from an Excel spreadsheet or from a Word document. For this example, we’ll use an Excel worksheet.
-
Select the table from an Excel spreadsheet, or the portion of a spreadsheet, that you want on your drawing. Right-click the selected cells and click Copy.
-
In Visio, right-click the page where you want to put the table, then click Paste Special.
Important: Be sure to use Paste Special. If you click Paste, you lose the rows, columns and formatting of the table.
-
In the Paste Special box, in the As list, click Microsoft Excel Worksheet to paste it as an Excel table. To edit the table later, double-click it on your drawing. A small Excel file opens to let you edit.
If you click to paste as a Worksheet or Document and nothing happens, check the program the table was built in. For example, when you return to Excel, you might find a security notice that is triggered because Visio uses a macro to connect the table with Excel. Click Enable Macros, and if you get another notice about data connections, click Enable. The table should then appear on your Visio drawing.
Tip: If you don’t think you will need to edit the tables later, in the Paste Special box, in the As list, click Picture. The table keeps the formatting it has in the program you built it in.


