

Try it!
Sometimes in your queries, you want to see all the records from one table, along with the matching records from another table. To do this, create outer joins.
Inner joins only display data when there is a matching ID in both connected data sources. For example, if you want to display the products and quantities sold, you create an inner join between the Products and Order Details tables. When you run the query, only products that occur in orders, and thus appear in both tables, are returned.
In contrast, outer joins return all the data from one data source and some of the data from another table or data source.
For example, if you want to see which products haven’t sold, you create a query that shows the Product ID from the Products table and any matching Order IDs from the Order Details table. Products that don’t have matching records in the Order Details table return the product name with no value for the Order ID field.
Left outer joins and right outer joins
In an outer join, the table that displays all its records is called the base table. The table that displays only some (matching) records is called the secondary table.
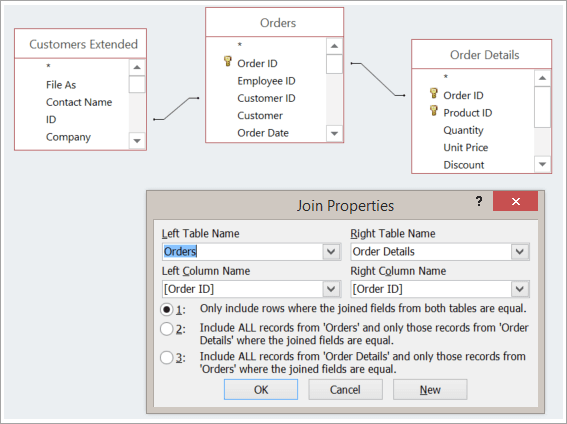
The Join Properties dialog box describes what you see with different types of joins:
Suppose you’ve created a query to show which products your customers bought. Your output fields are Product Name, Order ID, and Quantity.
-
Inner join. Only include rows (records) in which the joined fields from both tables are equal, for example, only the products that have orders associated with them.
-
Left outer join. Include all records from the table under Left Table Name and only those records from the table under Right Table Name in which the joined fields are equal, for example, all orders, but only the quantities and Product IDs for those orders that have products associated with them.
-
Right outer join. Include all records from the table under Right Table Name and only those records from the table under Left Table Name in which the joined fields are equal, for example, all the products, even when there are no orders for them, in which case blank values appear in the Order ID and Quantity fields.
As you can tell from these examples, it’s important to know which table is on the left and which is on the right, which can actually be different from how the tables are arranged in the query window. To understand which data you’ll get from your query, read the text carefully in the Join Properties dialog box.
1. Add data sources
-
Select Create > Query Design.
Add all the tables and queries you need as data sources. (Don’t worry. If you forget one, you still have an opportunity to add more data sources later.)
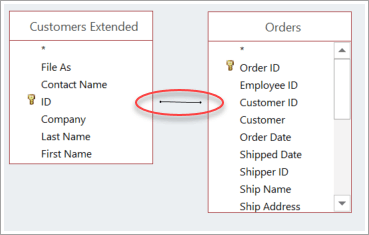
If it detects or deduces them, Access may show relationships for the data sources.
2. Add a join
-
If you don’t see a relationship between the sources, add a join. Drag from the field you want in one data source to the corresponding field in another data source. The table you drag from is the table that will appear on the left in the Join Properties dialog box. By default, Access creates an inner join. If you need an outer join, change its type.
3. Change a join
-
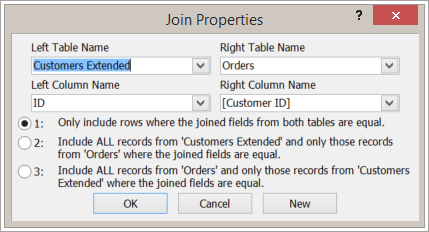
Double-click the line representing the join you want to change.
-
In the Join Properties dialog box, to create an outer join, select the second or third option. Then, select OK.
Remember to pay attention to which table is the base table—the one from which all records are displayed.
4. Complete the query
Follow the usual steps for creating a query: add output fields, add any criteria, and run or save your query. To learn how, see Create basic queries.
Want more?


Need more help?
Want more options?
Explore subscription benefits, browse training courses, learn how to secure your device, and more.


Communities help you ask and answer questions, give feedback, and hear from experts with rich knowledge.


