
You can manage your queries either in the Queries pane of the Power Query Editor or on the Queries tab of the Queries & Connections pane in Excel. This is especially helpful if you have many queries and you want to quickly locate a query. Once you find a query, there are a number of additional actions you can do, such as duplicate, reference, merge, append, share, and delete a query.
When you create a query, connection information is created behind the scenes. The role of the query is to shape the data. The role of the connection information is to maintain data source information and to refresh the data according to refresh settings, such as the frequency.
Not all queries may be loaded to a worksheet. This can occur when you import data from an external data source, shape the data in Power Query Editor, select Home > Load To, and then use the Import Data dialog box to put the query either in a Data Model or an Office Data Connection (ODC) file.
The following is a summary of the commands you can use listed in the order they are displayed on their respective context menus of the Queries tab of the Queries & Connection pane in Excel or the Queries pane in the Power Query Editor. Some commands are only available on one pane. Many of these commands are also available on the context Query tab in the ribbon. All queries in the workbook are displayed and sorted by the date and time when they were last modified starting with the most recent.
-
Do one of the following:
In Excel Select Data > Queries & Connections > Queries tab.
In the Power Query Editor Select Data > Get Data > Launch Power Query Editor, and view the Queries pane on the left. -
Select a query management command:
Edit Edits the query in the Power Query Editor. Only available on the Queries tab of the Queries & Connections pane.
Delete Removes a query.
Rename Changes the query name.
Refresh Brings in up-to-date data from external data sources. Only available on the Queries tab of the Queries & Connections pane. For more information, see Refresh an external data connection in Excel.
Load To Displays the Import Data dialog box so you can select how you want to view the data, where you want to put it, and add it to a Data Model. Only available on the Queries tab of the Queries & Connections pane.
Duplicate Creates a copy of the selected query with the same name as the original query appended by (2). You can rename the query to identify it more easily. Subsequent changes to the original query won’t affect the new query.
Reference Creates a new query that uses the steps of a previous query without having to duplicate the query. The new query follows a similar naming convention as the Duplicate command. You can rename the new query to identify it more easily. Subsequent changes to the original query will affect the new query if the output is changed.
Merge Merge columns in a query with matching columns in other queries. For more information about merging see Merge queries. Only available on the Queries tab of the Queries & Connections pane.
Append Append columns in a query with matching columns in other queries. For more information about appending see Append queries. Only available on the Queries tab of the Queries & Connections pane.
Move To Group Moves the query to a group in the list or if there are no groups, select New Group to create one. Give it a meaningful name, such as Budget or Marketing. Use groups to organize many queries into categories. You can even create groups within groups.
Move Up Moves the query up in the list of queries.
Move Down Moves the query down in the list of queries.
Create Function displays the Create Function dialog box. Only available on the Queries pane in the Power Query Editor. For more information, see Power Query M function reference.
Convert to Parameter Converts the query to a parameter and displays it in Preview Data. If the current display is a parameter, then the command toggles to Convert To Query. Only available on the Queries pane in the Power Query Editor. For more information, see Create a parameter query (Power Query).
Advanced Editor Opens the Advanced Editor window. For more information, see Create Power Query formulas in Excel. Only available on the Queries pane in the Power Query Editor.
Export Connection File Saves the query as an ODC connection file. The ODC file contains the query definition, the data source connection information, and all the transformation steps. This is useful when you want to share queries with other users and workbooks. Alternatively, you can use the Properties command on the Query context tab of the Power Query ribbon. For more information, see Create, edit, and manage connections to external data. Only available on the Queries tab of the Queries & Connections pane.
Show the Peek Displays the query flyout with a data preview and other useful information. Only available on the Queries tab of the Queries & Connections pane.
Properties Use this command to manage a query and its data source connection information. On the Queries tab of the Queries & Connections pane, opens the Query Properties dialog box. On the Queries pane in the Power Query Editor, opens the Query Settings dialog box.
You can enable or disable the display of the query flyout when you hover over a query name on the Query tab in the Queries & Connections pane. This option only controls the display of the flyout by hovering. You can still display the query flyout by right clicking on the query name, and then selecting Show the Peek.
-
Select Data > Get Data > Query Options.
-
On the left under GLOBAL, select General.
-
On the right, under Query Preview clear the check box next to Show the peek on hover. The default action is to display the flyout when you hover.
Excel for the Web incorporates Power Query (also called Get & Transform) technology to provide greater capability when working with imported data sources. You can view your queries and related details in the Queries task pane.
Notes:
-
Watch for further announcements about improvements to Excel for the Web and Power Query integration.
-
Viewing queries is available to all Office 365 Subscribers. Managing queries and groups is available to all Office 365 Subscribers with Business or Enterprise plans.
You can view your queries and related details in the Queries pane.
-
Make sure you’re in Editing view (select Viewing > Editing).
-
Select Data > Queries.
Result
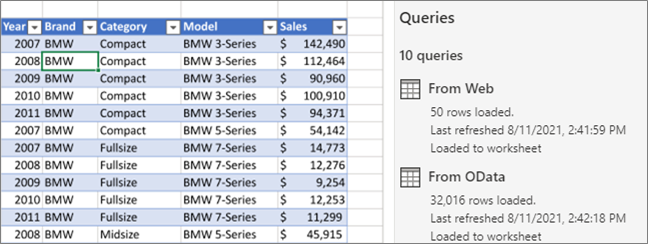
Excel displays the Queries task pane and all queries in the current workbook along with query details, such as row count, last refresh date, location, and load status. If a query is loaded to the Data Model and not to the grid, Excel displays "Connection Only".
You can perform various grouping tasks to better organize your queries.
-
Make sure you’re in Editing view (select Viewing > Editing).
-
Select Data > Queries.
-
Do one or more of the following:
Create a group
-
At the top right of the Queries pane, select More Options … > New group.
-
Enter a name, optionally a description, and then select Save.
Move a query or group into another group
-
Next to a query or group name, select More Options … > Move to group.
-
Select the group to which you want to move, and then select Save.
Move a group to the top level
-
Next to a group name, select More Options … > Move to top level.
Expand or collapse groups
-
To expand or collapse all groups, at the top right of the Queries pane, select More Options … > Expand all or Collapse all.
-
To expand or collapse a specific group, select the arrow next to the group name.
Refresh all queries in a group
-
Next to a group name, select More Options … > Refresh.
Note Refresh only works for supported data sources. For more information, see Power Query data sources in Excel versions.
Ungroup queries within a group
-
Next to a group name, select More Options … > Ungroup.
Note This action deletes the group, but not the queries in this group.
Rename a group
-
Next to a group name, select More Options … > Rename.
-
Enter the new name, and then press RETURN.
Delete a group
-
Next to a group name, select More Options … > Delete group.
Edit group properties
-
Next to a group name, select More Options … > Properties.
-
Rename the group or change its description, and then select Save.
Tip You can see the group description by hovering over it.
-


