
Fields codes are useful as placeholders for data that might change in your document, and you can use them to automate certain aspects of your document. Field codes are inserted for you when you use Word features like page numbers or a table of contents, but you can insert field codes manually for other tasks like performing calculations or filling in document content from a data source.
These steps work for inserting any field code in Word. For a list of all field codes with detailed information about each, see List of field codes in Word.
-
Click where you want to insert a field.
Tip: If you know the field code for the field that you want to insert, you can type it directly in your document, but not by typing the bracket characters. Press Ctrl+F9, and then type the code within the brackets.
-
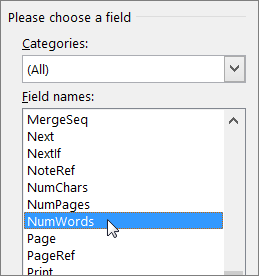
Click Insert > Quick Parts > Field.

-
In the Field names list, select a field name.
Tip: You can filter the list by clicking the down arrow in the Categories list.
-
Under Field properties, select any properties or options you want, and click OK.
Notes:
-
To see the codes for a particular field in the Field box, click Field Codes. For some fields, this button is clicked by default.
-
To nest a field within another field, first insert the outer, or container, field (steps 1-4 above). Then place the insertion point inside the field code where you want to insert the inner field, and repeat steps 2-4 above.
-
Right-click in the field, and then click Edit Field.
-
Change the field properties and options. For information about the properties and options available for a particular field, see List of field codes in Word.
Notes:
-
For some fields, you must display the field code to edit the field: press Alt+F9.
-
Some fields are edited in their own dialog boxes instead of in the Field dialog box. For example, if you right-click a hyperlink and then click Edit Hyperlink, the Edit Hyperlink dialog box opens.
-
Press Alt+F9 to switch between viewing field codes and viewing field results in your document. When you view a field code , the syntax looks like this:
{ FIELD NAME Properties Optional switches }
-
FIELD NAME This is the name that appears in the list of field names in the Field dialog box.
-
Instructions These are any instructions or variables that are used in a particular field. Not all fields have instructions. In the Field dialog box these are listed as Field properties.
-
Field-specific switches These are settings that can be turned off and on for a particular field. Not all fields have switches. In the Field dialog box these are listed as Field options.
-
General switches These are settings that govern the format of the field results, such as capitalization of text and date/time format. In the Field dialog box these are listed as Format choices. For details, see Format field results.
For information about the syntax for a particular field, see List of field codes in Word.
Security Note: Because field codes can be visible to anyone reading your document, be sure that the information you place in field codes is not information that you want kept private.
By default, Word displays the field results seamlessly with the content of your document so that someone reading the document is unaware that part of the content is in a field. However, fields can also be displayed with a shaded background, to make them more visible in the document.
-
Click the File > Options. (In Word 2007, click Microsoft Office Button

-
Click Advanced.
-
Under Show document content, in the Field shading list, do one of the following:
-
To make fields stand out from the rest of the document content, select Always.
-
To make fields blend in seamlessly with the document content, select Never.
-
To make users of Word aware that they have clicked in a field, select When selected.
When the field shading option is set to When selected, the field displays a gray background when you click within the field. However, the gray shading does not indicate that the field is selected. When you select the field by double-clicking or dragging the mouse, highlighting that indicates selection is added to the gray shading.
-
By default, Word automatically updates fields when a document is opened. That way, information stays up to date. There are situations where you might not want this to happen, however. For example, you may want the date in the header to reflect a particular date rather than automatically updating to the current date every time the document is opened.
Fields can also be updated by right-clicking a field and then clicking Update Field or by clicking in a field and then pressing F9.
To manually update all the fields in the main body of a document, press Ctrl+A, and then press F9. Fields in headers, footers, or text boxes must be updated separately. Click within the header, footer, or text box, press Ctrl+A, and then press F9.
You can lock fields to prevent automatic or inadvertent updating of the field.
Lock or unlock a particular field
Do one of the following:
-
To lock a field so that field results are not updated, click the field, and then press Ctrl+F11.
-
To unlock a field so that field results can be updated, click the field, and then press Ctrl+Shift+F11.
Lock results of BOOKMARK, INCLUDETEXT, and REF fields
The Lock Result (\!) field switch prevents a field that is included in the result of a BOOKMARK, INCLUDETEXT, or REF field from being updated unless the field result in the original location has changed. Without this switch, Word updates fields that are included in a field result whenever the BOOKMARK, INCLUDETEXT, or REF field is updated.
For example, the field { INCLUDETEXT C:\\Sales\Qtr4 Sales.doc \! } inserts the contents of the document "Qtr4 Sales.doc," which contains a DATE field and an EMBED field. If you update the INCLUDETEXT field, the \! switch prevents Word from updating the DATE and EMBED fields in the included text unless they are first updated in the original document ("Qtr4 Sales.doc"). The switch ensures that the text inserted by the INCLUDETEXT field matches the text in the original document.
To update the DATE and EMBED fields in both locations, update fields in the original document (Qtr4 Sales.doc), and then update the INCLUDETEXT field.


