
Use your keyboard to customize the Quick Access Toolbar. You learn how to add buttons to the Quick Access Toolbar for your favorite features and commands to quickly get around in any Microsoft 365 app without using a mouse. You'll also learn how to access the toolbar, change the order of the buttons, remove a button, and much more.
In this topic
What is the Quick Access Toolbar?
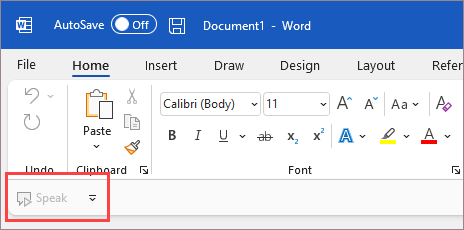
The Quick Access Toolbar is a collection of shortcuts to the features, options, commands, or option groups that you use frequently. By default, the toolbar is hidden below the ribbon in Microsoft 365 apps, but you can choose to show it and move it to display above the ribbon instead.
Show or hide the Quick Access Toolbar
-
In any Microsoft 365 app, press the Alt key.
-
Press Z and then R to expand the Ribbon Display Options menu.
-
Do one of the following:
-
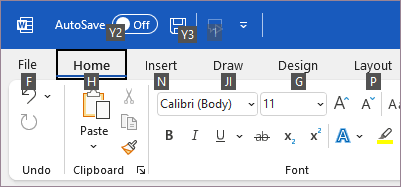
If the Quick Access Toolbar is hidden, press S to select Show Quick Access Toolbar.
The Quick Access Toolbar appears below the ribbon. -
If the Quick Access Toolbar is visible, press H to hide it.
-
Use the buttons on the Quick Access Toolbar
To access and use the buttons on the Quick Access Toolbar while editing a file in any Microsoft 365 app:
-
Press the Alt key.
-
Press the Key Tip letter or number associated with the feature.
Use the buttons on the Quick Access Toolbar with a screen reader
-
Press the Alt key. You hear "Ribbon tabs," followed by the currently selected tab, for example, "Home tab."
-
Do one of the following:
-
If the Quick Access Toolbar is in its default location below the ribbon, press the Down arrow key until you hear "Quick access toolbar," followed by the first item on the toolbar.
-
If you have moved the Quick Access Toolbar above the ribbon, press the Up arrow key once to move the focus to the top of the screen. Then press the Right arrow key until you hear "Quick access toolbar," followed by the first item on the toolbar.
-
-
To move on the toolbar, use the Right and Left arrow keys.
Add buttons to the Quick Access Toolbar
You can quickly add buttons for features that are already on the ribbon to the Quick Access Toolbar. If you can't find the feature you want on the ribbon, you can look for it in the feature list available in the app options.
Add buttons for features from the ribbon
-
In any Microsoft 365 app, press the Alt key. The focus moves to the ribbon.
-
Navigate to the tab and then to the feature, option, command, or group of options that you want to add to the Quick Access Toolbar. For instructions on how to use the ribbon, refer to Use the keyboard to work with the ribbon.
-
Once you're on the right feature, press Shift+F10 or the Windows Menu key to open the context menu.
-
To add the button to the toolbar, press A.
Add buttons for features that aren't on the ribbon
-
In any Microsoft 365 app, press the Alt key.
-
Do one of the following:
-
If the Quick Access Toolbar is below the ribbon, press the Down arrow key until you reach the Quick Access Toolbar.
-
If the Quick Access Toolbar is above the ribbon, press the Up arrow key once to move the focus to the top of the screen.
-
-
Press the Right arrow key until you reach the

-
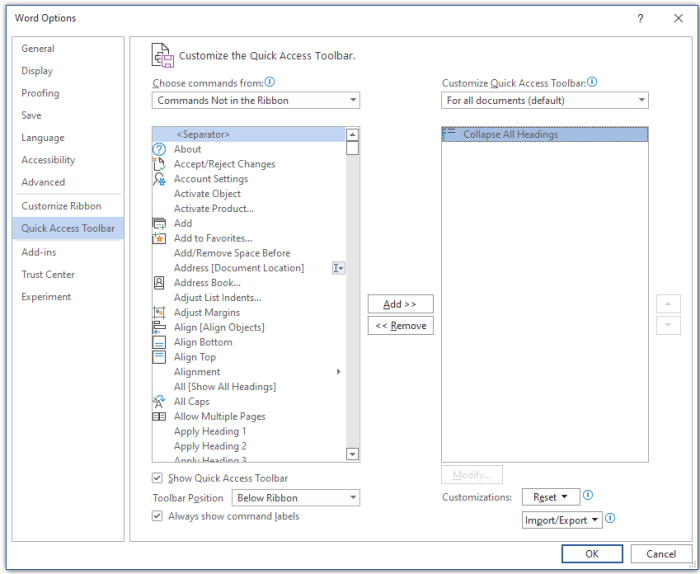
Press M. The Quick Access Toolbar tab in the app options opens.
-
Press the Tab key once to move the focus to the Popular Commands list.
-
Press the Down arrow key to expand the list.
-
Use the Down arrow key to scroll down to the command group or tab that contains the feature you want to add, and press Enter to select the group or tab.
Tip: The tabs are listed in the order they appear on the ribbon.
-
To move to the list of features in the group or tab you selected, press the Tab key once.
-
Use the Down arrow key to scroll through the features in the list.
-
When you find the feature you want to add, press Alt+A. The feature is added to the list of items on the toolbar.
-
To add other features from the same group or tab, use the Up or Down arrow key until you reach the feature you want to add, and then press Alt+A.
-
Once you're done adding features to the toolbar, press Enter to apply your changes.
Remove a button from the Quick Access Toolbar
-
In any Microsoft 365 app, press the Alt key.
-
Do one of the following:
-
If the Quick Access Toolbar is below the ribbon, press the Down arrow key until you reach the Quick Access Toolbar.
-
If the Quick Access Toolbar is above the ribbon, press the Up arrow key once to move the focus to the top of the screen.
-
-
Press the Right arrow key until you reach the button you want to remove.
-
Press Shift+F10 or the Windows Menu key to open the context menu. The focus is on the Remove from Quick Access Toolbar button.
-
To remove the button from the toolbar, press Enter.
Change the order of the buttons on the Quick Access Toolbar
-
In any Microsoft 365 app, press the Alt key.
-
Do one of the following:
-
If the Quick Access Toolbar is below the ribbon, press the Down arrow key until you reach the Quick Access Toolbar.
-
If the Quick Access Toolbar is above the ribbon, press the Up arrow key once to move the focus to the top of the screen, and then press the Right arrow key until you reach the Quick Access Toolbar.
-
-
Press Shift+F10 or the Windows Menu key to open the context menu.
-
To open the Quick Access Toolbar tab in the app options, press C.
-
Press the Tab key until you reach the list of features currently on the Quick Access Toolbar.
-
Press the Down arrow key until you reach the button you want to move.
-
Press the Tab key until you reach the


-
To move the button, press Enter repeatedly until the button has moved to the position you want.
-
To apply your changes, press the Tab key until you reach the OK button, and press Enter.
Group the buttons on the Quick Access Toolbar
To keep your buttons on the Quick Access Toolbar organized, you can add a separator to group the buttons.
-
In any Microsoft 365 app, press the Alt key.
-
Do one of the following:
-
If the Quick Access Toolbar is below the ribbon, press the Down arrow key until you reach the Quick Access Toolbar.
-
If the Quick Access Toolbar is above the ribbon, press the Up arrow key once to move the focus to the top of the screen, and then press the Right arrow key until you reach the Quick Access Toolbar.
-
-
Press Shift+F10 or the Windows Menu key to open the context menu.
-
To open the Quick Access Toolbar tab in the app options, press C.
-
The focus is on the <Separator> option in the Popular Commands list. Press Alt+A. The separator is added to the list of buttons on the Quick Access Toolbar and the focus is on the separator.
-
If you need to change the position of the separator, press the Tab key until you reach the
-
To apply your changes, press the Tab key until you reach the OK button, and press Enter.
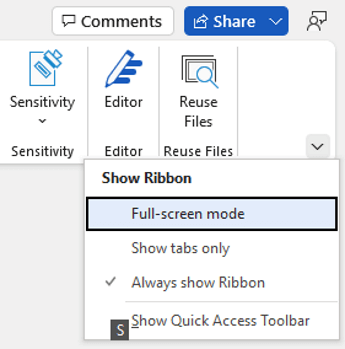
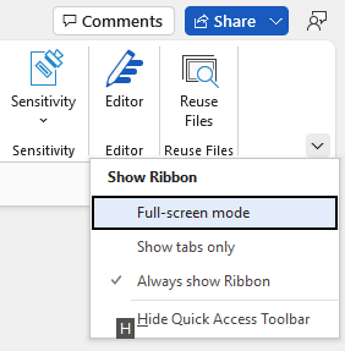
Move the Quick Access Toolbar
You can place the Quick Access Toolbar either below the ribbon (the default location) or above the ribbon.
-
In any Microsoft 365 app, press the Alt key.
-
Do one of the following:
-
If the Quick Access Toolbar is currently below the ribbon, press the Down arrow key until you reach the Quick Access Toolbar.
-
If the Quick Access Toolbar is currently above the ribbon, press the Up arrow key once to move the focus to the top of the screen.
-
-
Press the Right arrow key until you reach the
-
To expand the menu, press Alt+Down arrow key.
-
To move the toolbar, press S.
Reset the Quick Access Toolbar to the default settings
-
In any Microsoft 365 app, press the Alt key.
-
Do one of the following:
-
If the Quick Access Toolbar is below the ribbon, press the Down arrow key until you reach the Quick Access Toolbar.
-
If the Quick Access Toolbar is above the ribbon, press the Up arrow key once to move the focus to the top of the screen, and then press the Right arrow key until you reach the Quick Access Toolbar.
-
-
Press Shift+F10 or the Windows Menu key to open the context menu.
-
To open the Quick Access Toolbar tab in the app options, press C.
-
Press Alt+E, use the Up or Down arrow key to select the Reset only Quick Access Toolbar option, and press Enter. If you're prompted to confirm resetting the toolbar, press Enter.
-
To apply your changes, press the Tab key until you reach the OK button, and press Enter.
Export a customized Quick Access Toolbar
If you want to use the exact same Quick Access Toolbar and ribbon layout and selection of buttons on any computer, you can export your ribbon and Quick Access Toolbar customizations into a file. Save the file to a cloud location, and import it to another computer.
-
In any Microsoft 365 app, press the Alt key.
-
Do one of the following:
-
If the Quick Access Toolbar is below the ribbon, press the Down arrow key until you reach the Quick Access Toolbar.
-
If the Quick Access Toolbar is above the ribbon, press the Up arrow key once to move the focus to the top of the screen, and then press the Right arrow key until you reach the Quick Access Toolbar.
-
-
Press Shift+F10 or the Windows Menu key to open the context menu.
-
To open the Quick Access Toolbar tab in the app options, press C.
-
Press Alt+P, use the Up or Down arrow key to select the Export all customizations option, and press Enter. The File Save dialog box opens.
-
To change the default file name, type a new name. Navigate to the file location where you want to save the export file, and press Alt+S to save it.
Import a customized Quick Access Toolbar
If you want to keep Microsoft 365 apps looking the same on any workstation, you can import customization files to replace the current layout of the ribbon and Quick Access Toolbar.
-
In any Microsoft 365 app, press the Alt key.
-
Do one of the following:
-
If the Quick Access Toolbar is below the ribbon, press the Down arrow key until you reach the Quick Access Toolbar.
-
If the Quick Access Toolbar is above the ribbon, press the Up arrow key once to move the focus to the top of the screen, and then press the Right arrow key until you reach the Quick Access Toolbar.
-
-
Press Shift+F10 or the Windows Menu key to open the context menu.
-
To open the Quick Access Toolbar tab in the app options, press C.
-
Press Alt+P, use the Up or Down arrow key to select the Import customization file option, and press Enter. The File Open dialog box opens.
-
Navigate to the customization file you want to import, and press Alt+O to import your customizations. If you're prompted to confirm the import, press Enter.
See also
Use the keyboard to work with the ribbon
Technical support for customers with disabilities
Microsoft wants to provide the best possible experience for all our customers. If you have a disability or questions related to accessibility, please contact the Microsoft Disability Answer Desk for technical assistance. The Disability Answer Desk support team is trained in using many popular assistive technologies and can offer assistance in English, Spanish, French, and American Sign Language. Please go to the Microsoft Disability Answer Desk site to find out the contact details for your region.
If you are a government, commercial, or enterprise user, please contact the enterprise Disability Answer Desk.


